


This is a deep dive into time pickers in Flutter. We will explore the showTimePicker function, its parameters, and how to handle the returned result. Next, we will study an example of how to implement a time picker with a default appearance, and then we will customize it by using the builder argument and the TimePickerThemeData class.
Overview
showTimePicker function
You can implement a time picker by using the showTimePicker function. This function comes with the material library, so we don’t need to install any third-party plugins.
The syntax of the showTimePicker() function:
Future<TimeOfDay?> showTimePicker(
 {
   required BuildContext context,
   required TimeOfDay initialTime,
   TransitionBuilder? builder,
   bool useRootNavigator = true,
   TimePickerEntryMode initialEntryMode = TimePickerEntryMode.dial,
   String? cancelText,
   String? confirmText,
   String? helpText,
   String? errorInvalidText,
   String? hourLabelText,
   String? minuteLabelText,
   RouteSettings? routeSettings,
   EntryModeChangeCallback? onEntryModeChanged,
   Offset? anchorPoint
 }
)
Details about the main parameters:
| Parameters | Type | Description |
|---|---|---|
| context (required) | BuildContext | A handle for the location of the date picker in the widget tree |
| initialTime (required) | TimeOfDay | The time at the beginning |
| builder | TransitionBuilder | Wrap the dialog widget to add inherited widgets |
| useRootNavigator | bool | Determine use Root Navigator or not. The default is true. |
| initialEntryMode | TimePickerEntryMode | Determine the initial time entry selection (clock or text) |
| cancelText | String | Text on the cancel button (CANCEL is the default) |
| confirmText | String | text on the OK button (OK is the default) |
| helpText | String | The text on the top left of the picker (SELECT TIME is the default) |
| routeSettings | RouteSettings | Example: RouteSettings(name: ‘abc’, arguments: ‘xyz’) |
Formatting the returned Result
The function returns Future<TimeOfDay> or null (if nothing is selected).
If you want to save the result as a string (for saving to a database, file, or cloud), then do as below:
final TimeofDay result = await showTimePicker(/*...*/);
final String myTime = result.format(context);
Note that using result.toString() will not give you what you want.
If you want AM/PM (day period), Hours, and Minutes, you can do like this:
final TimeofDay result = await showTimePicker(/*...*/);
if(result != null){
  print(result.period); // DayPeriod.pm or DayPeriod.am
  print(result.hour);
  print(result.minute);
}
The Example
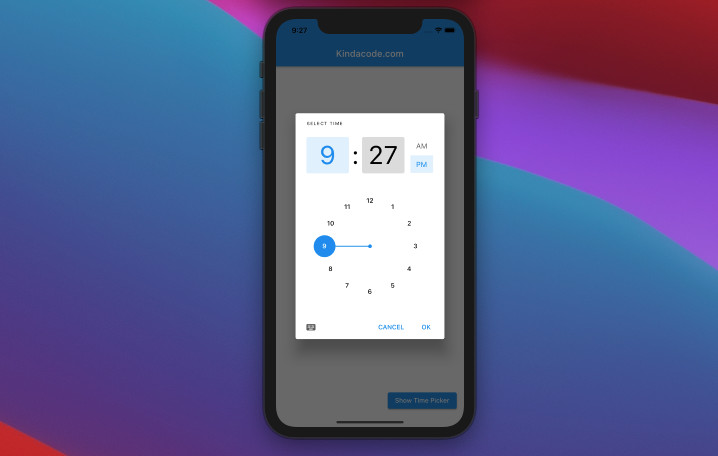
This example app is intended to be as simple and short as possible. It contains a floating button and a Text widget in the center area. When the button is pressed, a time picker will show up and let you pick a time. The picked time will be displayed on the screen.
Preview
The code
Here is the complete code for the app shown in the video above:
// main.dart
import 'package:flutter/material.dart';

void main() {
  runApp(const MyApp());
}

class MyApp extends StatelessWidget {
  const MyApp({Key? key}) : super(key: key);

  @override
  Widget build(BuildContext context) {
    return const MaterialApp(
      // Remove the debug banner
      debugShowCheckedModeBanner: false,
      title: 'Kindacode.com',
      home: HomePage(),
    );
  }
}

class HomePage extends StatefulWidget {
  const HomePage({Key? key}) : super(key: key);

  @override
  State<HomePage> createState() => _HomePageState();
}

class _HomePageState extends State<HomePage> {
  String? _selectedTime;

  // We don't need to pass a context to the _show() function
  // You can safety use context as below
  Future<void> _show() async {
    final TimeOfDay? result =
        await showTimePicker(context: context, initialTime: TimeOfDay.now());
    if (result != null) {
      setState(() {
        _selectedTime = result.format(context);
      });
    }
  }

  @override
  Widget build(BuildContext context) {
    return Scaffold(
      appBar: AppBar(
        title: const Text('Kindacode.com'),
      ),
      body: Center(
        child: Text(
          _selectedTime != null ? _selectedTime! : 'No time selected!',
          style: const TextStyle(fontSize: 30),
        ),
      ),
      floatingActionButton: ElevatedButton(
          onPressed: _show, child: const Text('Show Time Picker')),
    );
  }
}
Customizing Time Picker
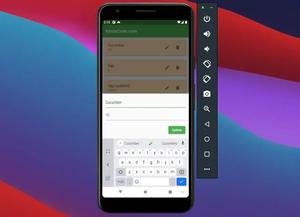
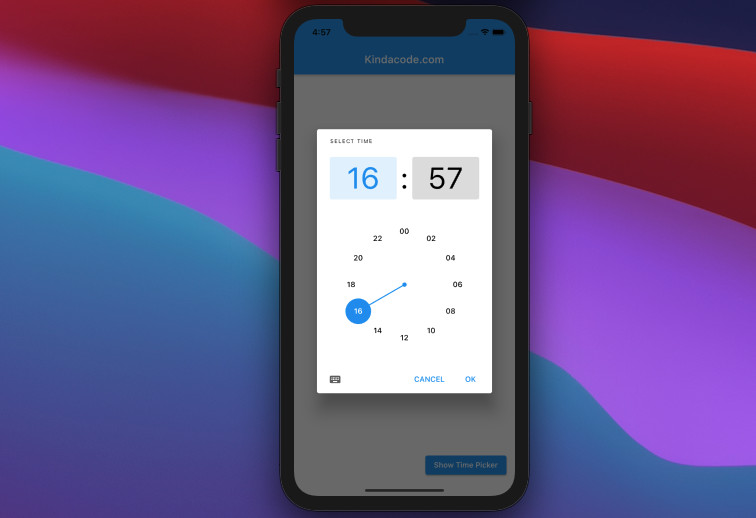
Using 24-Hour / 12-Hour Format
The above example creates a time picker in the 12-hour format. You can set it to 24-hour format by using the builder argument of the showTImePicker function like this:
showTimePicker(
        context: context,
        initialTime: TimeOfDay.now(),
        builder: (context, childWidget) {
          return MediaQuery(
              data: MediaQuery.of(context).copyWith(
                  // Using 24-Hour format
                  alwaysUse24HourFormat: true),
              // If you want 12-Hour format, just change alwaysUse24HourFormat to false or remove all the builder argument
              child: childWidget!);
});
Screenshot:
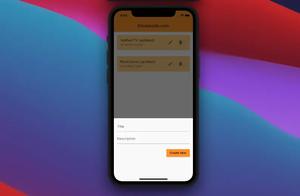
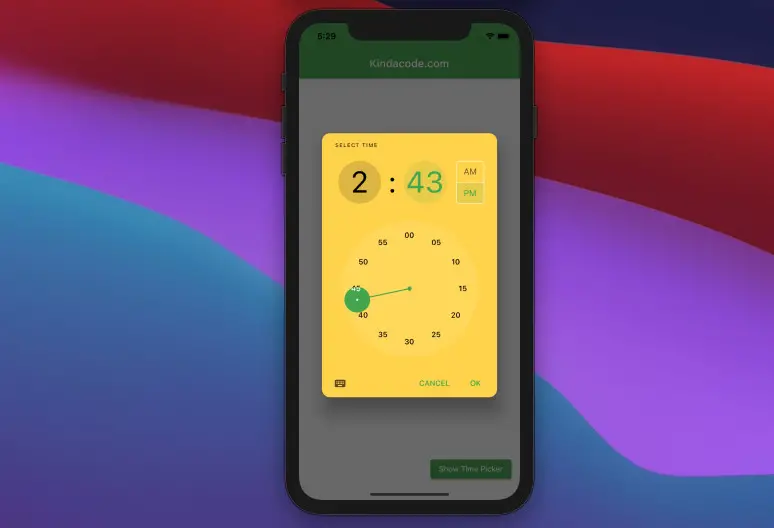
TimePickerThemeData
In this section, we will customize the look and feel of a time picker (colors, typography, shapes, input box styles, etc.) with the help of TimePickerThemeData.
For example, to make our time picker more gorgeous, modify the code in the MaterialApp block like this:
 return MaterialApp(
      // Remove the debug banner
      debugShowCheckedModeBanner: false,
      title: 'Kindacode.com',
      theme: ThemeData(
        timePickerTheme: TimePickerThemeData(
          backgroundColor: Colors.amberAccent,
          shape:
              RoundedRectangleBorder(borderRadius: BorderRadius.circular(15)),
          hourMinuteShape: const CircleBorder(),
        ),
        colorScheme: ColorScheme.fromSwatch(primarySwatch: Colors.green)
            .copyWith(secondary: Colors.greenAccent),
      ),
      home: const HomePage(),
    );
And you will see:
The full source code:
// main.dart
import 'package:flutter/material.dart';

void main() {
  runApp(const MyApp());
}

class MyApp extends StatelessWidget {
  const MyApp({Key? key}) : super(key: key);

  @override
  Widget build(BuildContext context) {
    return MaterialApp(
      // Remove the debug banner
      debugShowCheckedModeBanner: false,
      title: 'Kindacode.com',
      theme: ThemeData(
        timePickerTheme: TimePickerThemeData(
          backgroundColor: Colors.amberAccent,
          shape:
              RoundedRectangleBorder(borderRadius: BorderRadius.circular(15)),
          hourMinuteShape: const CircleBorder(),
        ),
        colorScheme: ColorScheme.fromSwatch(primarySwatch: Colors.green)
            .copyWith(secondary: Colors.greenAccent),
      ),
      home: const HomePage(),
    );
  }
}

class HomePage extends StatefulWidget {
  const HomePage({Key? key}) : super(key: key);

  @override
  State<HomePage> createState() => _HomePageState();
}

class _HomePageState extends State<HomePage> {
  String? _selectedTime;
  Future<void> _show() async {
    final TimeOfDay? result = await showTimePicker(
        context: context,
        initialTime: TimeOfDay.now(),
        builder: (context, child) {
          return MediaQuery(
              data: MediaQuery.of(context).copyWith(
                  // Using 12-Hour format
                  alwaysUse24HourFormat: false),
              // If you want 24-Hour format, just change alwaysUse24HourFormat to true
              child: child!);
        });
    if (result != null) {
      setState(() {
        _selectedTime = result.format(context);
      });
    }
  }

  @override
  Widget build(BuildContext context) {
    return Scaffold(
      appBar: AppBar(
        title: const Text('Kindacode.com'),
      ),
      body: Center(
        child: Text(
          _selectedTime != null ? _selectedTime! : 'No time selected!',
          style: const TextStyle(fontSize: 30),
        ),
      ),
      floatingActionButton: ElevatedButton(
          onPressed: _show, child: const Text('Show Time Picker')),
    );
  }
}
Conclusion
This article has covered the most important aspects of using martial time picker, a component you’ll need a lot when building apps with Flutter. Knowing and mastering them will make your workflow much more enjoyable. If you would like to explore more beautiful and interesting stuff in Flutter, take a look at the following articles:
- Working with Cupertino Date Picker in Flutter
- Using GetX (Get) for State Management in Flutter
- How to convert DateTime to time ago in Flutter
- Flutter: Make a simple Color Picker from scratch
- Working with ReorderableListView in Flutter
- Flutter Autocomplete example
You can also check out our Flutter category page or Dart category page for the latest tutorials and examples.