


The process of updating a production app often takes a lot of time and effort, from editing the code to building the app bundles, updating the metadata on the App Store and Google Play, and especially the waiting time for the review process to complete (it’s done partially by humans, not 100% automatically by machine). That’s why it’s good to limit unnecessary updates to our app, especially when we’re making not-so-complicated changes to the app’s interface or behavior. Luckily, Firebase Remote Config exists and can help us get that job done. At this time, it is totally free for unlimited daily active users.
This article walks you through a complete example of using Firebase Remote Config in a Flutter project.
Prerequisites
To follow along with this tutorial, you need the following:
- Basic knowledge about Flutter.
- Flutter version 3.3.10 or higher.
- A registered Firebase account with a ready-to-use project.
- A clean Flutter project with the firebase_core plugin installed and correctly configured. If you don’t, see the following guide before moving to the next section: Flutter: Configure Firebase for iOS and Android.
- Understanding Firebase’s terms of service.
Note: Firebase Remote Config is NOT real-time. Therefore, settings and changes will not be applied immediately. Another important thing you need to keep in mind is NOT to store sensitive data in Remote Config parameter keys or values.
The Example
We are going to show a happy new year banner and a special background color for the app during the New Year holidays. To illustrate the use of config based on conditions, we are going to set the different background colors on iOS and Android.
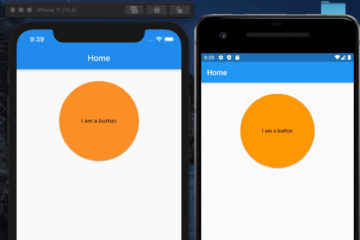
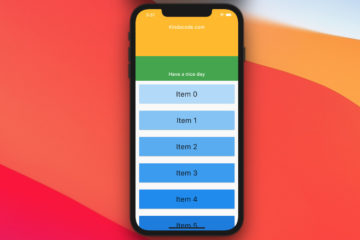
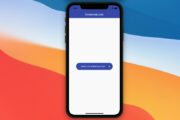
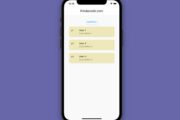
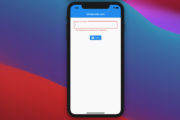
App Preview
When the application is opened for the first time, the default settings will be used. Behind the scene, we’ll fetch the parameters from Firebase Remote Config and apply them the next time the app starts up.
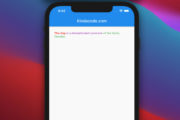
After a hot restart (by pressing Shift + R), the remote config has been used. The text “Have a nice day” is replaced with “Happy New Year” and the background color changes from white to pink on iOS and amber on Android.
Tip: You can run a Flutter project on an iOS simulator and an Android emulator at the same time by using the “flutter run -d all” command.
Working with Firebase Dashboard
Note: The Firebase Remote Config interface may change slightly over time, and you can see a slight difference when you look at the screenshots below. However, the important points will still be the same.
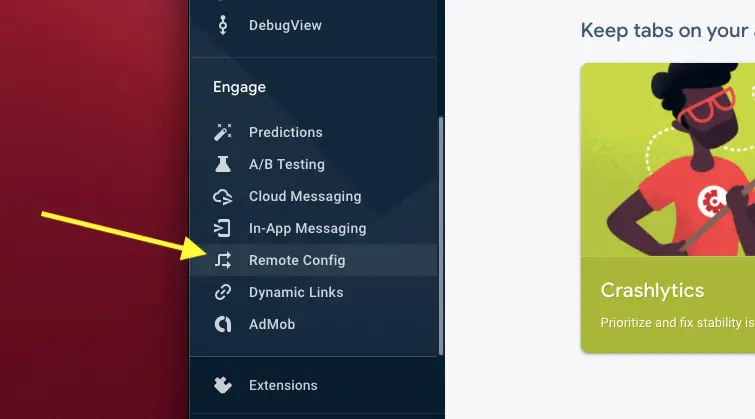
1. Go to your Firebase project and select Remote Config from the left-hand sidebar.
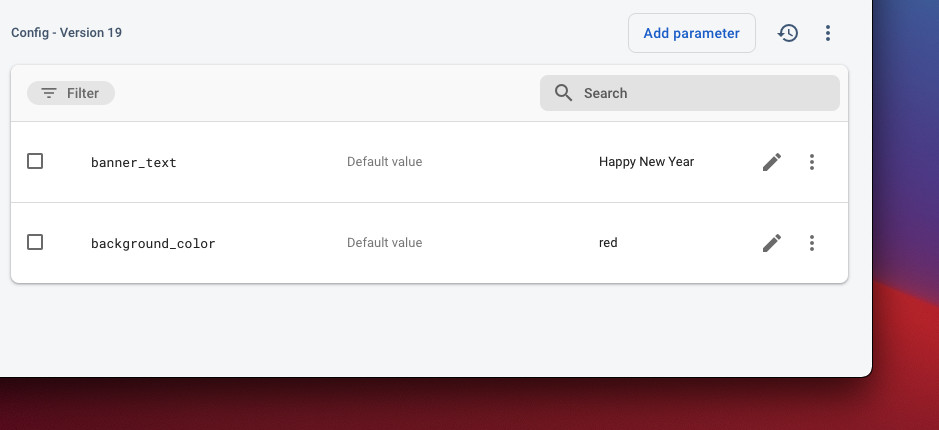
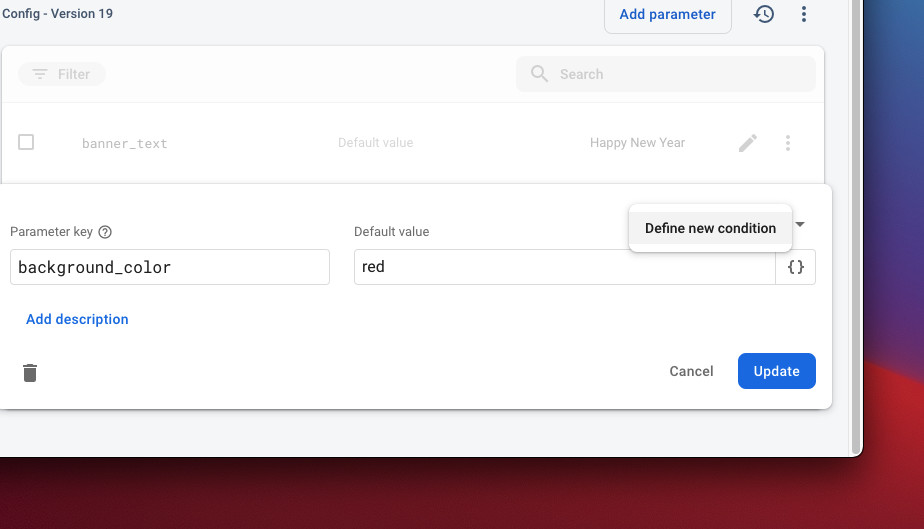
2. Click the Add parameter button, then add 2 new parameters with keys and values as shown below:
3. You can provide different parameter values that depend on several conditions such as app version, platform, country/region, languages, date time, etc.
Click the edit button that is associated with background_color then select Add value for condition > Define new condition:
4. Create 2 new conditions named ios and android as the following:
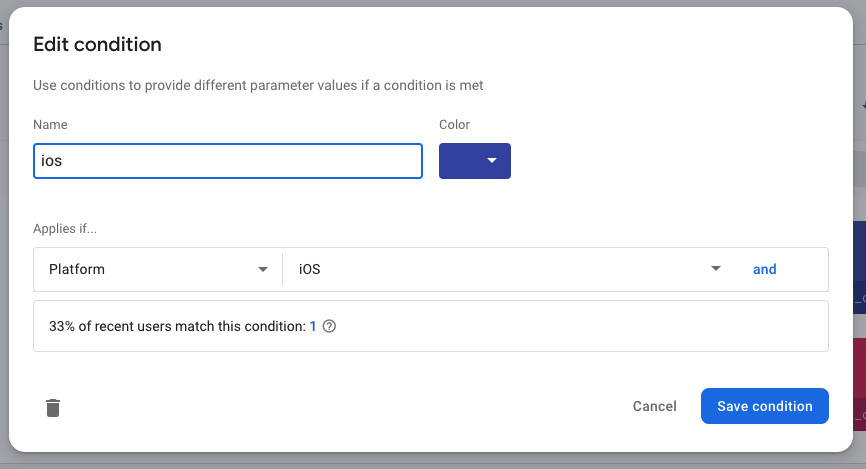
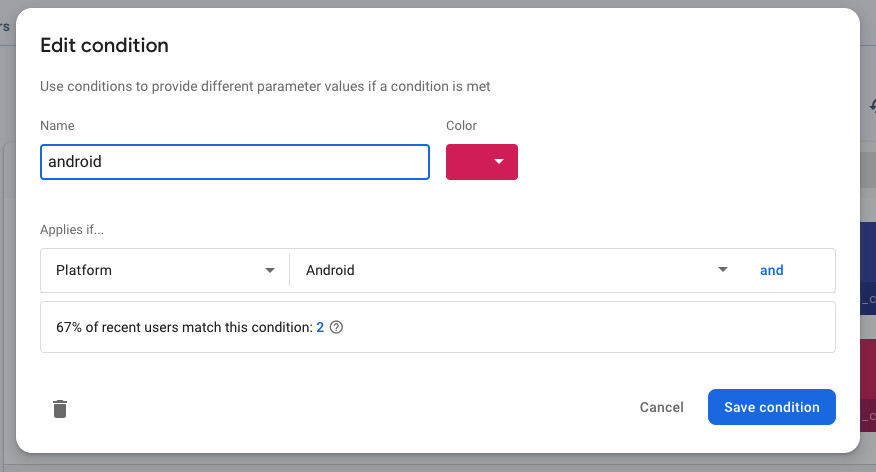
Now add pink for the ios condition and amber for the android condition.
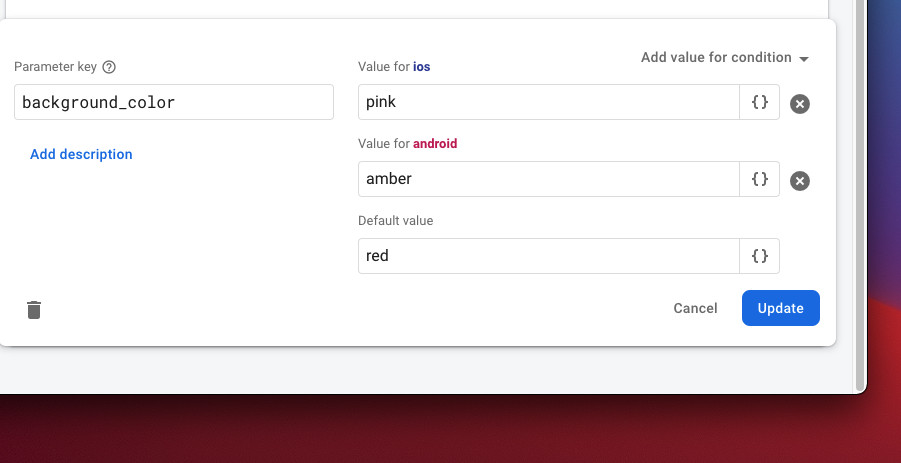
Then click the Update button.
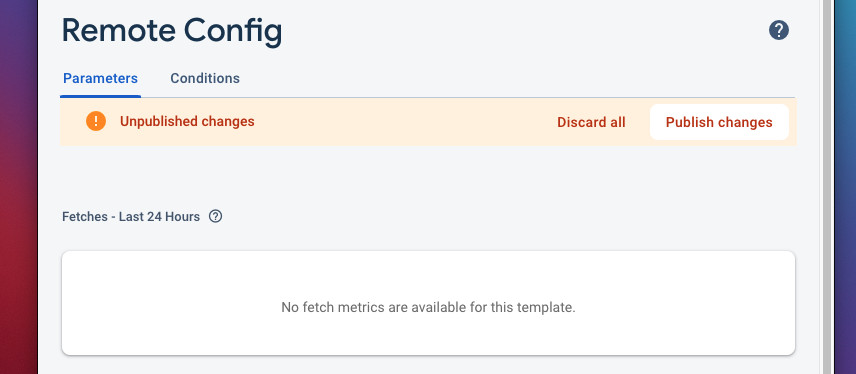
5. Publish your changes.
Now we’re done with the Firebase dashboard. Let’s dive into the code.
Writing Code
1. Install the firebase_remote_config plugin by executing this command:
flutter pub add firebase_remote_configThen run:
flutter pub get2. The final code in main.dart with explanations:
// main.dart
import 'package:flutter/material.dart';
import 'package:firebase_core/firebase_core.dart';
import 'package:firebase_remote_config/firebase_remote_config.dart';

void main() async {
  WidgetsFlutterBinding.ensureInitialized();
  await Firebase.initializeApp();
  runApp(const MyApp());
}

class MyApp extends StatelessWidget {
  const MyApp({Key? key}) : super(key: key);

  @override
  Widget build(BuildContext context) {
    return MaterialApp(
        // Hide the debug banner
        debugShowCheckedModeBanner: false,
        title: 'Kindacode.com',
        theme: ThemeData(
          primarySwatch: Colors.green,
        ),
        home: const HomeScreen());
  }
}

class HomeScreen extends StatefulWidget {
  const HomeScreen({Key? key}) : super(key: key);

  @override
  State<HomeScreen> createState() => _HomeScreenState();
}

class _HomeScreenState extends State<HomeScreen> {
  // Define background colors available for this app
  final Map<String, dynamic> _availableBackgroundColors = {
    "pink": Colors.pink,
    "amber": Colors.amber,
    "red": Colors.red,
    "white": Colors.white
  };

  final String _defaultBannerText = "Have a nice day";
  final String _defaultBackgroundColor = "white";

  final FirebaseRemoteConfig _remoteConfig = FirebaseRemoteConfig.instance;
  Future<void> _initConfig() async {
    await _remoteConfig.setConfigSettings(RemoteConfigSettings(
      fetchTimeout: const Duration(
          seconds: 1), // a fetch will wait up to 10 seconds before timing out
      minimumFetchInterval: const Duration(
          seconds:
              10), // fetch parameters will be cached for a maximum of 1 hour
    ));

    _fetchConfig();
  }

  // Fetching, caching, and activating remote config
  void _fetchConfig() async {
    await _remoteConfig.fetchAndActivate();
  }

  @override
  void initState() {
    _initConfig();
    super.initState();
  }

  @override
  Widget build(BuildContext context) {
    return Scaffold(
      backgroundColor: _availableBackgroundColors[
          _remoteConfig.getString('background_color').isNotEmpty
              ? _remoteConfig.getString('background_color')
              : _defaultBackgroundColor],
      appBar: AppBar(
        title: const Text('Kindacode.com'),
      ),
      body: Center(
        child: Card(
          elevation: 9,
          child: Padding(
            padding: const EdgeInsets.all(50),
            child: Text(
              _remoteConfig.getString('banner_text').isNotEmpty
                  ? _remoteConfig.getString('banner_text')
                  : _defaultBannerText,
              style: const TextStyle(fontSize: 30),
            ),
          ),
        ),
      ),
    );
  }
}
Run your code and see the result. You will see white backgrounds with the words Have a nice day.
Perform a hot restart and check the result again.
Conclusion
You’ve learned how to use Firebase Remote Config to quickly change the behavior and appearance of your app without releasing an update. If you’d like to explore more new and interesting stuff about Flutter and mobile development, take a look at the following articles:
- Using GetX (Get) for State Management in Flutter
- 4 Ways to Store Data Offline in Flutter
- Flutter and Firestore Database: CRUD example
- Flutter & Hive Database: CRUD Example
- Flutter + Firebase Storage: Upload, Retrieve, and Delete files
- Flutter: Check Internet Connection without any plugins
You can also take a tour around our Flutter topic page, or Dart topic page for the latest tutorials and examples.