


This article shows you how to create blur effects in Flutter. We’ll go through 2 complete examples. The first example makes a blurred background image and the second one, a little bit more complex and longer, adds a frosted glass effect when showing a dialog.
Overview
In order to create blur effects in Flutter, you can use BackdropFilter and ImageFilter.blur.
BackdropFilter constructor:
BackdropFilter({
  Key? key,
  required ImageFilter filter,
  Widget? child,
  BlendMode blendMode = BlendMode.srcOver
})
ImageFilter.blur constructor:
ImageFilter.blur({
double sigmaX = 0.0,
double sigmaY = 0.0,
TileMode tileMode = TileMode.clamp
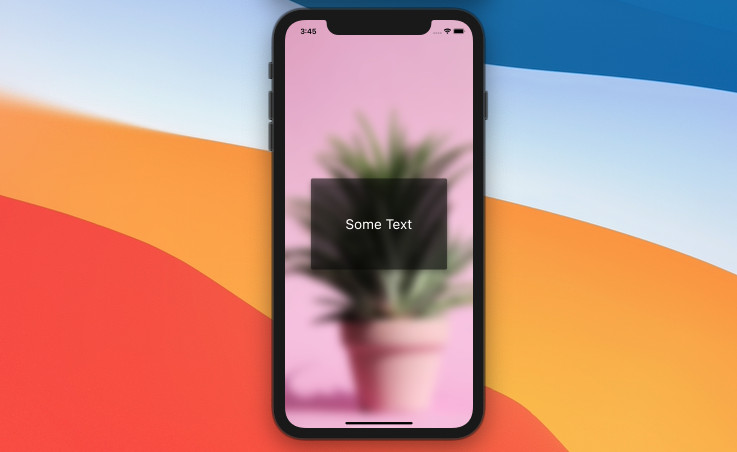
})Example 1: Blurred Background Image
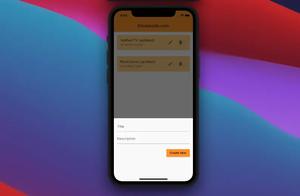
Preview:
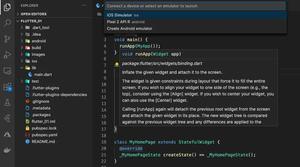
The full code:
// main.dart
import 'package:flutter/material.dart';
import 'dart:ui';
void main() {
runApp(const MyApp());
}
class MyApp extends StatelessWidget {
const MyApp({Key? key}) : super(key: key);
@override
Widget build(BuildContext context) {
return const MaterialApp(
// Remove the debug banner
debugShowCheckedModeBanner: false,
title: 'Kindacode.com',
home: HomePage(),
);
}
}
class HomePage extends StatefulWidget {
const HomePage({Key? key}) : super(key: key);
@override
State<HomePage> createState() => _HomePageState();
}
class _HomePageState extends State<HomePage> {
@override
Widget build(BuildContext context) {
return Scaffold(
body: Container(
decoration: const BoxDecoration(
image: DecorationImage(
image: NetworkImage(
'https://www.kindacode.com/wp-content/uploads/2021/04/background.jpeg'),
fit: BoxFit.cover)),
child: BackdropFilter(
filter: ImageFilter.blur(sigmaX: 10.0, sigmaY: 10.0),
child: Center(
child: Card(
elevation: 10,
color: Colors.black.withOpacity(0.5),
child: const SizedBox(
width: 300,
height: 200,
child: Center(
child: Text(
'Some Text',
style: TextStyle(fontSize: 30, color: Colors.white),
),
),
),
),
),
),
),
);
}
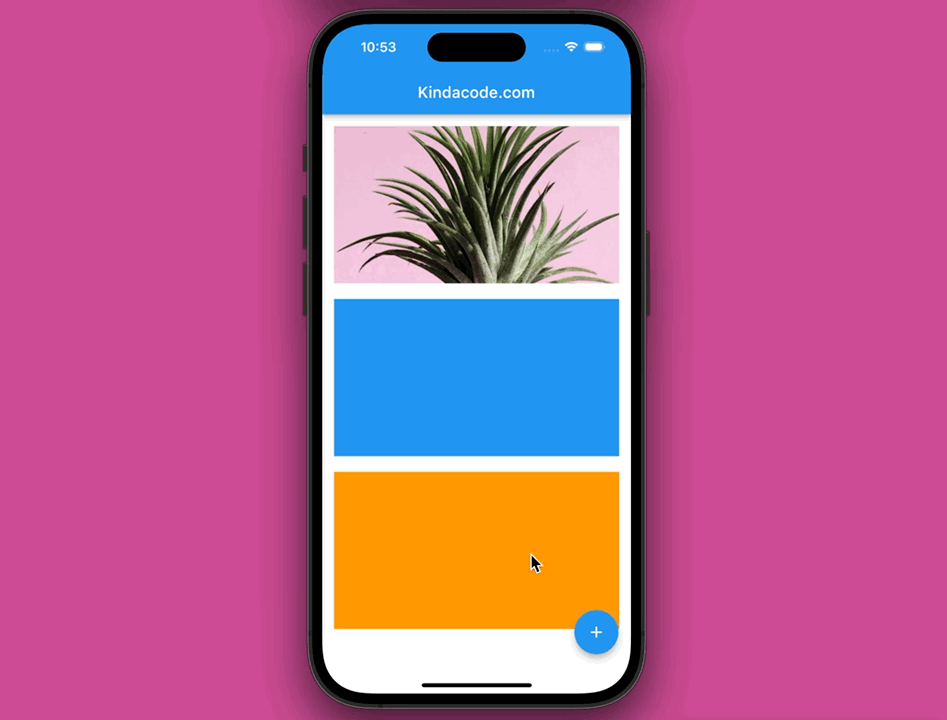
}Example 2: Blur Screen When Showing a Dialog
In this example, the blur effect is only visible when a dialog shows up. This will blur everything on the screen except for the dialog. When this dialog goes away, the blur effect will be removed too.
Preview
The full code:
// main.dart
import 'package:flutter/material.dart';
import 'dart:ui';
void main() {
runApp(const MyApp());
}
class MyApp extends StatelessWidget {
const MyApp({Key? key}) : super(key: key);
@override
Widget build(BuildContext context) {
return const MaterialApp(
// Remove the debug banner
debugShowCheckedModeBanner: false,
title: 'Kindacode.com',
home: HomePage(),
);
}
}
class HomePage extends StatefulWidget {
const HomePage({Key? key}) : super(key: key);
@override
State<HomePage> createState() => _HomePageState();
}
class _HomePageState extends State<HomePage> {
void _show() {
showDialog(
context: context,
barrierColor: Colors.transparent,
builder: (BuildContext ctx) {
return BackdropFilter(
filter: ImageFilter.blur(sigmaX: 5.0, sigmaY: 5.0),
child: AlertDialog(
elevation: 10,
title: const Text('Title'),
content: const Text('Some content here'),
actions: [
TextButton(
onPressed: () {
Navigator.of(context).pop();
},
child: const Text('Close'))
],
),
);
});
}
@override
Widget build(BuildContext context) {
return Scaffold(
appBar: AppBar(
title: const Text('Kindacode.com'),
),
body: Center(
child: Padding(
padding: const EdgeInsets.all(15),
child: Column(
// These things help make the blu effect become clearer. You can remove them to keep the code concise.
children: [
Container(
width: double.infinity,
height: 200,
decoration: const BoxDecoration(
image: DecorationImage(
image: NetworkImage(
'https://www.kindacode.com/wp-content/uploads/2021/04/background.jpeg'),
fit: BoxFit.cover)),
),
const SizedBox(
height: 20,
),
Container(
width: double.infinity,
height: 200,
color: Colors.blue,
),
const SizedBox(
height: 20,
),
Container(
width: double.infinity,
height: 200,
color: Colors.orange,
)
],
),
),
),
floatingActionButton: FloatingActionButton(
onPressed: _show,
child: const Icon(Icons.add),
),
);
}
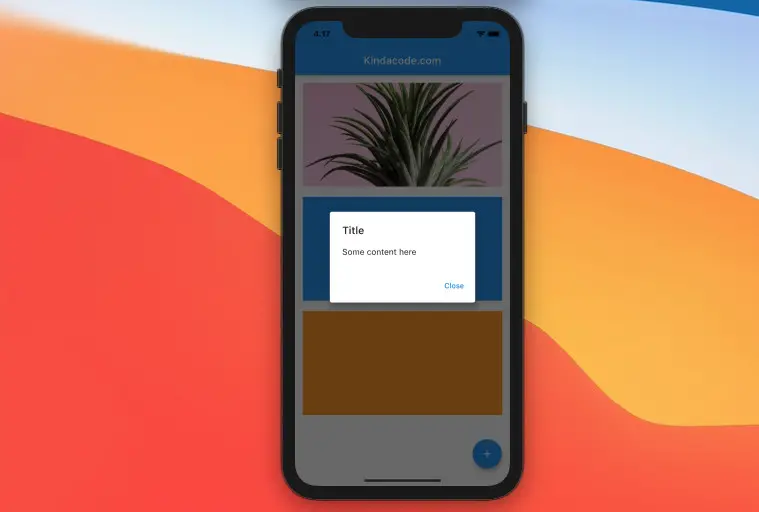
}If you show a dialog without any blur effects, you’ll see this:
Final Words
You’ve learned how to implement blur effects in Flutter. Continue exploring more interesting things by reading the following articles: Flutter Draggable example, Flutter StreamBuilder examples, Flutter: Check Internet Connection without any plugins, Most Popular Packages for State Management in Flutter, Create a Custom NumPad (Number Keyboard) in Flutter.
You can also have a look at our Flutter topic page or Dart topic page for the latest tutorials and examples.


