


In this article (which was recently updated to keep up with the times), we will have a look at the SliverList widget and go over a complete example of using it in a Flutter application.
What are Slivers in Flutter?
According to the Cambridge dictionary, a sliver is a very small, thin piece of something, usually broken off something larger.
In Flutter, slivers (not silver) are nothing but parts of a scrollable area. Using sliver stuff helps us create many fancy scrolling effects and can make the scrolling process through a large number of children more efficient due to the ability to lazily build each item when it scrolls into view.
SliverList Overview
SliverList needs to be implemented inside a silver group and a CustomScrollView, like this:
CustomScrollView(
      slivers: [
        SliverList(
         /** */
        ),

        // other sliver widgets
      ],
)
Here’s the SliverList constructor:
SliverList({
  Key key,
  @required SliverChildDelegate delegate
})
We won’t care about the key parameter and only focus on the delegate parameter. This one provides the items into the list when they scroll into view. You can construct it with one of the following that are subclasses of SliverChildDelegate:
- SliverChildListDelegate: Supplies children for slivers using a widget list.
- SliverChildBuilderDelegate: Build the list lazily, suitable for a list with a tremendous number of items
SliverChildListDelegate constructor:
SliverChildListDelegate(
  List<Widget> children,
  {
     bool addAutomaticKeepAlives = true,
     bool addRepaintBoundaries = true,
     bool addSemanticIndexes = true,
     SemanticIndexCallback semanticIndexCallback = _kDefaultSemanticIndexCallback,
     int semanticIndexOffset = 0
  }
)
SliverChildListDelegate.fixed constructor:
SliverChildListDelegate.fixed(
  List<Widget> children,
  {
     bool addAutomaticKeepAlives = true,
     bool addRepaintBoundaries = true,
     bool addSemanticIndexes = true,
     SemanticIndexCallback semanticIndexCallback = _kDefaultSemanticIndexCallback,
     int semanticIndexOffset = 0
   }
)
SliverChildBuilderDelegate constructor:
SliverChildBuilderDelegate(
  IndexedWidgetBuilder builder,
  {
    ChildIndexGetter findChildIndexCallback,
    int childCount,
    bool addAutomaticKeepAlives: true,
    bool addRepaintBoundaries: true,
    bool addSemanticIndexes: true,
    SemanticIndexCallback semanticIndexCallback: _kDefaultSemanticIndexCallback,
    int semanticIndexOffset: 0
  }
)
You can also check the official docs for more information. If you get bored with the tedious words and just want to dive into the code then move to the next section.
The Complete Example
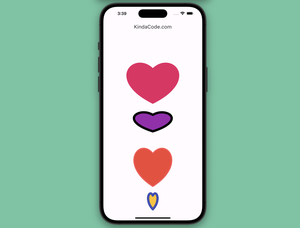
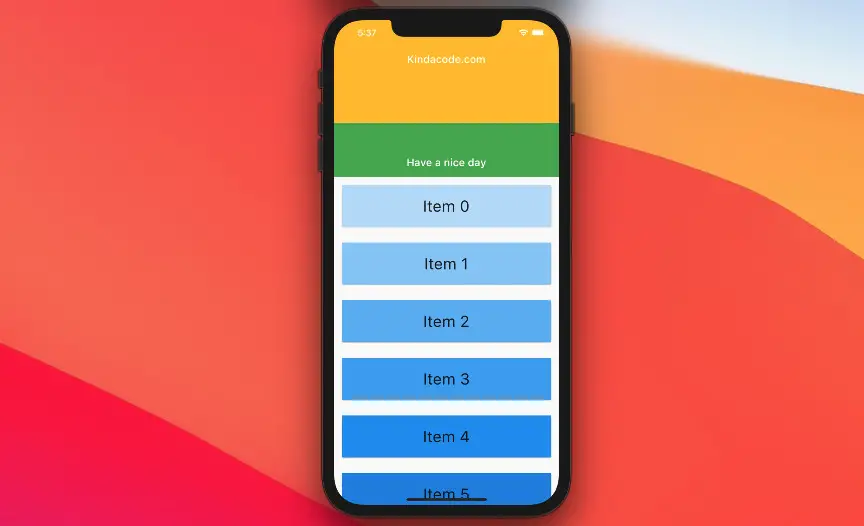
Preview
This example contains a sliver list and 2 sliver app bars. These bars will disappear when you scroll the screen down. The second bar (the green one) will reappear right as you scroll up but the first bar (the amber one) will only show up when you scroll to the top.
The Code
Here’s the full code in main.dart:
import 'package:flutter/material.dart';

void main() {
  runApp(const MyApp());
}

class MyApp extends StatelessWidget {
  const MyApp({Key? key}) : super(key: key);

  @override
  Widget build(BuildContext context) {
    return const MaterialApp(
      debugShowCheckedModeBanner: false,
      title: 'Kindacode.com',
      home: HomePage(),
    );
  }
}

class HomePage extends StatefulWidget {
  const HomePage({Key? key}) : super(key: key);

  @override
  State<HomePage> createState() => _HomePageState();
}

class _HomePageState extends State<HomePage> {
  @override
  Widget build(BuildContext context) {
    return Scaffold(
        body: CustomScrollView(
      slivers: [
        const SliverAppBar(
          backgroundColor: Colors.amber,
          title: Text('Kindacode.com'),
          expandedHeight: 30,
          collapsedHeight: 150,
        ),
        const SliverAppBar(
          backgroundColor: Colors.green,
          title: Text('Have a nice day'),
          floating: true,
        ),
        SliverList(
          delegate: SliverChildBuilderDelegate(
            (BuildContext context, int index) {
              return Card(
                margin: const EdgeInsets.all(15),
                child: Container(
                  color: Colors.blue[100 * (index % 9 + 1)],
                  height: 80,
                  alignment: Alignment.center,
                  child: Text(
                    "Item $index",
                    style: const TextStyle(fontSize: 30),
                  ),
                ),
              );
            },
            childCount: 1000, // 1000 list items
          ),
        ),
      ],
    ));
  }
}
Wrap Up
At this point, you should have a better understanding of the SliverList widget and feel a little bit more comfortable when working with it. You can continue learning about Flutter by reading the following articles:
- Example of CupertinoSliverNavigationBar in Flutter
- Flutter SliverAppBar Example (with Explanations)
- Flutter AnimatedList – Tutorial and Examples
- Using NavigationRail and BottomNavigationBar in Flutter
- Guide to InteractiveViewer in Flutter
- How to implement Pull-to-Refresh in Flutter
- How to implement FutureBuilder in Flutter
To find the latest stuff, check out our Flutter category page and Dart category page. Enjoy.


