

ReorderableListView is a built-in widget in Flutter that can help us create a list view whose items can be repositioned and reordered by dragging and dropping.
This article will cover the most important things about the ReorderableListView widget and walks you through 2 complete examples of using it in Flutter applications.
What are the points?
Constructors
There are 2 constructors that can be used to implement reorderable lists.
ReorderableListView.builder
Using the ReorderableListView.builder constructor is suitable when your list has a large number of items (usually loaded from APIs or from a database like SQLite). This has three important parameters:
- itemCount: The number of items in the list
- itemBuilder: A function to build list item widgets
- reOrder: A callback function used by the list to report that a list item has been dragged to a new location in the list, and the application should update the order of the items.
Full implementation:
ReorderableListView({
  Key? key,
  required List<Widget> children,
  required ReorderCallback onReorder,
  void onReorderStart(int index)?,
  void onReorderEnd(int index)?,
  double? itemExtent,
  Widget? prototypeItem,
  ReorderItemProxyDecorator? proxyDecorator,
  bool buildDefaultDragHandles = true,
  EdgeInsets? padding,
  Widget? header,
  Widget? footer,
  Axis scrollDirection = Axis.vertical,
  bool reverse = false,
  ScrollController? scrollController,
  bool? primary,
  ScrollPhysics? physics,
  bool shrinkWrap = false,
  double anchor = 0.0,
  double? cacheExtent,
  DragStartBehavior dragStartBehavior = DragStartBehavior.start,
  ScrollViewKeyboardDismissBehavior keyboardDismissBehavior = ScrollViewKeyboardDismissBehavior.manual,
  String? restorationId,
  Clip clipBehavior = Clip.hardEdge
})
ReorderableListView
Using the ReorderableListView constructor is convenient when your list has a small number of items. The main parameters are:
- children: A list of widgets.
- reOrder: A callback function used by the list to report that a list item has been dragged to a new location in the list, and the application should update the order of the items.
Full implementation:
ReorderableListView.builder({
  Key? key,
  required IndexedWidgetBuilder itemBuilder,
  required int itemCount,
  required ReorderCallback onReorder,
  void onReorderStart(int index)?,
  void onReorderEnd(int index)?,
  double? itemExtent,
  Widget? prototypeItem,
  ReorderItemProxyDecorator? proxyDecorator,
  bool buildDefaultDragHandles = true,
  EdgeInsets? padding,
  Widget? header,
  Widget? footer,
  Axis scrollDirection = Axis.vertical,
  bool reverse = false,
  ScrollController? scrollController,
  bool? primary,
  ScrollPhysics? physics,
  bool shrinkWrap = false,
  double anchor = 0.0,
  double? cacheExtent,
  DragStartBehavior dragStartBehavior = DragStartBehavior.start,
  ScrollViewKeyboardDismissBehavior keyboardDismissBehavior = ScrollViewKeyboardDismissBehavior.manual,
  String? restorationId,
  Clip clipBehavior = Clip.hardEdge
})
The onReorder function
In general, ReorderableListView goes with a stateful widget. The onReorder functions are almost the same in many cases:
onReorder: (oldIndex, newIndex) {
            setState(() {
              if (newIndex > oldIndex) {
                newIndex = newIndex - 1;
              }
              final item = _myListData.removeAt(oldIndex);
              _myListData.insert(newIndex, element);
            });
}

// Don't forget to change _myListData with your own list
Keys
Each item of a ReorderableListView must have a key in order to distinguish the list items after their position is changed. Using ValueKey() is fine. If the keys are missing, a major error will occur.
Examples
ReorderableListView.builder
Preview
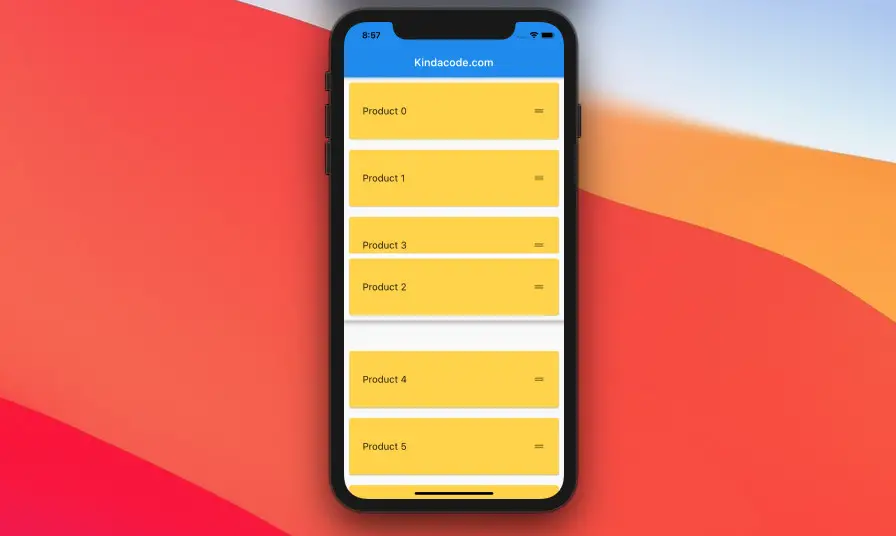
This sample app contains a ReorderableListView that holds one hundred fiction products. Each product in this list can be moved to a new location, starting with a long press gesture and then dragging and dropping.
The code
// main.dart
import 'package:flutter/material.dart';

void main() {
  runApp(const MyApp());
}

class MyApp extends StatelessWidget {
  const MyApp({Key? key}) : super(key: key);

  @override
  Widget build(BuildContext context) {
    return const MaterialApp(
      // Remove the debug banner
      debugShowCheckedModeBanner: false,
      title: 'Kindacode.com',
      home: HomePage(),
    );
  }
}

class HomePage extends StatefulWidget {
  const HomePage({Key? key}) : super(key: key);

  @override
  State<HomePage> createState() => _HomePageState();
}

class _HomePageState extends State<HomePage> {
  // Generate dummy data for the list view
  final List<String> _products =
      List.generate(100, (index) => "Product ${index.toString()}");

  @override
  Widget build(BuildContext context) {
    return Scaffold(
      appBar: AppBar(
        title: const Text('Kindacode.com'),
      ),
      body: ReorderableListView.builder(
          itemCount: _products.length,
          itemBuilder: (context, index) {
            final String productName = _products[index];
            return Card(
              key: ValueKey(productName),
              color: Colors.amberAccent,
              elevation: 1,
              margin: const EdgeInsets.all(10),
              child: ListTile(
                contentPadding: const EdgeInsets.all(25),
                title: Text(
                  productName,
                  style: const TextStyle(fontSize: 18),
                ),
                trailing: const Icon(Icons.drag_handle),
                onTap: () {/* Do something else */},
              ),
            );
          },
          // The reorder function
          onReorder: (oldIndex, newIndex) {
            setState(() {
              if (newIndex > oldIndex) {
                newIndex = newIndex - 1;
              }
              final element = _products.removeAt(oldIndex);
              _products.insert(newIndex, element);
            });
          }),
    );
  }
}
ReorderableListView
Preview
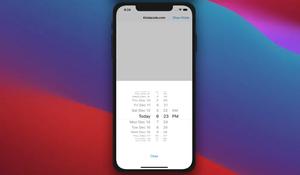
This example demonstrates a very common case in real life: a task app allows the user to change the priority of to-do tasks.
The code
// main.dart
import 'package:flutter/material.dart';

void main() {
  runApp(const MyApp());
}

class MyApp extends StatelessWidget {
  const MyApp({Key? key}) : super(key: key);

  @override
  Widget build(BuildContext context) {
    return const MaterialApp(
      // Remove the debug banner
      debugShowCheckedModeBanner: false,
      title: 'Kindacode.com',
      // home: HomePage(),
      home: HomePage(),
    );
  }
}

class HomePage extends StatefulWidget {
  const HomePage({Key? key}) : super(key: key);

  @override
  State<HomePage> createState() => _HomePageState();
}

class _HomePageState extends State<HomePage> {
  // This variable holds the list's items
  final List<String> _todos = ['Task A', 'Task B', 'Task C', 'Task D'];

  @override
  Widget build(BuildContext context) {
    return Scaffold(
      appBar: AppBar(
        title: const Text('Kindacode.com'),
      ),
      body: ReorderableListView(
          header: Container(
              padding: const EdgeInsets.all(25),
              color: Colors.amber,
              child: const Text('My Todo List')),
          children: _todos
              .map((task) => Container(
                    key: ValueKey(task),
                    decoration: BoxDecoration(
                        color: Colors.greenAccent,
                        border: Border.all(width: 1, color: Colors.green)),
                    child: ListTile(
                      contentPadding: const EdgeInsets.all(25),
                      leading: const Icon(Icons.lock_clock),
                      title: Text(
                        task,
                        style: const TextStyle(fontSize: 24),
                      ),
                      trailing: const Icon(Icons.drag_handle_outlined),
                    ),
                  ))
              .toList(),
          // The reorder function
          onReorder: (oldIndex, newIndex) {
            setState(() {
              if (newIndex > oldIndex) {
                newIndex -= 1;
              }
              final element = _todos.removeAt(oldIndex);
              _todos.insert(newIndex, element);
            });
          }),
    );
  }
}
Conclusion
We have gone over the fundamentals of the ReorderableListView widget and seen 2 examples of implementing it in practice. If you would like to learn more interesting and new things about Flutter, take a look at the following articles:
- Example of sortable DataTable in Flutter
- 4 Ways to Format DateTime in Flutter
- Ways to Store Data Offline in Flutter
- Flutter: Check Internet Connection without any plugins
- How to make an image carousel in Flutter
- How to implement Star Rating in Flutter
You can also check out our Flutter category page or Dart category page for the latest tutorials and examples.


