


This article shows you how to use radio buttons in Flutter.
Radio buttons let the user select only one of a limited number of choices. When one radio button in a group is selected, the previously selected one becomes unselected.
To add radio buttons to your Flutter app, you can use the Radio widget or the RadioListTile widget. There is not much difference between them. The RadioListTile widget just combines the Radio widget with a ListTile so that you can give the radio button a label.
Examples
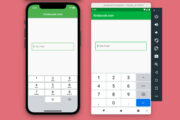
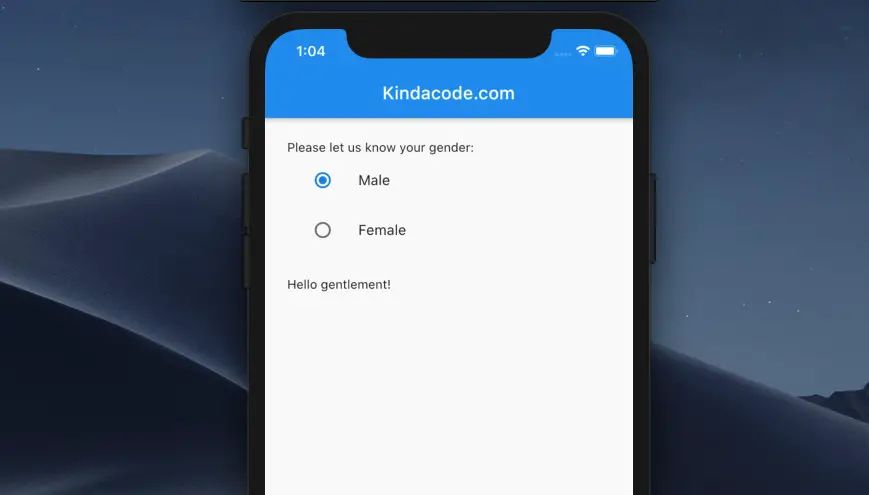
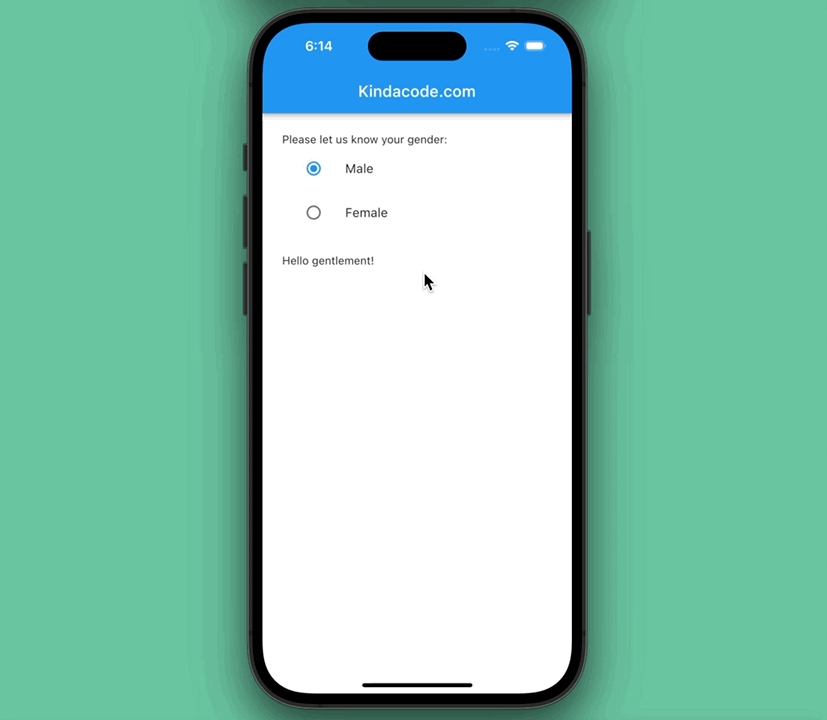
Example 1: Using Radio
Demo:
The code:
import 'package:flutter/material.dart';
void main() {
runApp(const MyApp());
}
class MyApp extends StatelessWidget {
const MyApp({Key? key}) : super(key: key);
@override
Widget build(BuildContext context) {
return const MaterialApp(
// Hide the debug banner
debugShowCheckedModeBanner: false,
title: 'Kindacode.com',
home: HomePage(),
);
}
}
class HomePage extends StatefulWidget {
const HomePage({Key? key}) : super(key: key);
@override
State<HomePage> createState() => _HomePageState();
}
class _HomePageState extends State<HomePage> {
// The inital group value
String _selectedGender = 'male';
@override
Widget build(BuildContext context) {
return Scaffold(
appBar: AppBar(
centerTitle: true,
title: const Text(
'Kindacode.com',
),
),
body: Padding(
padding: const EdgeInsets.all(25),
child: Column(
crossAxisAlignment: CrossAxisAlignment.start,
children: [
const Text('Please let us know your gender:'),
ListTile(
leading: Radio<String>(
value: 'male',
groupValue: _selectedGender,
onChanged: (value) {
setState(() {
_selectedGender = value!;
});
},
),
title: const Text('Male'),
),
ListTile(
leading: Radio<String>(
value: 'female',
groupValue: _selectedGender,
onChanged: (value) {
setState(() {
_selectedGender = value!;
});
},
),
title: const Text('Female'),
),
const SizedBox(height: 25),
Text(_selectedGender == 'male' ? 'Hello gentlement!' : 'Hi lady!')
],
)),
);
}
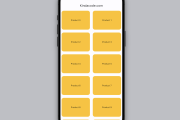
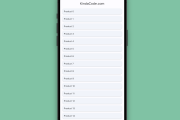
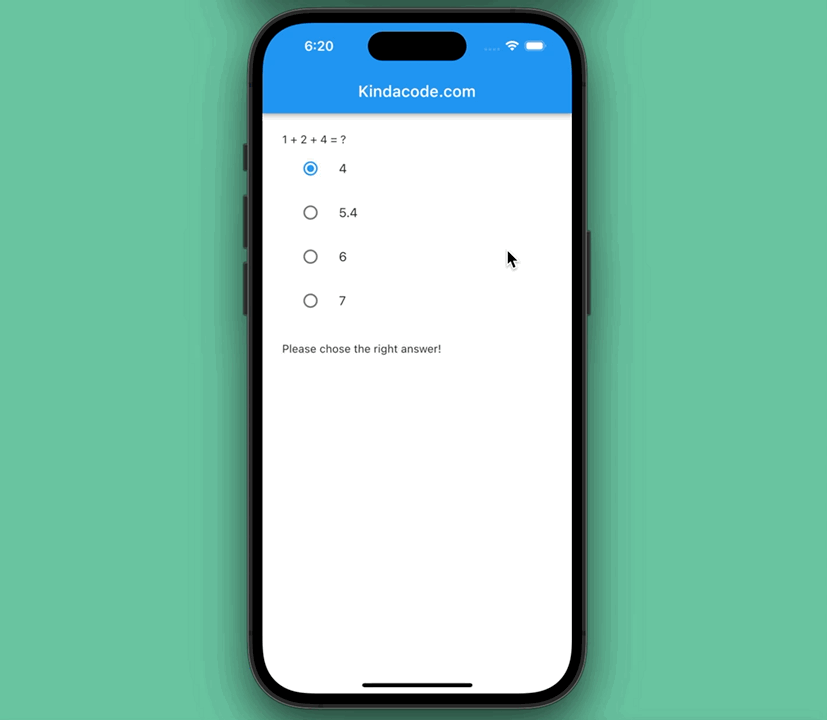
}Example 2: Using RadioListTile
Demo:
The code:
import 'package:flutter/material.dart';

void main() {
  runApp(const MyApp());
}

class MyApp extends StatelessWidget {
  const MyApp({Key? key}) : super(key: key);

  @override
  Widget build(BuildContext context) {
    return const MaterialApp(
      // Hide the debug banner
      debugShowCheckedModeBanner: false,
      title: 'Kindacode.com',
      home: HomePage(),
    );
  }
}

class HomePage extends StatefulWidget {
  const HomePage({Key? key}) : super(key: key);

  @override
  State<HomePage> createState() => _HomePageState();
}

class _HomePageState extends State<HomePage> {
  // The group value
  var _result;
  Widget build(BuildContext context) {
    return Scaffold(
      appBar: AppBar(
        centerTitle: true,
        title: const Text(
          'Kindacode.com',
        ),
      ),
      body: Padding(
          padding: const EdgeInsets.all(25),
          child: Column(
            crossAxisAlignment: CrossAxisAlignment.start,
            children: [
              const Text('1 + 2 + 4 = ?'),
              RadioListTile(
                  title: const Text('4'),
                  value: 4,
                  groupValue: _result,
                  onChanged: (value) {
                    setState(() {
                      _result = value;
                    });
                  }),
              RadioListTile(
                  title: const Text('5.4'),
                  value: 5.4,
                  groupValue: _result,
                  onChanged: (value) {
                    setState(() {
                      _result = value;
                    });
                  }),
              RadioListTile(
                  title: const Text('6'),
                  value: 6,
                  groupValue: _result,
                  onChanged: (value) {
                    setState(() {
                      _result = value;
                    });
                  }),
              RadioListTile(
                  title: const Text('7'),
                  value: 7,
                  groupValue: _result,
                  onChanged: (value) {
                    setState(() {
                      _result = value;
                    });
                  }),
              const SizedBox(height: 25),
              Text(_result == 7 ? 'Correct!' : 'Please chose the right answer!')
            ],
          )),
    );
  }
}
Wrapping Up
We’ve learned the fundamentals of radio buttons and gone over a couple of examples of implementing them in practice. If you’d like to explore more widgets and interesting stuff about Flutter, take a look at the following articles:
- Flutter: Making a Dropdown Multiselect with Checkboxes
- Working with dynamic Checkboxes in Flutter
- Flutter: GridPaper example
- Flutter: Creating Custom Back Buttons
- Flutter: AbsorbPointer example
- Flutter: Creating Strikethrough Text (Cross Out Text)
You can also check out our Flutter category page or Dart category page for the latest tutorials and examples.


bro here i want to add one list meansd what i have to add i means another question