


This article is about using Provider to manage states in Flutter applications. I first wrote this article a couple of years ago, but since the world is constantly changing, I felt the need to recheck and update it to ensure that every line of code is compliant with the latest version of Flutter and the provider package.
A Brief Overview
Provider is one of the most popular and mature methods for state management in Flutter. Below are the key points:
- Provider is a wrapper around InheritedWidget
- Wrapping Provider around the application makes the state accessible in all the widgets
- Provider allows you to not only expose a value but also create, listen, and dispose of it
In general, Provider goes with ChangeNotifier. ChangeNotifier is a built-in class of Flutter that provides change notifications to its listeners. With Provider, ChangeNotifier can encapsulate the app state:
class MyClass with ChangeNotifier {
   final _myList = [
     /* some data here */
   ];
   List get myList => _myList;
  /* ... */
}

// you can see the MovieClass in the example below for more clarity
To notify listening widgets whenever the state change and propel these widgets to rebuild (thus update the UI), you can call the notifyListeners() method:
class MyClass with ChangeNotifier {
   final _myList = [
     /* some data here */
   ];
   List get myList => _myList;
  /* ... */

  void updateMyList(){
    // do something with _myList
    // Then rebuild listening widgets:
    notifyListeners()
  }
}
To access states, you can use:
- context.watch<T>(): Make the widget listen to changes on T
- context.read<T>(): Returns T without listening to it
- context.select<T, R>(R cb(T value)): Allows a widget to listen to only a small part of T
Sample code:
var myList = context.watch<MyClass>().myList;If you’re new to Flutter, you can feel a little confused about these things. Don’t worry. The example below will help you get a better sense of and understand the concepts better.
The Example
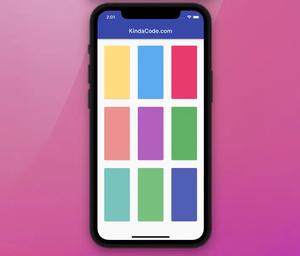
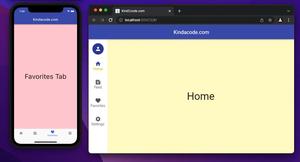
App Preview
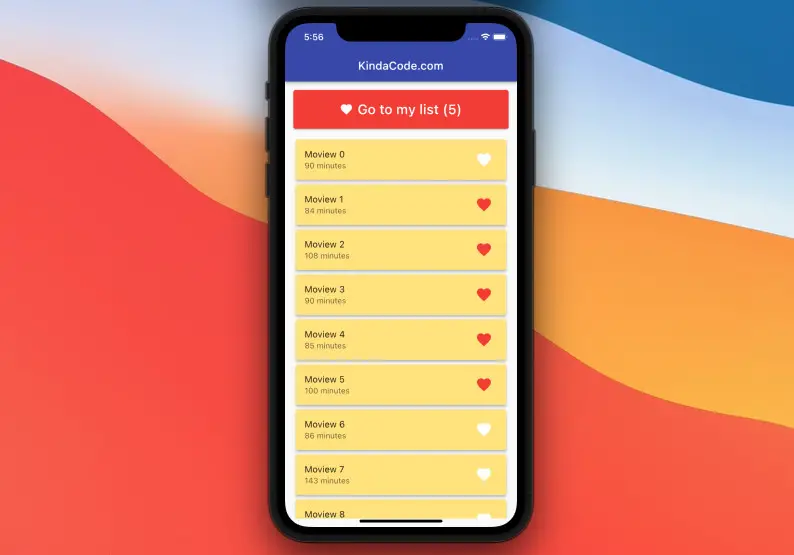
In this example, we will build a favorite movie list feature and manage the app state using Provider. Our app has 2 screens: HomeScreen and MyListScreen:
- HomeScreen: Displays a list of movies within a list view. Next to each movie, there will be a heart-shaped button icon to add or remove the corresponding movie to the favorites list. Besides the list view, we also have a red button that displays the number of movies in the favorites list. The user can use this button to navigate to MyListScreen.
- MyListScreen: Show only movies that the user loves and wants to watch later. The user can remove a movie from this list using the Remove button corresponding to that movie.
A short demo is worth more than a thousand words:
Note: If you’re using Safari, this demo video might not work nicely or not start at all. Please use Chrome, Edge, Firefox, or another web browser instead.
Getting Things Ready
1. Create a new Flutter project, then install the provider package by executing the following command:
flutter pub add provider2. Inside the lib folder, create 3 new folders named models, provider, and screens then:
- Add a new empty file called movie.dart in the models folder.
- Add a new file named movie_provider.dart in the provider folder.
- Add 2 new files named home_screen.dart and my_list_screen.dart in the screens folder.
Here’s the file structure inside the lib folder (we don’t care about things outside this folder):
.
├── main.dart
├── models
│   └── movie.dart
├── provider
│   └── movie_provider.dart
└── screens
    ├── home_screen.dart
    └── my_list_screen.dart
It seems unnecessary when there are folders containing only a single file. However, with this structure, you can scale your app in the future easily.
Now we’re ready to write some code.
The Code
Remove all of the default code in main.dart. For the time being, every Dart file in the lib folder is empty. We will go through and write the code for these 5 files one by one.
1. models/movie.dart
Defining the movie model (how a movie looks like):
// models/movie.dart
class Movie {
  final String title;
  final String? runtime; // how long this movie is (in minute)

  Movie({required this.title, this.runtime});
}
2. provider/movie_provider.dart
This is where we manage the state (information about movies) of the application and handle the logic of adding movies to our favorite list and removing movies from that list:
// provider/movie_provider.dart
import 'package:flutter/material.dart';
import 'dart:math';
import '../models/movie.dart';

// A list of movies
final List<Movie> initialData = List.generate(
    50,
    (index) => Movie(
        title: "Moview $index",
        runtime: "${Random().nextInt(100) + 60} minutes"));

class MovieProvider with ChangeNotifier {
  // All movies (that will be displayed on the Home screen)
  final List<Movie> _movies = initialData;

  // Retrieve all movies
  List<Movie> get movies => _movies;

  // Favorite movies (that will be shown on the MyList screen)
  final List<Movie> _myList = [];

  // Retrieve favorite movies
  List<Movie> get myList => _myList;

  // Adding a movie to the favorites list
  void addToList(Movie movie) {
    _myList.add(movie);
    notifyListeners();
  }

  // Removing a movie from the favorites list
  void removeFromList(Movie movie) {
    _myList.remove(movie);
    notifyListeners();
  }
}
3. Let’s implement the HomeScreen:
// screens/home_screen.dart
import 'package:flutter/material.dart';
import 'package:provider/provider.dart';

import '../provider/movie_provider.dart';
import 'my_list_screen.dart';

class HomeScreen extends StatefulWidget {
  const HomeScreen({Key? key}) : super(key: key);

  @override
  State<HomeScreen> createState() => _HomeScreenState();
}

class _HomeScreenState extends State<HomeScreen> {
  @override
  Widget build(BuildContext context) {
    var movies = context.watch<MovieProvider>().movies;
    var myList = context.watch<MovieProvider>().myList;

    return Scaffold(
      appBar: AppBar(
        title: const Text('KindaCode.com'),
      ),
      body: Padding(
        padding: const EdgeInsets.all(15),
        child: Column(
          crossAxisAlignment: CrossAxisAlignment.stretch,
          children: [
            ElevatedButton.icon(
              onPressed: () {
                Navigator.of(context).push(
                  MaterialPageRoute(
                    builder: (context) => const MyListScreen(),
                  ),
                );
              },
              icon: const Icon(Icons.favorite),
              label: Text(
                "Go to my list (${myList.length})",
                style: const TextStyle(fontSize: 24),
              ),
              style: ElevatedButton.styleFrom(
                  primary: Colors.red,
                  padding: const EdgeInsets.symmetric(vertical: 20)),
            ),
            const SizedBox(
              height: 15,
            ),
            Expanded(
              child: ListView.builder(
                  itemCount: movies.length,
                  itemBuilder: (_, index) {
                    final currentMovie = movies[index];
                    return Card(
                      key: ValueKey(currentMovie.title),
                      color: Colors.amberAccent.shade100,
                      elevation: 4,
                      child: ListTile(
                        title: Text(currentMovie.title),
                        subtitle:
                            Text(currentMovie.runtime ?? 'No information'),
                        trailing: IconButton(
                          icon: Icon(
                            Icons.favorite,
                            color: myList.contains(currentMovie)
                                ? Colors.red
                                : Colors.white,
                            size: 30,
                          ),
                          onPressed: () {
                            if (!myList.contains(currentMovie)) {
                              context
                                  .read<MovieProvider>()
                                  .addToList(currentMovie);
                            } else {
                              context
                                  .read<MovieProvider>()
                                  .removeFromList(currentMovie);
                            }
                          },
                        ),
                      ),
                    );
                  }),
            ),
          ],
        ),
      ),
    );
  }
}
4. And the MyListScreen:
// screens/my_list_screen.dart
import 'package:flutter/material.dart';
import 'package:provider/provider.dart';

import '../provider/movie_provider.dart';

class MyListScreen extends StatefulWidget {
  const MyListScreen({Key? key}) : super(key: key);

  @override
  State<MyListScreen> createState() => _MyListScreenState();
}

class _MyListScreenState extends State<MyListScreen> {
  @override
  Widget build(BuildContext context) {
    final myList = context.watch<MovieProvider>().myList;
    return Scaffold(
      appBar: AppBar(
        title: Text("My List (${myList.length})"),
      ),
      body: ListView.builder(
          itemCount: myList.length,
          itemBuilder: (_, index) {
            final currentMovie = myList[index];
            return Card(
              key: ValueKey(currentMovie.title),
              elevation: 4,
              child: ListTile(
                title: Text(currentMovie.title),
                subtitle: Text(currentMovie.runtime ?? ''),
                trailing: TextButton(
                  child: const Text(
                    'Remove',
                    style: TextStyle(color: Colors.red),
                  ),
                  onPressed: () {
                    context.read<MovieProvider>().removeFromList(currentMovie);
                  },
                ),
              ),
            );
          }),
    );
  }
}
5. Last but not least, add the code below to main.dart:
// main.dart
import 'package:flutter/material.dart';
import 'package:provider/provider.dart';

import 'provider/movie_provider.dart';

import 'screens/home_screen.dart';

void main() {
  runApp(ChangeNotifierProvider<MovieProvider>(
    child: const MyApp(),
    create: (_) => MovieProvider(), // Create a new ChangeNotifier object
  ));
}

class MyApp extends StatelessWidget {
  const MyApp({Key? key}) : super(key: key);

  @override
  Widget build(BuildContext context) {
    return MaterialApp(
      // Remove the debug banner
      debugShowCheckedModeBanner: false,
      title: 'Kindacode.com',
      theme: ThemeData(
        primarySwatch: Colors.indigo,
      ),
      home: const HomeScreen(),
    );
  }
}
Now run the project and check the result.
Conclusion
You’ve learned how to use Provider to manage states in a Flutter application. This approach can be used to build a small app with only 2 screens or a large and complex platform. If you don’t like Provider, there are several alternatives. Take a look at the following articles to explore alternative state management solutions and other exciting stuff in Flutter:
- Using GetX (Get) for State Management in Flutter
- Flutter: ValueListenableBuilder Example
- Most Popular Packages for State Management in Flutter
- Flutter: Stream.periodic example
- Flutter StreamBuilder examples (null safety)
- Flutter and Firestore Database: CRUD example (null safety)
- Flutter StatefulBuilder example
You can also check out our Flutter category page or Dart category page for the latest tutorials and examples.


