


This article shows you how to configure Firebase SDK for a Flutter project and fix some common errors you may run into when working with this stuff. We will use the most recent versions of Flutter and the firebase_core package. Using older versions might lead to unexpected outcomes and incompatibilities.
If you are using Flutter with Firebase for the first time, chances are that the process won’t be as smooth and easy as you want. Be patient and calm, and everything will fall into the right place by the end of this tutorial.
Prerequisites
To get the most out of this article, you need the following:
- Flutter version 3.3.10 or newer. To check it, run the “flutter doctor” command.
- A registered Firebase account.
- Basic knowledge about Flutter.
Because many people confront errors during Firebase integration so this article will try to be as detailed as possible and provides as many screenshots as possible.
Setting up a new Firebase project
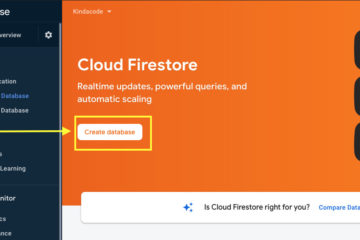
1. Launch your web browser, go to https://console.firebase.google.com/, login, and click on the “+” button.
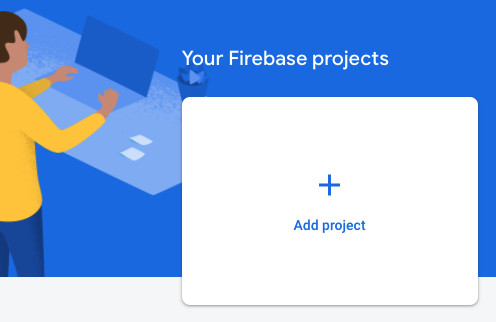
2. Give your project a name, then click on the “Continue” button:
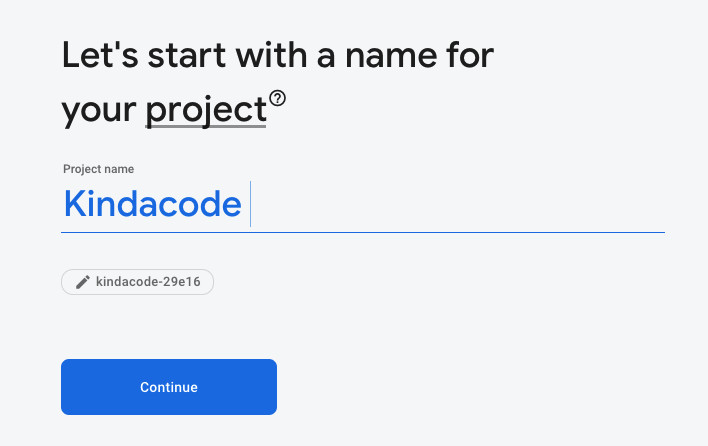
3. To keep this tutorial short and clean, we will disable Google Analytics but you can reenable it later as you want. Click on the “Create project” button to initialize your project.
4. It will take a while to complete.
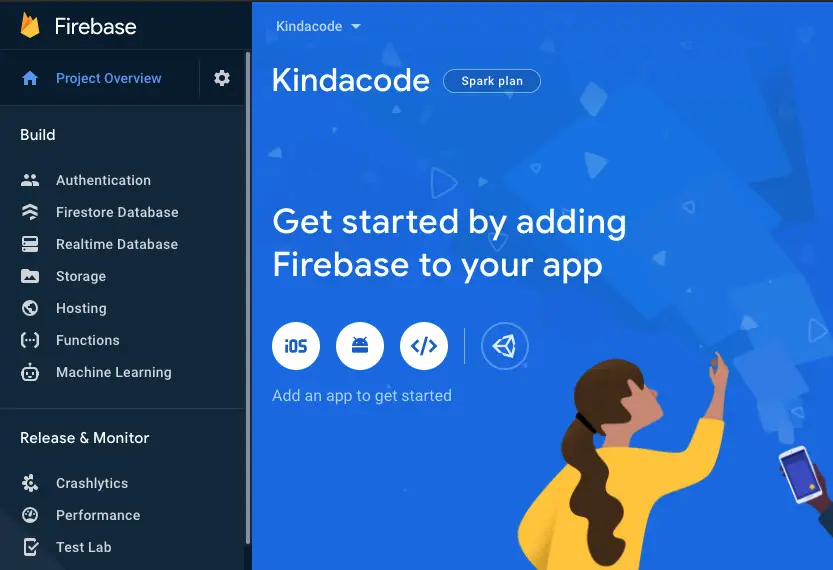
Here’s the project’s dashboard:
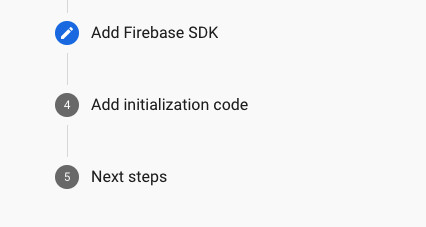
Adding Firebase SDK
Installing the firebase_core package
This package is essential and responsible for connecting your Flutter app to Firebase.
1. Create a new Flutter project by running:
flutter create my_project2. Add the firebase_core package to the project by running the following command:
flutter pub add firebase_coreThen execute this:
flutter pub getNow, we will have to take different steps for iOS and Android. The process may be tedious for you but that’s the way we’ll have to go.
iOS
Note: You can ignore this section and move on to the next one if you’re only working with Android
The Steps:
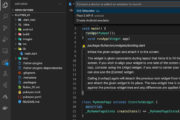
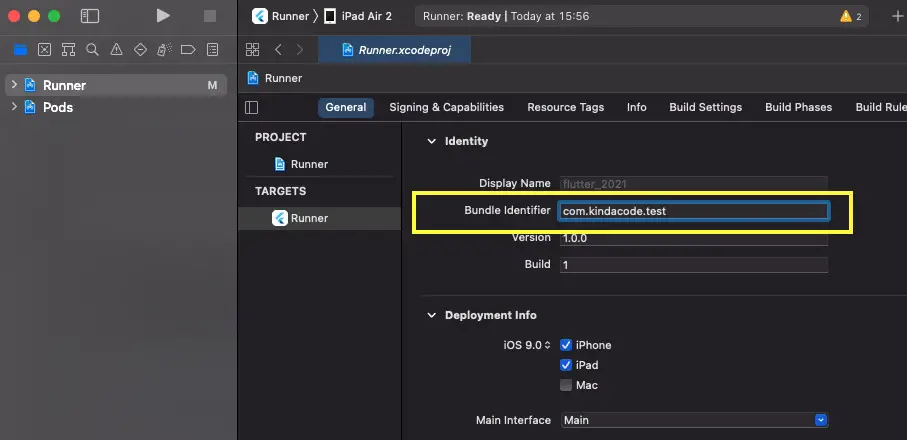
1. Open <your-project>/ios/Runner.xcworkspace with Xcode, select the General tab, then see your Bundle identifier. We’ll need this information for the following steps.
Don’t close Xcode. We need to go back to it later.
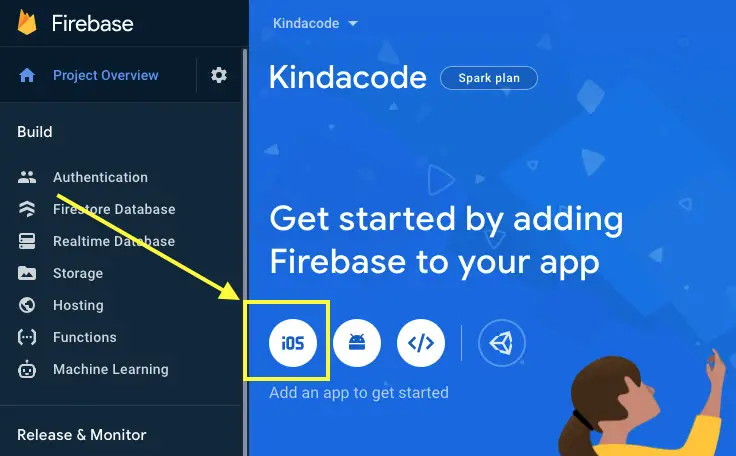
2. Go back to your Firebase project’s dashboard, and click on the iOS icon to register an iOS app:
3. Now, you will have to fill in some fields. The “iOS bundle ID” field is required and must be the same as the app bundle identifier that we’ve seen in Xcode in the first step of this section.
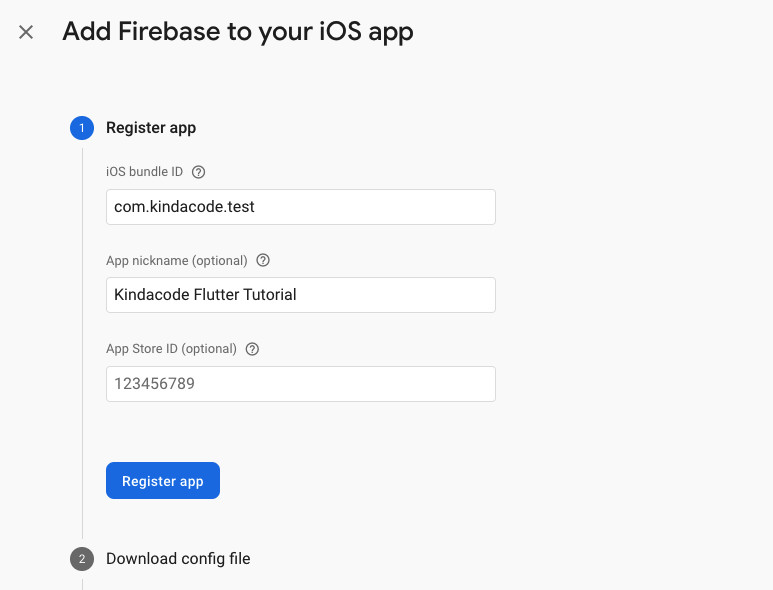
Click on the “Register app” button to continue.
4. Download the “GoogleService-info.plist” file:
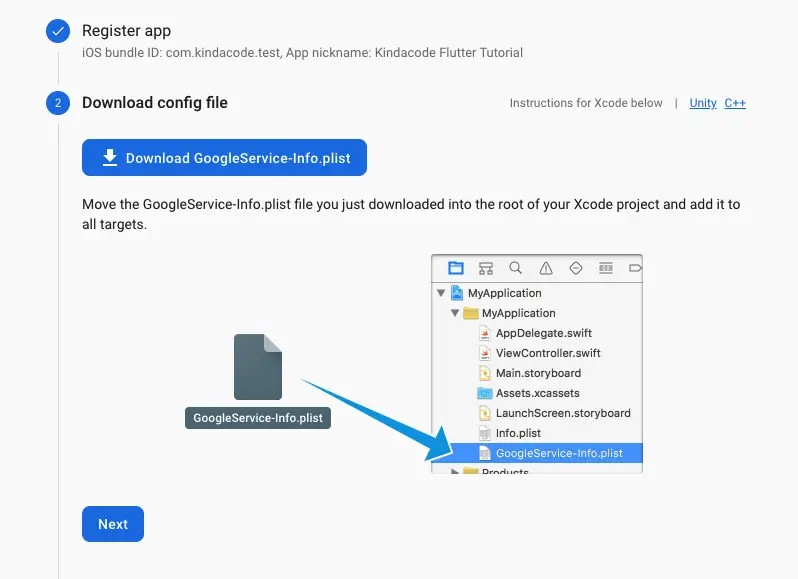
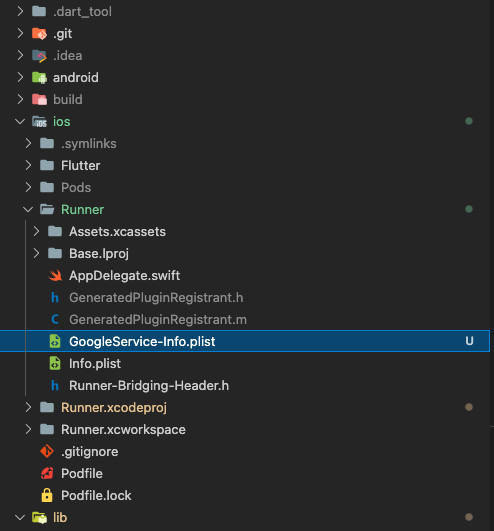
and drag it into the root of <your-project>/ios/Runner directory:
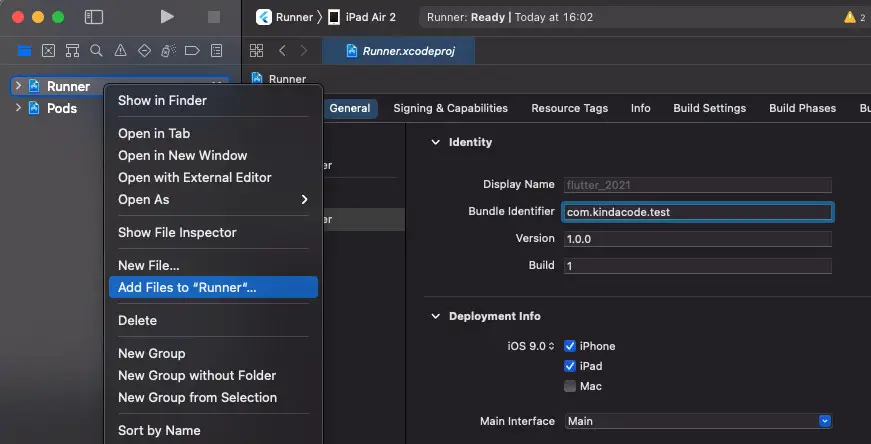
This step is not done, and we have to do one extra thing. Go back to Xcode, right-click on ‘Runner’, select ‘Add Files to “Runner”…’ from the drop-down, then pick the “GoogleService-info.plist” file.
We’re done with iOS. The last three steps on the Firebase instruction page are needless for Flutter, and it’s fine to ignore them.
Android
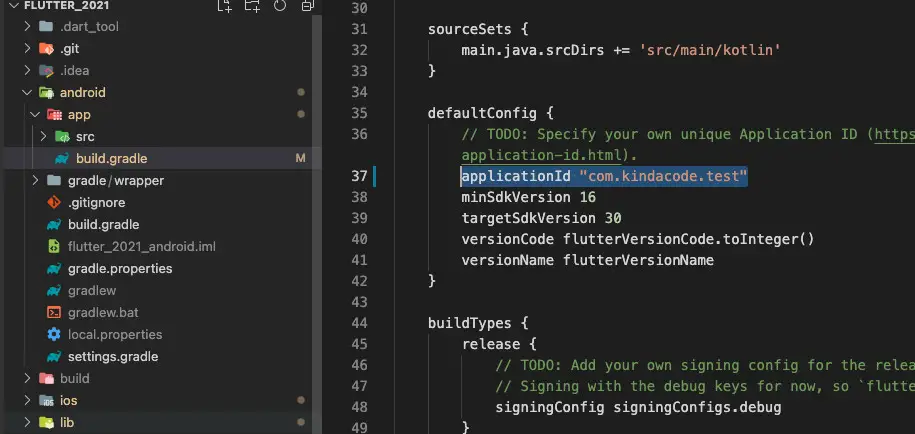
Note: We’ll work with 2 build.gradle files. One lies in <your-project>/android, and the other locates in <your–project>/android/app. In the following steps, you also have to replace my version numbers with the latest ones, replacing my application IDs (com.kindacode.test) with your own application ID (there are some screenshots taken by me a long time ago).
The steps
1. Open <your-project>/android/app/build.gradle, go to the defaultConfig section and see your applicationId:
2. Go back to your Firebase project’s dashboard, click on the “+ Add app” button, and register an Android app. Enter the applicationId you have seen in the previous step into the “Android package name” field. Note that it cannot be changed for this Firebase Android app after it’s registered with your Firebase project.
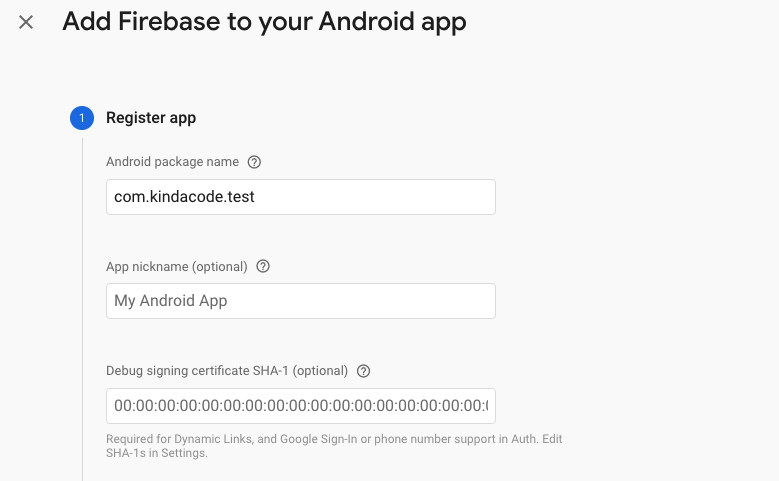
The other fields can be left empty.
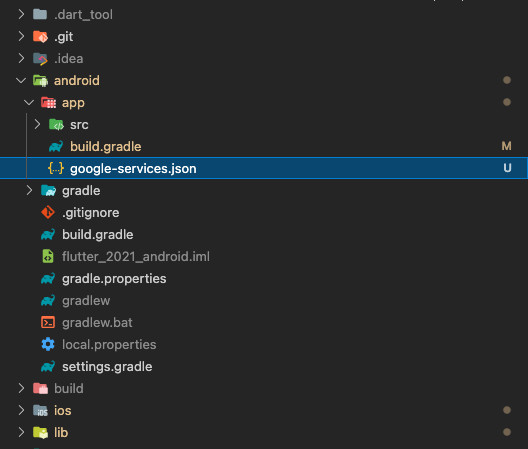
2. Download the “google-services.json” file:
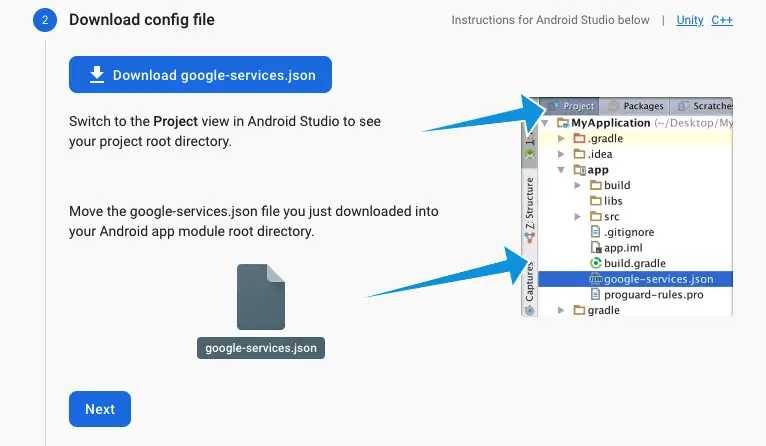
Move the “google-services.json” file into your <your-project>/android/app directory:
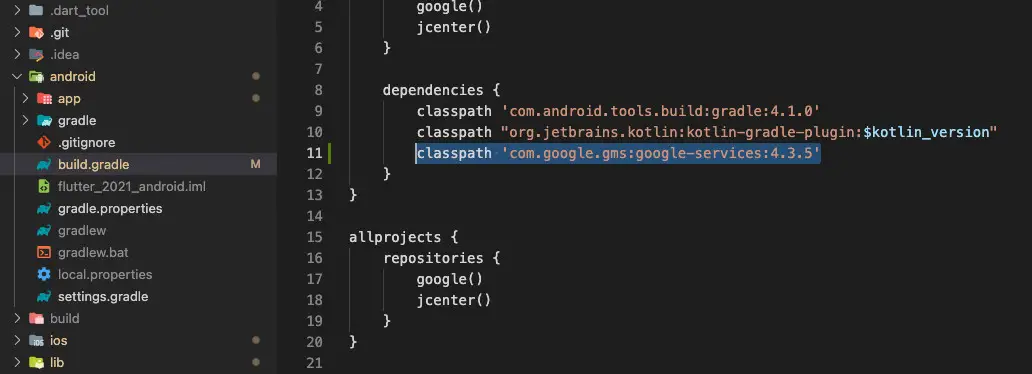
3. Open <your-project>/android/build.gradle and add the following line to the dependencies section:
classpath 'com.google.gms:google-services:4.3.5'
// Latest update: classpath 'com.google.gms:google-services:4.3.13'
See my screenshot if you’re confused:
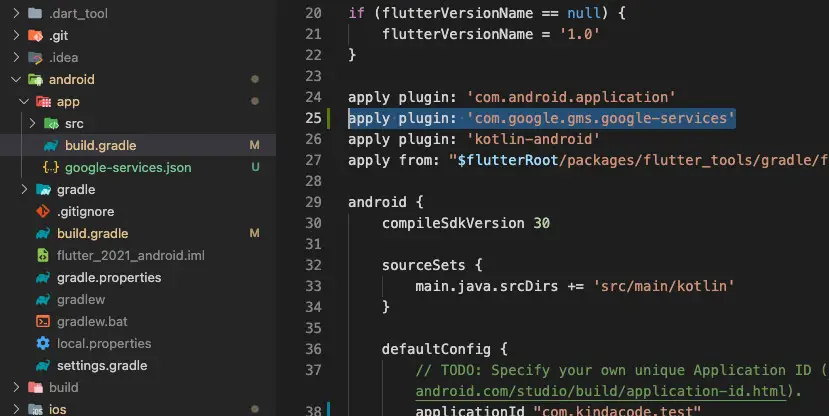
4. Open <your-project>/android/app/build.gradle and add the following line right below the apply plugin: ‘com.android.application’ line:
apply plugin: 'com.google.gms.google-services'See mine for more clarity:
Now we’re with the Android guy.
Test our work
If a bug blocks your way, don’t panic. The next section provides you with some solutions to beat it.
1. Before using any Firebase service, we have to call the initializeApp method:
import 'package:firebase_core/firebase_core.dart'; // import firebase_core

void main() async {
  WidgetsFlutterBinding.ensureInitialized();
  await Firebase.initializeApp();
  runApp(const MyApp());
}
The full code:
// main.dart
import 'package:flutter/material.dart';
import 'package:firebase_core/firebase_core.dart';

void main() async {
  WidgetsFlutterBinding.ensureInitialized();
  await Firebase.initializeApp();
  runApp(const MyApp());
}

class MyApp extends StatelessWidget {
  const MyApp({Key? key}) : super(key: key);

  @override
  Widget build(BuildContext context) {
    return const MaterialApp(
      // Remove the debug banner
      debugShowCheckedModeBanner: false,
      title: 'Kindacode.com',
      home: HomePage(),
    );
  }
}

class HomePage extends StatefulWidget {
  const HomePage({Key? key}) : super(key: key);

  @override
  State<HomePage> createState() => _HomePageState();
}

class _HomePageState extends State<HomePage> {
  @override
  Widget build(BuildContext context) {
    return Scaffold(
      appBar: AppBar(
        title: const Text('Kindacode.com'),
      ),
      body: const Center(),
    );
  }
}
2. Run the project one by one with the iOS simulator and then the Android emulator. If no error occurs, we are successful. If there are errors, please see the next section.
flutter runThe first time you launch your Flutter app with Firebase on iOS or Android will be quite a while. However, the next times will be much faster.
Common Errors and How to Fix Them
CocoaPods could not find compatible versions for pod “firebase_core” (iOS)
This problem occurs on iOS.
The error message:
Specs satisfying the `firebase_core (from `.symlinks/plugins/firebase_core/ios`)` dependency were found, but they required a higher minimum
    deployment target.
More output from CocoaPods:
 [!] Automatically assigning platform `iOS` with version `9.0` on target `Runner` because no platform was specified. Please specify a platform for
    this target in your Podfile. See `https://guides.cocoapods.org/syntax/podfile.html#platform`.
Solution
Go to <your-project>/ios/Podfile, uncomment the “# platform :ios, ‘9.0’” line, then replace ‘9.0’ with ‘10.0’ or a higher version. I will go with ‘12.0’.
# Uncomment this line to define a global platform for your project
platform :ios, '12.0'
Now run your project again. It should work fine.
uses-sdk:minSdkVersion 16 cannot be smaller than version 19 (Android)
This problem occurs on Android.
Some of the error messages:
build/tflite/intermediates/library_manifest/debug/AndroidManifest.xml as the library might be using APIs not available in 16
        Suggestion: use a compatible library with a minSdk of at most 16,
                or increase this project's minSdk version to at least 19,
                or use tools:overrideLibrary="sq.flutter.tflite" to force usage (may lead to runtime failures)

FAILURE: Build failed with an exception.

* What went wrong:
Execution failed for task ':app:processDebugMainManifest'.
> Manifest merger failed with multiple errors, see logs
Solution
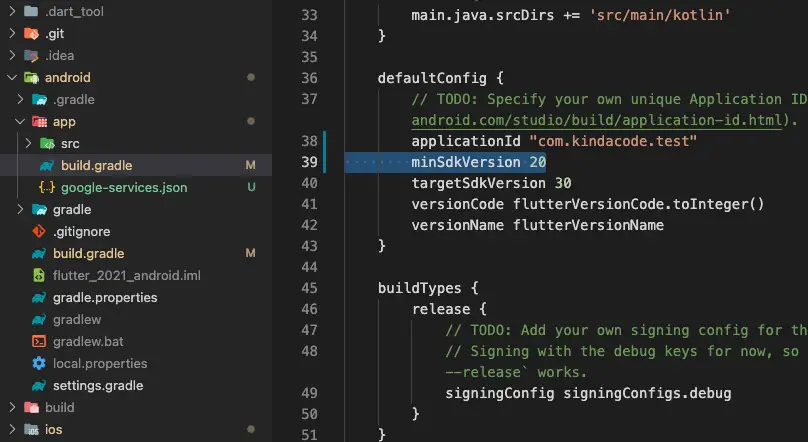
The solution is proposed quite clearly in the error messages. Our job is to increase the project’s minSdk to 19 or higher. Go to <your-project>/android/app/build.gradle, find the defaultConfig block, and change minSdkVersion to 19 or a higher number. I will go with 20.
For more clarity, you can take a glance at this screenshot:
What’s Next?
Congratulation! You’ve successfully added Firebase SDK to your Flutter project. Don’t be upset if you encounter bugs and spend more time than you expected. It is a very normal thing that everyone encounters in developing applications.
More article(s) about Firebase stuff:
- Flutter and Firestore Database: CRUD example
- Flutter + Firebase Storage: Upload, Retrieve, and Delete files
- Flutter: Firebase Remote Config example
If you would like to explore other new and interesting stuff about Flutter, take a look at the following articles:
- Working with ReorderableListView in Flutter
- 4 Ways to Store Data Offline in Flutter
- Flutter Cupertino Button – Tutorial and Examples
- Flutter: Make a simple Color Picker from scratch
You can also check out our Flutter category page or Dart category page for the latest tutorials and examples.


When I try your code a get error:
E/flutter ( 5584): [ERROR:flutter/lib/ui/ui_dart_state.cc(186)]
So strange. Can you give me more clues? Flutter version, firebase_core version.
After all errors I used “lib/main.dart” from FlutterFire and it start working. After that I try your code again and it works?
I don’t understand. Thanks anyway!
These mysterious things happen very often when building apps 🙂
Can u make a tutorial on firebase messaging for v9.0.0
Yep. I’ll make it.