


This article shows you 2 different ways to implement a dropdown multi-select with checkboxes in Flutter. In the first approach, we will build the multi-select from scratch. In the second approach, we will get the job done quickly by using a third-party package.
Creating a Multiselect with Checkboxes from scratch
App preview
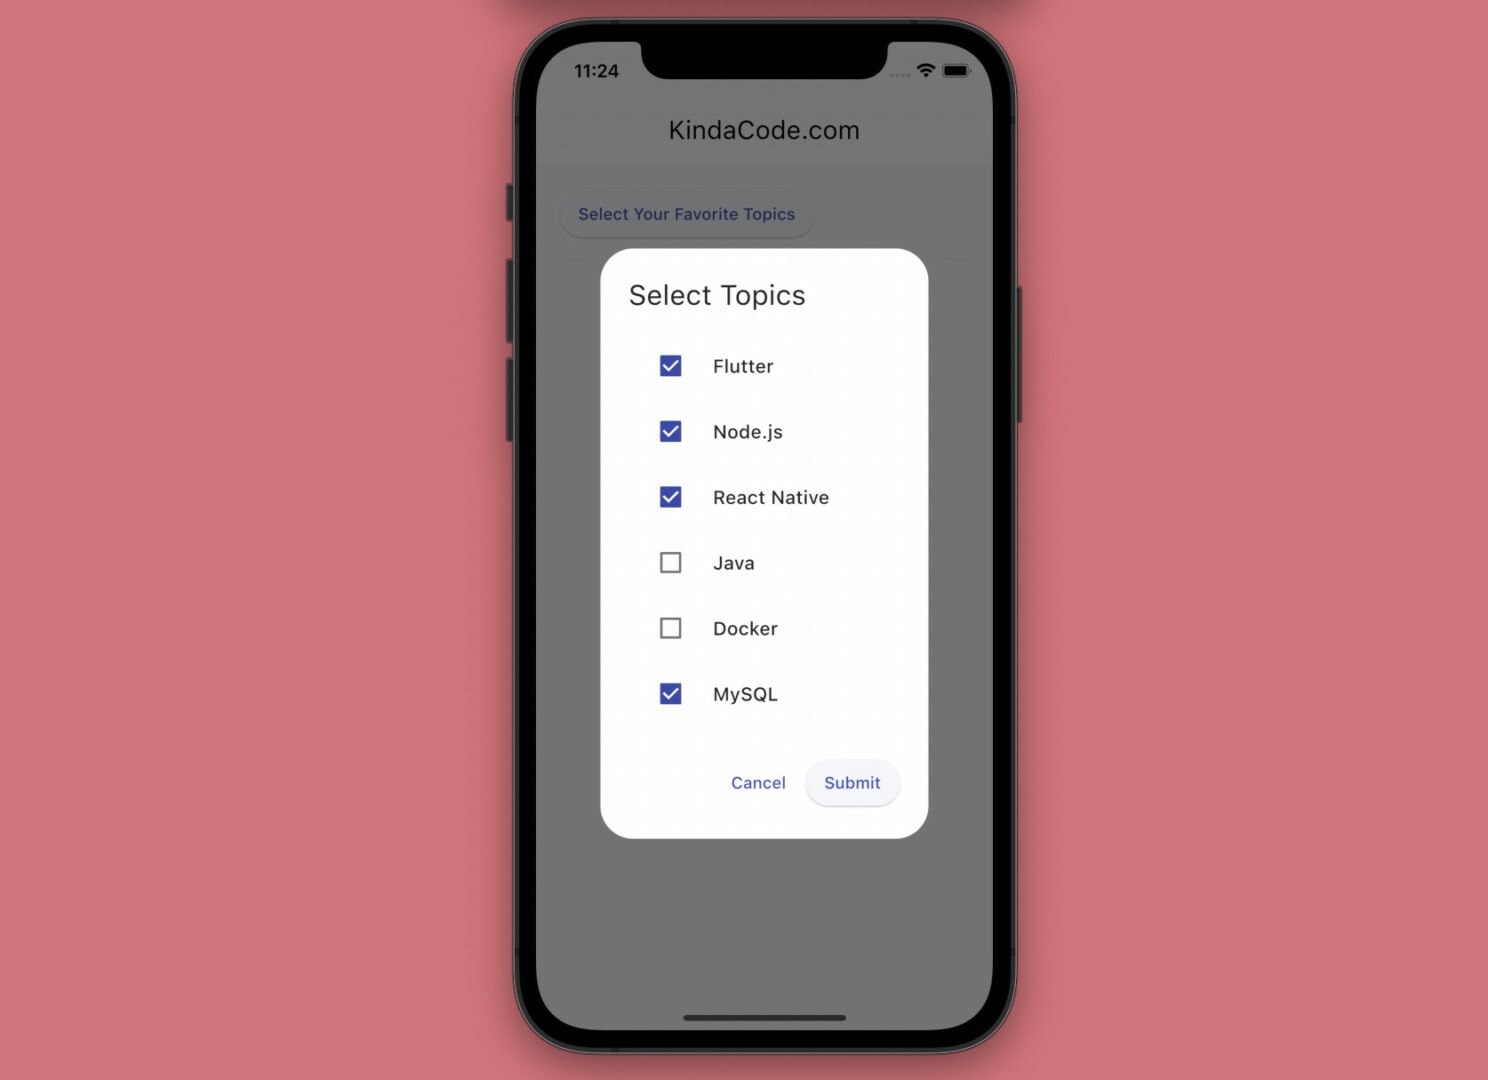
The app we are going to build has a professional, full-feature multi-select widget that displays a list of options. An option can be selected or unselected by checking/unchecking the checkbox associated with it.
When the elevated button is pressed, the multi-select dialog will show up. It lets the user choose their favorite topics in programming. The selected topics will be displayed on the screen as chips.
Here’s how our app works in action:
Building a custom multiselect widget
Create a reusable widget called MultiSelect that can take a list of options (you can hard-code these items or fetch them from a database/API):
// Multi Select widget
// This widget is reusable
class MultiSelect extends StatefulWidget {
  final List<String> items;
  const MultiSelect({Key? key, required this.items}) : super(key: key);

  @override
  State<StatefulWidget> createState() => _MultiSelectState();
}

class _MultiSelectState extends State<MultiSelect> {
  // this variable holds the selected items
  final List<String> _selectedItems = [];

// This function is triggered when a checkbox is checked or unchecked
  void _itemChange(String itemValue, bool isSelected) {
    setState(() {
      if (isSelected) {
        _selectedItems.add(itemValue);
      } else {
        _selectedItems.remove(itemValue);
      }
    });
  }

  // this function is called when the Cancel button is pressed
  void _cancel() {
    Navigator.pop(context);
  }

// this function is called when the Submit button is tapped
  void _submit() {
    Navigator.pop(context, _selectedItems);
  }

  @override
  Widget build(BuildContext context) {
    return AlertDialog(
      title: const Text('Select Topics'),
      content: SingleChildScrollView(
        child: ListBody(
          children: widget.items
              .map((item) => CheckboxListTile(
                    value: _selectedItems.contains(item),
                    title: Text(item),
                    controlAffinity: ListTileControlAffinity.leading,
                    onChanged: (isChecked) => _itemChange(item, isChecked!),
                  ))
              .toList(),
        ),
      ),
      actions: [
        TextButton(
          onPressed: _cancel,
          child: const Text('Cancel'),
        ),
        ElevatedButton(
          onPressed: _submit,
          child: const Text('Submit'),
        ),
      ],
    );
  }
}
The complete code
Here’s the code that produces the app you’ve seen in the demo video above:
// main.dart
import 'package:flutter/material.dart';

void main() {
  runApp(const MyApp());
}

class MyApp extends StatelessWidget {
  const MyApp({Key? key}) : super(key: key);

  @override
  Widget build(BuildContext context) {
    return MaterialApp(
      debugShowCheckedModeBanner: false,
      title: 'KindaCode.com',
      theme: ThemeData(
        // enable Material 3
        useMaterial3: true,
        primarySwatch: Colors.indigo,
      ),
      home: const HomePage(),
    );
  }
}

// Multi Select widget
// This widget is reusable
class MultiSelect extends StatefulWidget {
  final List<String> items;
  const MultiSelect({Key? key, required this.items}) : super(key: key);

  @override
  State<StatefulWidget> createState() => _MultiSelectState();
}

class _MultiSelectState extends State<MultiSelect> {
  // this variable holds the selected items
  final List<String> _selectedItems = [];

// This function is triggered when a checkbox is checked or unchecked
  void _itemChange(String itemValue, bool isSelected) {
    setState(() {
      if (isSelected) {
        _selectedItems.add(itemValue);
      } else {
        _selectedItems.remove(itemValue);
      }
    });
  }

  // this function is called when the Cancel button is pressed
  void _cancel() {
    Navigator.pop(context);
  }

// this function is called when the Submit button is tapped
  void _submit() {
    Navigator.pop(context, _selectedItems);
  }

  @override
  Widget build(BuildContext context) {
    return AlertDialog(
      title: const Text('Select Topics'),
      content: SingleChildScrollView(
        child: ListBody(
          children: widget.items
              .map((item) => CheckboxListTile(
                    value: _selectedItems.contains(item),
                    title: Text(item),
                    controlAffinity: ListTileControlAffinity.leading,
                    onChanged: (isChecked) => _itemChange(item, isChecked!),
                  ))
              .toList(),
        ),
      ),
      actions: [
        TextButton(
          onPressed: _cancel,
          child: const Text('Cancel'),
        ),
        ElevatedButton(
          onPressed: _submit,
          child: const Text('Submit'),
        ),
      ],
    );
  }
}

// Implement a multi select on the Home screen
class HomePage extends StatefulWidget {
  const HomePage({Key? key}) : super(key: key);

  @override
  State<HomePage> createState() => _HomePageState();
}

class _HomePageState extends State<HomePage> {
  List<String> _selectedItems = [];

  void _showMultiSelect() async {
    // a list of selectable items
    // these items can be hard-coded or dynamically fetched from a database/API
    final List<String> items = [
      'Flutter',
      'Node.js',
      'React Native',
      'Java',
      'Docker',
      'MySQL'
    ];

    final List<String>? results = await showDialog(
      context: context,
      builder: (BuildContext context) {
        return MultiSelect(items: items);
      },
    );

    // Update UI
    if (results != null) {
      setState(() {
        _selectedItems = results;
      });
    }
  }

  @override
  Widget build(BuildContext context) {
    return Scaffold(
      appBar: AppBar(
        title: const Text('KindaCode.com'),
      ),
      body: Padding(
        padding: const EdgeInsets.all(20),
        child: Column(
          crossAxisAlignment: CrossAxisAlignment.start,
          children: [
            // use this button to open the multi-select dialog
            ElevatedButton(
              onPressed: _showMultiSelect,
              child: const Text('Select Your Favorite Topics'),
            ),
            const Divider(
              height: 30,
            ),
            // display selected items
            Wrap(
              children: _selectedItems
                  .map((e) => Chip(
                        label: Text(e),
                      ))
                  .toList(),
            )
          ],
        ),
      ),
    );
  }
}
Alternatives
Making a custom multi-select is neither complex nor complicated. However, if you have an urgent task and just want to have a multi-select as quickly as possible, then using a third-party plugin is a good choice. There are several good open-source packages for you:
The downside of depending on a third-party library is that there are things you can’t customize to your liking and if the author of that library no longer updates it, in the future that library can Not compatible with newer versions of Flutter.
Conclusion
You’ve learned more than one technique to add a custom multi-select to your app. If you’d like to explore more new and exciting things about modern Flutter development, take a look at the following articles:
- Using Stepper widget in Flutter: Tutorial & Example
- Using Provider for State Management in Flutter
- Flutter: Creating OTP/PIN Input Fields (2 approaches)
- Flutter: Making Beautiful Chat Bubbles (2 Approaches)
- Flutter: Creating Strikethrough Text (Cross Out Text)
- Using GetX (Get) for Navigation and Routing in Flutter
You can also take a tour around our Flutter topic page and Dart topic page to see the latest tutorials and examples.


