


This article is dedicated to the ListWheelScrollView widget in Flutter. We’ll discover the fundamentals of the widget and then study 2 different examples. The first example is straightforward and nondescript, while the second one is a result of customization – an image carousel/slideshow. Without any further ado, let’s get started.
Overview
The ListWheelScrollView widget, as its name implies, creates a 3D list view with items that seem to be on a fiction wheel whose pivot is a horizontal line behind the screen. Items closer to the middle of the viewport appear larger; conversely, items farther from the center appear smaller.
There is a strict rule we have to adhere to when implementing a ListWheelScrollView widget. That is, all children must be the same size along the scrolling axis (this might be the biggest difference between ListWheeScrollView and ListView). We can set the fixed size with the itemExtend parameter:
// minimal implementation
ListWheelScrollView(
    itemExtend: /* size of each child in main axis (double) */,
    children: /* list items */
)
Now it’s time to see what we can do with it.
The Basic Example
App Preview
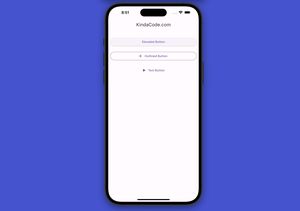
The main part of this tiny app is a ListWheelScrollView that presents a list of animals. The selected item will have an orange background color, while other items’ backgrounds are indigo. Moreover, the name of the selected animal will be shown in the Text widget right below the app bar (a little redundant work).
A demo GIF is worth more than a thousand words:

The Code
The complete code with explanations in the comments:
// kindacode.com
// main.dart
import 'package:flutter/material.dart';

void main() {
  runApp(const MyApp());
}

class MyApp extends StatelessWidget {
  const MyApp({Key? key}) : super(key: key);

  @override
  Widget build(BuildContext context) {
    return MaterialApp(
      // Remove the debug banner
      debugShowCheckedModeBanner: false,
      title: 'KindaCode.com',
      theme: ThemeData(useMaterial3: true),
      home: const HomeScreen(),
    );
  }
}

class HomeScreen extends StatefulWidget {
  const HomeScreen({Key? key}) : super(key: key);

  @override
  State<HomeScreen> createState() => _HomeScreenState();
}

class _HomeScreenState extends State<HomeScreen> {
  // Dummy data to feed the list
  final List _items = [
    'Dog',
    'Cat',
    'Dragon',
    'Crocodile',
    'KindaCode.com',
    'Monkey',
    'Chicken',
    'Flamingo'
  ];

  // The index of the selected item (the one at the middle of the wheel)
  // In the beginning, it's the index of the first item
  int _selectedItemIndex = 0;

  @override
  Widget build(BuildContext context) {
    return Scaffold(
      appBar: AppBar(title: const Text('KindaCode.com')),
      body: Column(children: [
        // display selected item
        Container(
            width: double.infinity,
            padding: const EdgeInsets.symmetric(vertical: 50),
            color: Colors.grey.shade800,
            alignment: Alignment.center,
            child: Text(
              _items[_selectedItemIndex],
              style: const TextStyle(fontSize: 32, color: Colors.white),
            )),
        // implement the List Wheel Scroll View
        Expanded(
          child: Container(
            padding: const EdgeInsets.symmetric(horizontal: 20, vertical: 5),
            width: double.infinity,
            color: Colors.amber.shade200,
            child: ListWheelScrollView(
              itemExtent: 100,
              diameterRatio: 1.8,
              onSelectedItemChanged: (int index) {
                // update the UI on selected item changes
                setState(() {
                  _selectedItemIndex = index;
                });
              },
              // children of the list
              children: _items
                  .map((e) => Card(
                        // make selected item background color is differ from the rest
                        color: _items.indexOf(e) == _selectedItemIndex
                            ? Colors.orange
                            : Colors.indigo,
                        child: Center(
                          child: Text(
                            e,
                            style: const TextStyle(
                                fontSize: 20, color: Colors.white),
                          ),
                        ),
                      ))
                  .toList(),
            ),
          ),
        ),
      ]),
    );
  }
}
Horizontal ListWheelScrollView: Image Carousel/Slideshow
At the time of writing, ListWheelScrollView doesn’t provide any option to make a horizontal list wheel. However, we can achieve the goal without too much effort by using the RotatedBox widget, which rotates its child.
App Preview
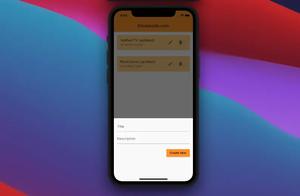
This example creates a photo carousel/slideshow. When a photo is selected, its caption will be displayed too. Here’s how it works:
The Code
The full source code with explanations in the comments:
// main.dart
import 'package:flutter/material.dart';

void main() {
  runApp(const MyApp());
}

class MyApp extends StatelessWidget {
  const MyApp({Key? key}) : super(key: key);

  @override
  Widget build(BuildContext context) {
    return MaterialApp(
      // Remove the debug banner
      debugShowCheckedModeBanner: false,
      title: 'KindaCode.com',
      theme: ThemeData(useMaterial3: true),
      home: const HomeScreen(),
    );
  }
}

class HomeScreen extends StatefulWidget {
  const HomeScreen({Key? key}) : super(key: key);

  @override
  State<HomeScreen> createState() => _HomeScreenState();
}

class _HomeScreenState extends State<HomeScreen> {
  // list of photos to display (including urls and captions)
  final List<Map<String, dynamic>> _photos = [
    {
      "url":
          "https://www.kindacode.com/wp-content/uploads/2022/06/big-boss.jpeg",
      "caption": "Big Boss",
    },
    {
      "url":
          "https://www.kindacode.com/wp-content/uploads/2022/07/flower-1.jpeg",
      "caption": "Flower One"
    },
    {
      "url":
          "https://www.kindacode.com/wp-content/uploads/2022/07/flower-2.jpeg",
      "caption": "Flower Two"
    },
    {
      "url":
          "https://www.kindacode.com/wp-content/uploads/2022/07/flower-3.jpeg",
      "caption": "Flower Three"
    },
    {
      "url":
          "https://www.kindacode.com/wp-content/uploads/2022/07/flower-4.jpeg",
      "caption": "Flower Four"
    }
  ];

  Map<String, dynamic>? _selectedPhoto;

  @override
  Widget build(BuildContext context) {
    return Scaffold(
      appBar: AppBar(title: const Text('KindaCode.com')),
      body: Column(
        children: [
          Container(
            height: 400,
            color: Colors.amber,
            alignment: Alignment.center,
            child: RotatedBox(
              quarterTurns: -45,
              // implement the ListWheelScrollView
              child: ListWheelScrollView(
                itemExtent: MediaQuery.of(context).size.width * 0.9,
                onSelectedItemChanged: (index) {
                  setState(() {
                    _selectedPhoto = _photos[index];
                  });
                },
                // use the _photos list as children
                children: _photos
                    .map((photo) => RotatedBox(
                          key: ValueKey(photo["url"]),
                          quarterTurns: 45,
                          child: Image.network(
                            photo["url"],
                            width: double.infinity,
                            height: 300,
                            fit: BoxFit.cover,
                          ),
                        ))
                    .toList(),
              ),
            ),
          ),
          // display the caption of the selected photo
          SizedBox(
            height: 120,
            child: Center(
              child: Text(
                _selectedPhoto == null
                    ? _photos[0]['caption']
                    : _selectedPhoto!['caption'],
                style: const TextStyle(fontSize: 30),
              ),
            ),
          ),
        ],
      ),
    );
  }
}
Conclusion
You’ve learned about the ListWheelScrollView widget and examined several examples of using it in practice. Feel free to modify the code, remove some lines, add some lines, and see what happens.
Programming well can be a lifelong endeavor. If you’d like to explore more new and exciting things in modern Flutter, take a look at the following articles:
- Flutter: Rendering an Image from Byte Buffer/Int8List
- Flutter: Caching Network Images for Big Performance gains
- Flutter: Check Internet Connection without any plugins
- Flutter: Creating Transparent/Translucent App Bars
- Flutter: SliverGrid example
- Flutter: ValueListenableBuilder Example
You can also tour around our Flutter topic page or Dart topic page for the most recent tutorials and examples.


