


In general, a bottom navigation bar displays two to five tabs at the bottom of a screen of a mobile or web app. Each tab contains an icon and an optional text label.
In Flutter, you can easily implement a bottom tab bar and its tabs by using the built-in widgets named BottomNavigationBar and BottomNavigationBarItem, respectively.
Table of Contents
Example
App Preview
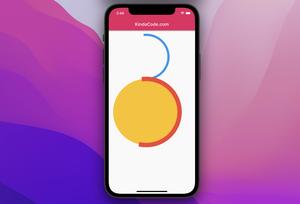
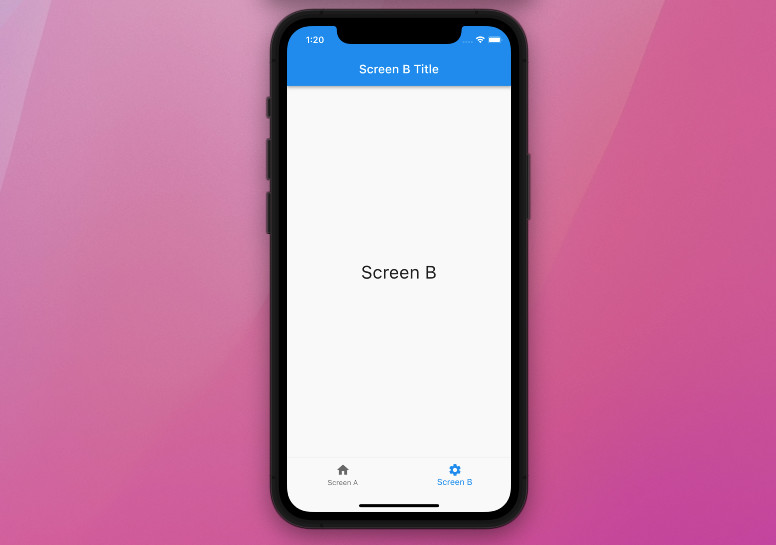
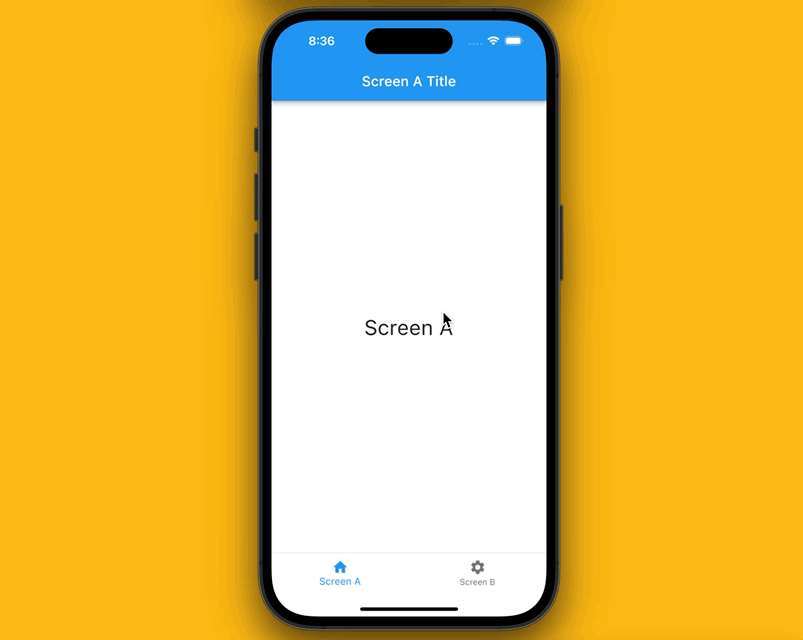
To demonstrate how to work with BottomNavigationBar, we’ll build a tiny Flutter app that contains 2 screens (ScreenA and ScreenB). To navigate between them, you can use the bottom tab bar. Here’s how it works at the end:
Writing Code
1. Create a new Flutter app:
flutter create my_app 2. In the lib directory, create 2 new files: screen_a.dart and screen_b.dart. Here’s the file structure in the lib folder:
.
├── main.dart
├── screen_a.dart
└── screen_b.dart
3. Add this to screen_a.dart:
// screen_a.dart
import 'package:flutter/material.dart';

class ScreenA extends StatelessWidget {
  const ScreenA({Key? key}) : super(key: key);

  @override
  Widget build(BuildContext context) {
    return const Center(
      child: Text(
        'Screen A',
        style: TextStyle(fontSize: 30),
      ),
    );
  }
}
4. Add this to screen_b.dart:
// screen_b.dart
import 'package:flutter/material.dart';

class ScreenB extends StatelessWidget {
  const ScreenB({Key? key}) : super(key: key);

  @override
  Widget build(BuildContext context) {
    return const Center(
      child: Text(
        'Screen B',
        style: TextStyle(fontSize: 30),
      ),
    );
  }
}
5. Remove all the default code in main.dart and add the following:
// main.dart
import 'package:flutter/material.dart';

import './screen_a.dart';
import './screen_b.dart';

void main() {
  runApp(const MyApp());
}

class MyApp extends StatelessWidget {
  const MyApp({Key? key}) : super(key: key);

  @override
  Widget build(BuildContext context) {
    return const MaterialApp(
      // Hide the debug banner
      debugShowCheckedModeBanner: false,
      title: 'Kindacode.com',
      home: MyHomePage(),
    );
  }
}

class MyHomePage extends StatefulWidget {
  const MyHomePage({Key? key}) : super(key: key);

  @override
  State<MyHomePage> createState() => _MyHomePageState();
}

class _MyHomePageState extends State<MyHomePage> {
  int _selectedScreenIndex = 0;
  final List _screens = [
    {"screen": const ScreenA(), "title": "Screen A Title"},
    {"screen": const ScreenB(), "title": "Screen B Title"}
  ];

  void _selectScreen(int index) {
    setState(() {
      _selectedScreenIndex = index;
    });
  }

  @override
  Widget build(BuildContext context) {
    return Scaffold(
      appBar: AppBar(
        title: Text(_screens[_selectedScreenIndex]["title"]),
      ),
      body: _screens[_selectedScreenIndex]["screen"],
      bottomNavigationBar: BottomNavigationBar(
        currentIndex: _selectedScreenIndex,
        onTap: _selectScreen,
        items: const [
          BottomNavigationBarItem(icon: Icon(Icons.home), label: 'Screen A'),
          BottomNavigationBarItem(icon: Icon(Icons.settings), label: "Screen B")
        ],
      ),
    );
  }
}
6. Launch an iOS simulator or an Android emulator and run:
flutter runConstructors
BottomNavigationBar:
BottomNavigationBar({
  Key? key,
  required List<BottomNavigationBarItem> items,
  ValueChanged<int>? onTap,
  int currentIndex = 0,
  double? elevation,
  BottomNavigationBarType? type,
  Color? fixedColor,
  Color? backgroundColor,
  double iconSize = 24.0,
  Color? selectedItemColor,
  Color? unselectedItemColor,
  IconThemeData? selectedIconTheme,
  IconThemeData? unselectedIconTheme,
  double selectedFontSize = 14.0,
  double unselectedFontSize = 12.0,
  TextStyle? selectedLabelStyle,
  TextStyle? unselectedLabelStyle,
  bool? showSelectedLabels,
  bool? showUnselectedLabels,
  MouseCursor? mouseCursor,
  bool? enableFeedback,
  BottomNavigationBarLandscapeLayout? landscapeLayout
})
BottomNavigationBarItem:
BottomNavigationBarItem({
  required Widget icon,
  String? label,
  Widget? activeIcon,
  Color? backgroundColor,
  String? tooltip
})
References
- Bottom navigation (material.io)
- Tab Bars (developer.apple.com)
- BottomNavigationBar class (flutter.dev)
- BottomNavigationBarItem class (flutter.dev)
Conclusion
We’ve examined an end-to-end example of implementing a simple material bottom tab bar. If you’d like to explore more new and interesting things about Flutter, take a look at the following articles:
- Flutter: Convert UTC Time to Local Time and Vice Versa
- 4 Ways to Format DateTime in Flutter
- Flutter: FilteringTextInputFormatter Examples
- Flutter & Hive Database: CRUD Example
- Flutter and Firestore Database: CRUD example
- Flutter: 2 Ways to Make a Dark/Light Mode Toggle
You can also check out our Flutter category page or Dart category page for the latest tutorials and examples.


