


Introduction
Flutter already provides built-in navigator APIs that can help us navigate between screens (routes) and show dialogs, snack bars, and bottom sheets without installing a third-party library. They are good and easy to use. However, if you want to write less code and speed up your development process, you can use GetX (also called Get). Furthermore, you can use routes, snack bars, dialogs, and bottom sheets without context.
A quick example
The two code snippets below do the same thing: Navigating to a route named SomeScreen.
Using Flutter’s Navigator:
Navigator.push(
    context,
    MaterialPageRoute(builder: (context) => SomeScreen()),
);
Using GetX:
Get.to(SomeScreen());Obviously, the 2nd way is much shorter and doesn’t need to worry about context.
Note: GetX comes with a lot of features, but each of these features is in separate containers and is only started after use. If you only use Route Management, only Route Management will be compiled.
In this article, we’ll go over a few examples of navigation and routing with GetX. If you want to learn how to manage states with GetX, see this article.
Example: Navigating Between Screens
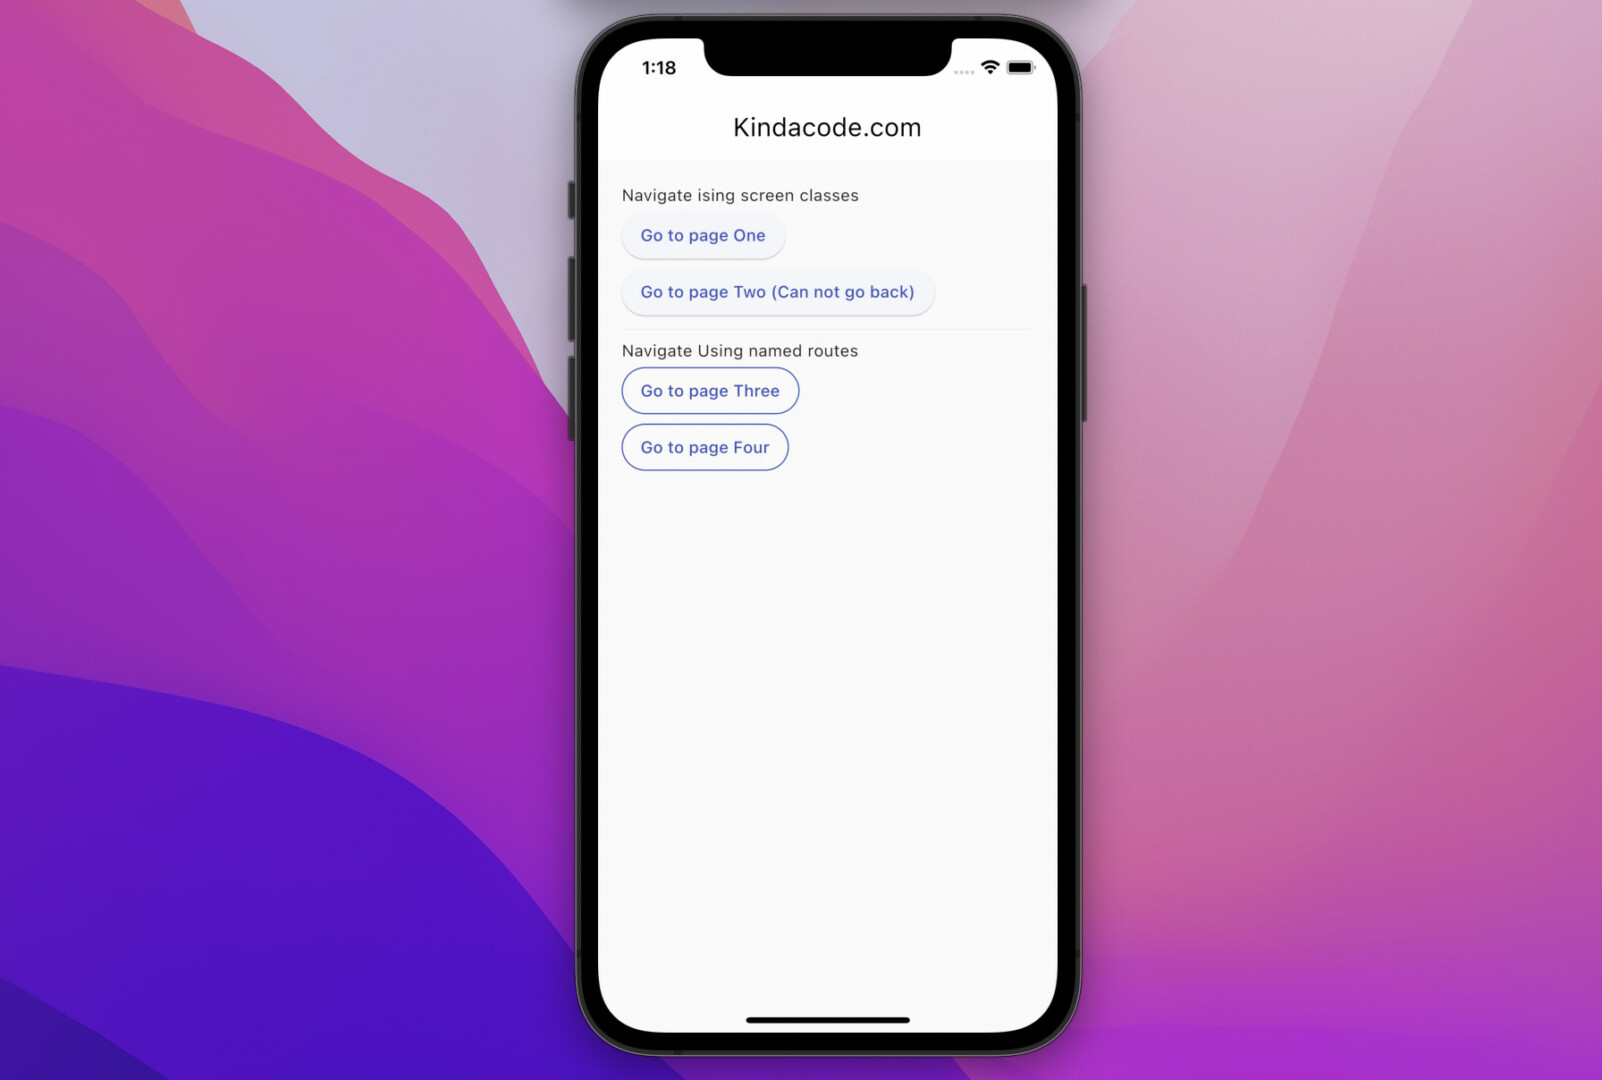
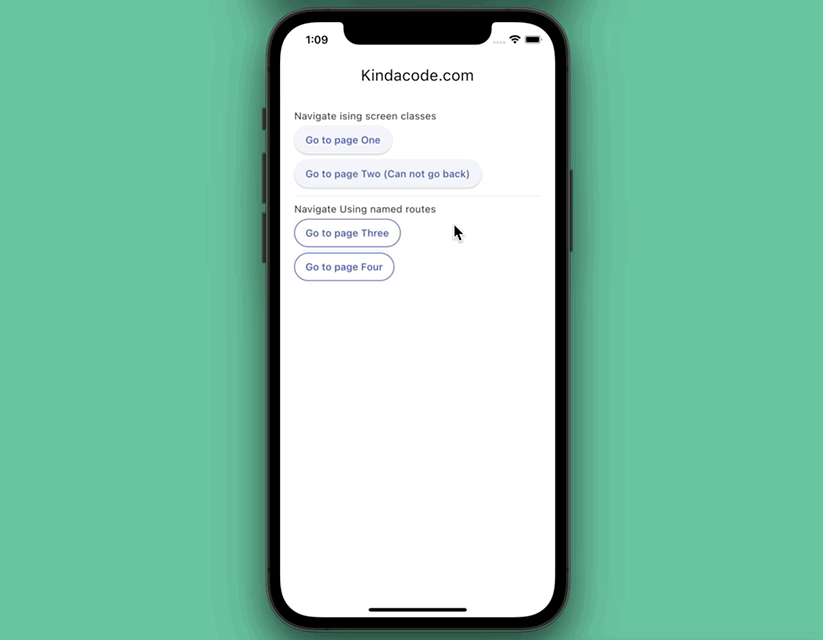
App Preview
This example shows you how to navigate by using route names and not using route names. Our app has 5 screens:
- HomePage: Contains buttons that lead to other screens
- PageOne: Displays a number passed in from the Home page via arguments. There is a back button to go back.
- PageTwo: There is no back button in the app bar.
- PageThree: Displays a number passed in from the Home page via arguments. There is a back button to go back.
- PageFour: Displays a number passed from the Home page via the dynamic route name.
Here’s how it works:
The Code
1. Install GetX by executing this command:
flutter pub add get2. Import the library into your Dart code:
import 'package:get/get.dart';In lib/main.dart, replace “MaterialApp” with “GetMaterialApp”.
3. The complete code:
// kindacode.com
// main.dart
import 'package:flutter/material.dart';
import 'dart:math';
import 'package:get/get.dart';
void main() {
runApp(const MyApp());
}
class MyApp extends StatelessWidget {
const MyApp({Key? key}) : super(key: key);
@override
Widget build(BuildContext context) {
return GetMaterialApp(
// Remove the debug banner
debugShowCheckedModeBanner: false,
title: 'Kindacode.com',
theme: ThemeData(
// enable Material 3
useMaterial3: true,
colorScheme: const ColorScheme.light(
primary: Colors.indigo,
outline: Colors.indigo,
),
),
home: const HomePage(),
getPages: [
GetPage(name: '/page-three', page: () => const PageThree()),
GetPage(
name: '/page-four/:data',
page: () => const PageFour()) // Dynamic route
],
);
}
}
// Home Screen
class HomePage extends StatelessWidget {
const HomePage({Key? key}) : super(key: key);
@override
Widget build(BuildContext context) {
return Scaffold(
appBar: AppBar(
title: const Text('Kindacode.com'),
),
body: Padding(
padding: const EdgeInsets.all(20),
child: Column(
crossAxisAlignment: CrossAxisAlignment.start,
children: [
const Text('Navigate ising screen classes'),
ElevatedButton(
onPressed: () => Get.to(const PageOne(), arguments: {
'id': Random().nextInt(1000).toString()
}), // Passing data by using "arguments"
child: const Text('Go to page One')),
ElevatedButton(
onPressed: () => Get.off(const PageTwo()),
child: const Text('Go to page Two (Can not go back)')),
const Divider(),
const Text('Navigate Using named routes'),
OutlinedButton(
onPressed: () => Get.toNamed('/page-three',
arguments: {'id': Random().nextInt(10000).toString()}),
child: const Text('Go to page Three')),
OutlinedButton(
onPressed: () => Get.toNamed(
'/page-four/${Random().nextInt(10000)}',
),
child: const Text('Go to page Four'))
],
),
),
);
}
}
// Page One
class PageOne extends StatelessWidget {
const PageOne({Key? key}) : super(key: key);
@override
Widget build(BuildContext context) {
return Scaffold(
appBar: AppBar(
title: const Text('Page One'),
),
body: Center(
child: Text(
Get.arguments['id'] ?? 'Page One',
style: const TextStyle(fontSize: 40),
),
),
);
}
}
// Page Two
class PageTwo extends StatelessWidget {
const PageTwo({Key? key}) : super(key: key);
@override
Widget build(BuildContext context) {
return Scaffold(
appBar: AppBar(
title: const Text('Page Two'),
),
body: Center(
child: ElevatedButton(
onPressed: () => Get.off(const HomePage()),
child: const Text('Go Home'),
),
),
);
}
}
// Page Three
class PageThree extends StatelessWidget {
const PageThree({Key? key}) : super(key: key);
@override
Widget build(BuildContext context) {
return Scaffold(
appBar: AppBar(
title: const Text('Page Three'),
),
body: Center(
child: Text(
Get.arguments['id'] ?? 'Page Three',
style: const TextStyle(fontSize: 40),
),
),
);
}
}
// Page Four
class PageFour extends StatelessWidget {
const PageFour({Key? key}) : super(key: key);
@override
Widget build(BuildContext context) {
return Scaffold(
appBar: AppBar(
title: const Text('Page Four'),
),
body: Center(
child: Text(
Get.parameters['data'] ?? 'Page Four',
style: const TextStyle(fontSize: 40),
),
),
);
}
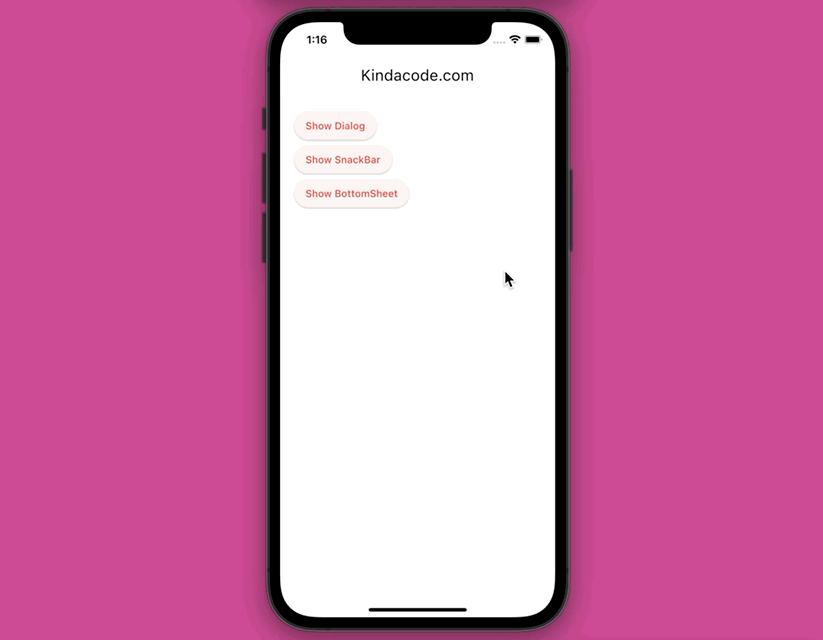
}Example: Dialog, Snack Bar, and Bottom Sheet
This example shows you how to display a dialog, a snack bar, and a bottom sheet by using GetX. We don’t need “context” at all.
Preview
The Code
The complete source code in main.dart with explanations:
// main.dart
import 'package:flutter/material.dart';
import 'package:get/get.dart';

void main() {
  runApp(const MyApp());
}

class MyApp extends StatelessWidget {
  const MyApp({Key? key}) : super(key: key);

  @override
  Widget build(BuildContext context) {
    return GetMaterialApp(
      // Remove the debug banner
      debugShowCheckedModeBanner: false,
      title: 'Kindacode.com',
      theme: ThemeData(
          // enable Material 3
          useMaterial3: true,
          primarySwatch: Colors.red),
      home: const HomePage(),
    );
  }
}

// Home Screen
class HomePage extends StatelessWidget {
  const HomePage({Key? key}) : super(key: key);

  // This function is triggered when the "Show Dialog" button pressed
  void _showDialog() async {
    await Get.dialog(AlertDialog(
      title: const Text('Dialog Title'),
      content: const Text('This is the dialog content'),
      actions: [
        TextButton(
            onPressed: () => Get.back(), // Close the dialog
            child: const Text('Close'))
      ],
    ));

    // Code that runs after the dialog disappears
    debugPrint('Dialog closed!');
  }

  // This function is triggered when the "Show SnackBar" button pressed
  void _showSnackBar() {
    Get.snackbar('SnackBar Title', 'This is a beautiful snack bar',
        duration: const Duration(seconds: 3),
        snackPosition: SnackPosition.BOTTOM,
        snackStyle: SnackStyle.FLOATING);
  }

// This function is triggered when the "Show BottomSheet" button pressed
  void _showBottomSheet() async {
    await Get.bottomSheet(Container(
      width: double.infinity,
      height: 300,
      color: Colors.redAccent,
      child: const Center(
        child: Text('Bottom Sheet Content'),
      ),
    ));

    // The code below will run after the bottom sheet goes away
    debugPrint('The Bottom Sheet has gone away!');
  }

  @override
  Widget build(BuildContext context) {
    return Scaffold(
      appBar: AppBar(
        title: const Text('Kindacode.com'),
      ),
      body: Padding(
        padding: const EdgeInsets.all(20),
        child: Column(
          crossAxisAlignment: CrossAxisAlignment.start,
          children: [
            ElevatedButton(
                onPressed: _showDialog, child: const Text('Show Dialog')),
            ElevatedButton(
                onPressed: _showSnackBar, child: const Text('Show SnackBar')),
            ElevatedButton(
                onPressed: _showBottomSheet,
                child: const Text('Show BottomSheet')),
          ],
        ),
      ),
    );
  }
}
Conclusion
You’ve learned and gone through several examples of navigating with GetX. Continue exploring more about developing apps with Flutter by taking a look at the following articles:
- Flutter + Firebase Storage: Upload, Retrieve, and Delete files
- Using GetX (Get) for State Management in Flutter
- Flutter and Firestore Database: CRUD example
- 2 ways to fetch data from APIs in Flutter
- Most Popular Packages for State Management in Flutter
- Flutter & SQLite: CRUD Example
You can also check out our Flutter category page, or Dart category page for the latest tutorials and examples.


