


This article walks you through two complete examples of making flipping card animation in Flutter. The first example implements things from scratch, and the second one uses a third-party package. Without any further ado, let’s get our hands dirty.
Some images used in the examples are from Pixabay.
Using Self-Written Code
This example creates flipping card effects by using the Transform widget. If this widget is new to you, this article can help you get familiar with it.
Preview
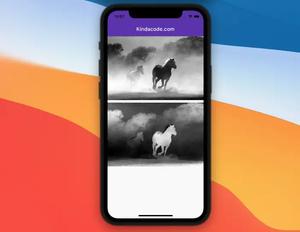
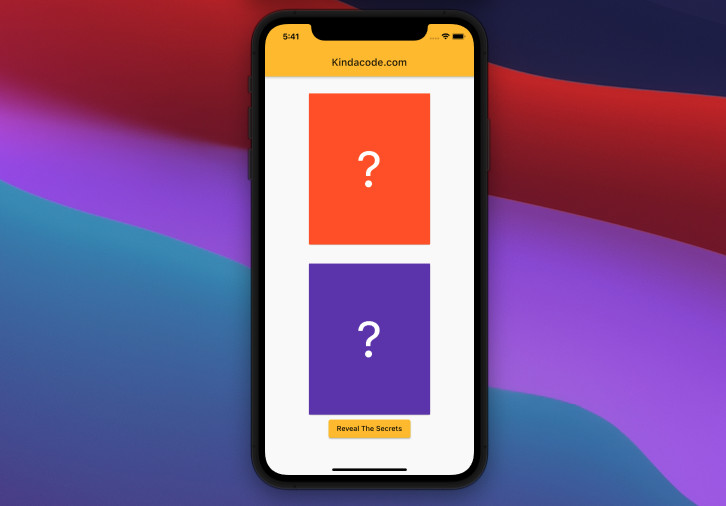
The demo app we are going to build displays two cards that conceal some secrets. You can expose the things behind the masks by pressing the Reveal The Secrets button. The top card presents a horizontal flipping animation and the bottom one demonstrates a vertical flipping animation.
The Complete Code
// main.dart
import 'package:flutter/material.dart';
import 'dart:math';

void main() {
  runApp(const MyApp());
}

class MyApp extends StatelessWidget {
  const MyApp({Key? key}) : super(key: key);

  @override
  Widget build(BuildContext context) {
    return MaterialApp(
        // Remove the debug banner
        debugShowCheckedModeBanner: false,
        title: 'Kindacode.com',
        theme: ThemeData(
          primarySwatch: Colors.amber,
        ),
        home: const HomePage());
  }
}

class HomePage extends StatefulWidget {
  const HomePage({Key? key}) : super(key: key);

  @override
  State<HomePage> createState() => _HomePageState();
}

// don't forget "with SingleTickerProviderStateMixin"
class _HomePageState extends State<HomePage>
    with SingleTickerProviderStateMixin {
  late AnimationController _controller;
  late Animation _animation;
  AnimationStatus _status = AnimationStatus.dismissed;

  // initialize _controller, _animation
  @override
  void initState() {
    super.initState();
    _controller =
        AnimationController(vsync: this, duration: const Duration(seconds: 1));
    _animation = Tween(end: 1.0, begin: 0.0).animate(_controller)
      ..addListener(() {
        setState(() {});
      })
      ..addStatusListener((status) {
        _status = status;
      });
  }

  @override
  Widget build(BuildContext context) {
    return Scaffold(
      appBar: AppBar(
        title: const Text('Kindacode.com'),
      ),
      body: Center(
        child: Column(
          crossAxisAlignment: CrossAxisAlignment.center,
          children: [
            const SizedBox(
              height: 30,
            ),
            // Horizontal Flipping
            Transform(
              alignment: FractionalOffset.center,
              transform: Matrix4.identity()
                ..setEntry(3, 2, 0.0015)
                ..rotateY(pi * _animation.value),
              child: Card(
                child: _animation.value <= 0.5
                    ? Container(
                        color: Colors.deepOrange,
                        width: 240,
                        height: 300,
                        child: const Center(
                            child: Text(
                          '?',
                          style: TextStyle(fontSize: 100, color: Colors.white),
                        )))
                    : Container(
                        width: 240,
                        height: 300,
                        color: Colors.grey,
                        child: Image.network(
                          'https://www.kindacode.com/wp-content/uploads/2021/09/girl.jpeg',
                          fit: BoxFit.cover,
                        )),
              ),
            ),
            // Vertical Flipping
            const SizedBox(
              height: 30,
            ),
            Transform(
              alignment: FractionalOffset.center,
              transform: Matrix4.identity()
                ..setEntry(3, 2, 0.0015)
                ..rotateX(pi * _animation.value),
              child: Card(
                child: _animation.value <= 0.5
                    ? Container(
                        color: Colors.deepPurple,
                        width: 240,
                        height: 300,
                        child: const Center(
                            child: Text(
                          '?',
                          style: TextStyle(fontSize: 100, color: Colors.white),
                        )))
                    : Container(
                        width: 240,
                        height: 300,
                        color: Colors.grey,
                        child: RotatedBox(
                          quarterTurns: 2,
                          child: Image.network(
                            'https://www.kindacode.com/wp-content/uploads/2021/09/flower.jpeg',
                            fit: BoxFit.cover,
                          ),
                        )),
              ),
            ),
            ElevatedButton(
                onPressed: () {
                  if (_status == AnimationStatus.dismissed) {
                    _controller.forward();
                  } else {
                    _controller.reverse();
                  }
                },
                child: const Text('Reveal The Secrets'))
          ],
        ),
      ),
    );
  }
}
Using a 3rd Plugin
If you’re new to Flutter, animation seems a tough area. Furthermore, writing code from scratch may be cumbersome and time-consuming. If you want to get the job done quickly and neatly, then using a pre-made widget from a plugin is a good option. The example below uses a great package named flip_card.
Preview
The Code
1. Add the plugin to your project:
flutter pub add flip_cardYou might need to run:
flutter pub getTo get the plugin installed.
2. Implement the FlipCard widget provided by the plugin:
FlipCard(
          direction: FlipDirection.HORIZONTAL,
          front: Container(
            width: 300,
            height: 400,
            color: Colors.red,
          ),
          back: Container(
            width: 300,
            height: 400,
            color: Colors.blue,
          ),
),
The complete code:
// main.dart
import 'package:flutter/material.dart';
import 'package:flip_card/flip_card.dart';

void main() {
  runApp(const MyApp());
}

class MyApp extends StatelessWidget {
  const MyApp({Key? key}) : super(key: key);

  @override
  Widget build(BuildContext context) {
    return MaterialApp(
      // Remove the debug banner
      debugShowCheckedModeBanner: false,
      title: 'KindaCode.com',
      theme: ThemeData(
        primarySwatch: Colors.pink,
      ),
      home: const HomeScreen(),
    );
  }
}

class HomeScreen extends StatefulWidget {
  const HomeScreen({Key? key}) : super(key: key);

  @override
  State<HomeScreen> createState() => _HomeScreenState();
}

class _HomeScreenState extends State<HomeScreen> {
  @override
  Widget build(BuildContext context) {
    return Scaffold(
      appBar: AppBar(title: const Text('KindaCode.com')),
      body: Center(
        child: FlipCard(
          direction: FlipDirection.HORIZONTAL,
          front: Container(
            width: 300,
            height: 400,
            color: Colors.red,
          ),
          back: Container(
            width: 300,
            height: 400,
            color: Colors.blue,
          ),
        ),
      ),
    );
  }
}
Conclusion
We’ve gone through a few examples of implementing flipping effects in an app. If you’d like to explore more about animations and other stuff in Flutter, take a look at the following articles:
- Flutter: How to Make Spinning Animation without Plugins
- Flutter TweenAnimationBuilder Examples
- Using AnimatedIcon in Flutter
- Example of using AnimatedContainer in Flutter
- Flutter AnimatedList – Tutorial and Examples
- How to Create a Countdown Timer in Flutter
You can also take a tour around our Flutter topic page and Dart topic page to see the latest tutorials and examples.


