

This article shows you how to programmatically take screenshots in a Flutter app so that your users can capture their screens by pressing a button or something like that. You can also use this technique to periodically take screenshots of your app’s screens for debug purposes.
A Quick Instruction
If you feel instructions in words are too confusing and boring, just skip this section and jump to the “The Complete Example” section.
Using the RepaintBoundary widget
The taking screenshot action doesn’t require you to install a third-party plugin. The built-in RepaintBoundary widget can help you get the job done. It will create a separate display list for its child.
RepaintBoundary({Key? key, Widget? child})If you want to capture the entire screen of your app, you can wrap your Scaffold widget inside a RepaintBoundary. Next, you can use the findRenderObject() method to find the current render object. After that, you can use the toImage() (provided by dart:ui > Image class) method to capture an image of the current state of this render object and its children.
Note that you can also use RepaintBoundary to capture only a single widget (just make that widget become a child of RepaintBoundary).
Saving the screenshot
You have some options to save the screenshot:
- The app documents directory: You can use the path_provider plugin to find commonly used locations on the filesystem.
- The photo gallery: You can use the image_gallery_saver plugin to save the screenshot to the gallery folder. The example below will use this method.
The Complete Example
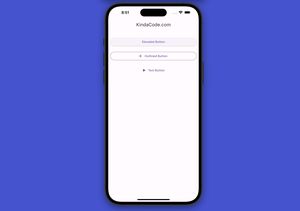
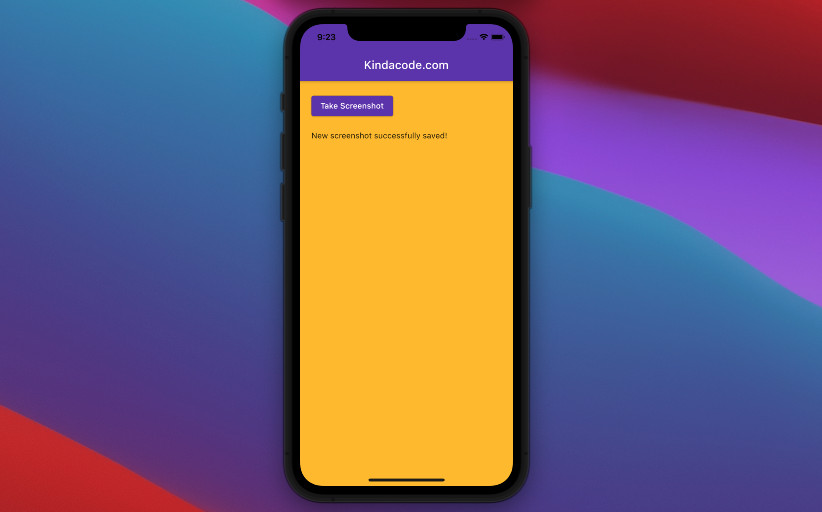
App Preview
This sample app contains an elevated button. When the user presses this button, a new screenshot will be created and saved to Gallery:
The Code
1. Installing the image_gallery_saver plugin by executing this command:
flutter pub add image_gallery_saverWe have to ask for permission to access the gallery folder.
IOS: Add the following between <dict></dict> in your <project-directory>/ios/Runner/info.plist file
<key>NSPhotoLibraryAddUsageDescription</key>
<string>This app need access to your gallery to save screenshots</string>Android: Open the manifest file and add this line to your application tag:
<application android:requestLegacyExternalStorage="true" .....>2. The full code (with explanations):
// main.dart
import 'package:flutter/material.dart';
import 'package:flutter/foundation.dart';

// In order to use RepaintBoundary, RenderRepaintBoundary
import 'package:flutter/rendering.dart';

import 'dart:ui' as ui;
import 'dart:typed_data';

// This package is used to save screenshots to the gallery
import 'package:image_gallery_saver/image_gallery_saver.dart';

void main() {
  runApp(const MyApp());
}

class MyApp extends StatelessWidget {
  const MyApp({Key? key}) : super(key: key);

  @override
  Widget build(BuildContext context) {
    return MaterialApp(
        // Remove the debug banner
        debugShowCheckedModeBanner: false,
        title: 'Kindacode.com',
        theme: ThemeData(primarySwatch: Colors.deepPurple),
        home: const HomePage());
  }
}

class HomePage extends StatefulWidget {
  const HomePage({Key? key}) : super(key: key);

  @override
  State<HomePage> createState() => _HomePageState();
}

class _HomePageState extends State<HomePage> {
  // This key is used for the RepaintBoundary widget
  final GlobalKey _key = GlobalKey();

  String _message = 'Press the button to take a screenshot';

  // This function will be triggered when the button is pressed
  void _takeScreenshot() async {
    RenderRepaintBoundary boundary =
        _key.currentContext!.findRenderObject() as RenderRepaintBoundary;

    ui.Image image = await boundary.toImage();
    ByteData? byteData = await image.toByteData(format: ui.ImageByteFormat.png);
    if (byteData != null) {
      Uint8List pngBytes = byteData.buffer.asUint8List();

      // Saving the screenshot to the gallery
      final result = await ImageGallerySaver.saveImage(
          Uint8List.fromList(pngBytes),
          quality: 90,
          name: 'screenshot-${DateTime.now()}.png');

      if (kDebugMode) {
        print(result);
      }
      setState(() {
        _message = 'New screenshot successfully saved!';
      });
    }
  }

  @override
  Widget build(BuildContext context) {
    return RepaintBoundary(
      key: _key,
      child: Scaffold(
        backgroundColor: Colors.amber,
        appBar: AppBar(
          title: const Text('Kindacode.com'),
        ),
        body: Padding(
          padding: const EdgeInsets.all(20),
          child: Column(
            crossAxisAlignment: CrossAxisAlignment.start,
            children: [
              // this button is used to take screenshots
              ElevatedButton(
                  onPressed: _takeScreenshot,
                  child: const Text('Take Screenshot')),
              const SizedBox(
                height: 20,
              ),
              Text(_message)
            ],
          ),
        ),
      ),
    );
  }
}
Conclusion
We’ve gone through a complete example of taking screenshots from within a Flutter app. If you’d like to explore more new and interesting things about Flutter and the mobile development area, have a look at the following articles:
- Flutter PaginatedDataTable Example
- Flutter: Caching Network Images for Big Performance gains
- Flutter: Don’t use BuildContexts across async gaps
- Flutter and Firestore Database: CRUD example (null safety)
- Flutter + Firebase Storage: Upload, Retrieve, and Delete files
- Flutter: ValueListenableBuilder Example
You can also check out our Flutter category page, or Dart category page for the latest tutorials and examples.


