


Tabs help you organize groups of content that are related and at the same level of hierarchy without taking much space. This article walks you through a complete example of implementing toggleable and switchable tabs with Tailwind CSS and a little vanilla Javascript (just a couple of code lines). Without any further ado, let’s get started.
Table of Contents
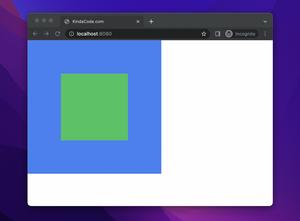
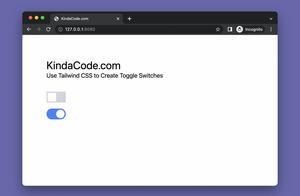
Preview
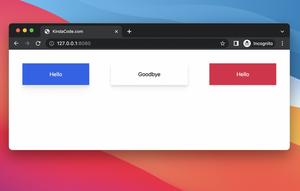
What we’re going to build contains three tab buttons sitting side by side and associated with three content panels. A user can navigate between content panels through these buttons. Here’s how it works in action:
The Steps
If you want to see the final source code and run it immediately, just skip this section and jump to the next one.
1. Implement and style tab buttons and tab panels:
<body class="p-20 bg-green-100">
    <h1 class="text-3xl mb-14">Tabs Example - KindaCode.com</h1>

    <!-- The wrapper of tabs -->
    <div class="drop-shadow-lg">
        <!-- Tab Buttons -->
        <div id="tab-buttons" class="flex bg-blue-600">
            <a href="javascript:void(0)" onclick="changeTab(event, 0)"
                class="inline-block px-8 py-3 bg-white text-blue-600">Tab
                1</a>
            <a href="javascript:void(0)" onclick="changeTab(event, 1)" class="inline-block px-8 py-3 text-white">Tab
                2</a>
            <a href="javascript:void(0)" onclick="changeTab(event, 2)" class="inline-block px-8 py-3 text-white">Tab
                3</a>
        </div>

        <!-- Tab Panels -->
        <div id="tab-panels" class="bg-white px-8 py-6">
            <div>
                <h1 class="text-2xl">Tab 1 Content</h1>
                <p>Lorem ipsum dolor sit amet, consectetur adipisicing elit. Aliquam, doloremque.</p>
                <p>Lorem ipsum dolor sit amet, consectetur adipisicing elit. Aliquam, doloremque.</p>
                <p>Lorem ipsum dolor sit amet, consectetur adipisicing elit. Aliquam, doloremque.</p>
                <p>Lorem ipsum dolor sit amet, consectetur adipisicing elit. Aliquam, doloremque.</p>
            </div>

            <div class="hidden">
                <h1 class="text-2xl text-red-500">Tab 2 Content</h1>
                <p>Lorem ipsum dolor sit amet, consectetur adipisicing elit. Aliquam, doloremque.</p>
                <p>Lorem ipsum dolor sit amet, consectetur adipisicing elit. Aliquam, doloremque.</p>
            </div>

            <div class="hidden">
                <h1 class="text-2xl text-purple-600">Tab 3 Content</h1>
                <p>Lorem ipsum dolor sit amet, consectetur adipisicing elit. Aliquam, doloremque.</p>
            </div>
        </div>

    </div>
</body>
2. Add Javascript code (right before the closing tag </body>):
 <!-- Javascript code -->
    <script>
        function changeTab(event, index) {
            var tabButtons = document.getElementById('tab-buttons').children;
            var tabPanels = document.getElementById('tab-panels').children;

            // Remove the active utility classes from all tabs (bg-white, text-blue-600)
            // And hide all tab content (with the "hidden" utility)
            for (var i = 0; i < tabButtons.length; i++) {
                tabButtons[i].classList.remove('text-blue-600');
                tabButtons[i].classList.remove('bg-white');
                tabButtons[i].classList.add('text-white');
                tabPanels[i].classList.add('hidden');
            }

            // Add the active utility classes to the currently active tab (bg-white, text-blue-600)
            // And show the current tab content (remove the "hidden" utility)
            tabButtons[index].classList.remove('text-white');
            tabButtons[index].classList.add('text-blue-600');
            tabButtons[index].classList.add('bg-white');
            tabPanels[index].classList.remove('hidden');
        }
    </script>
</body>
The Complete Code
The entire code for the example in this post. You can copy the whole thing and test it with your favorite web browser:
<!doctype html>
<html>

<head>
    <meta charset="UTF-8">
    <meta name="viewport" content="width=device-width, initial-scale=1.0">
    <meta http-equiv="X-UA-Compatible" content="ie=edge">
    <script src="https://cdn.tailwindcss.com"></script>

    <title>KindaCode.com</title>
</head>

<body class="p-20 bg-green-100">
    <h1 class="text-3xl mb-14">Tabs Example - KindaCode.com</h1>

    <!-- The wrapper of tabs -->
    <div class="drop-shadow-lg">
        <!-- Tab Buttons -->
        <div id="tab-buttons" class="flex bg-blue-600">
            <a href="javascript:void(0)" onclick="changeTab(event, 0)"
                class="inline-block px-8 py-3 bg-white text-blue-600">Tab
                1</a>
            <a href="javascript:void(0)" onclick="changeTab(event, 1)" class="inline-block px-8 py-3 text-white">Tab
                2</a>
            <a href="javascript:void(0)" onclick="changeTab(event, 2)" class="inline-block px-8 py-3 text-white">Tab
                3</a>
        </div>

        <!-- Tab Panels -->
        <div id="tab-panels" class="bg-white px-8 py-6">
            <div>
                <h1 class="text-2xl">Tab 1 Content</h1>
                <p>Lorem ipsum dolor sit amet, consectetur adipisicing elit. Aliquam, doloremque.</p>
                <p>Lorem ipsum dolor sit amet, consectetur adipisicing elit. Aliquam, doloremque.</p>
                <p>Lorem ipsum dolor sit amet, consectetur adipisicing elit. Aliquam, doloremque.</p>
                <p>Lorem ipsum dolor sit amet, consectetur adipisicing elit. Aliquam, doloremque.</p>
            </div>

            <div class="hidden">
                <h1 class="text-2xl text-red-500">Tab 2 Content</h1>
                <p>Lorem ipsum dolor sit amet, consectetur adipisicing elit. Aliquam, doloremque.</p>
                <p>Lorem ipsum dolor sit amet, consectetur adipisicing elit. Aliquam, doloremque.</p>
            </div>

            <div class="hidden">
                <h1 class="text-2xl text-purple-600">Tab 3 Content</h1>
                <p>Lorem ipsum dolor sit amet, consectetur adipisicing elit. Aliquam, doloremque.</p>
            </div>
        </div>

    </div>

    <!-- Javascript code -->
    <script>
        function changeTab(event, index) {
            var tabButtons = document.getElementById('tab-buttons').children;
            var tabPanels = document.getElementById('tab-panels').children;

            // Remove the active utility classes from all tabs (bg-white, text-blue-600)
            // And hide all tab content (with the "hidden" utility)
            for (var i = 0; i < tabButtons.length; i++) {
                tabButtons[i].classList.remove('text-blue-600');
                tabButtons[i].classList.remove('bg-white');
                tabButtons[i].classList.add('text-white');
                tabPanels[i].classList.add('hidden');
            }

            // Add the active utility classes to the currently active tab (bg-white, text-blue-600)
            // And show the current tab content (remove the "hidden" utility)
            tabButtons[index].classList.remove('text-white');
            tabButtons[index].classList.add('text-blue-600');
            tabButtons[index].classList.add('bg-white');
            tabPanels[index].classList.remove('hidden');
        }
    </script>
</body>

</html>
You and add more tab buttons and tab panels. It’ll work perfectly without modifying the Javascript part.
Note: I use Tailwind CSS CDN for development and learning purposes. For production projects, you should set up Tailwind CSS by following the instructions from its official website.
Epilogue
Congratulations! You’ve learned how to construct interactive tabs with Tailwind CSS and a little plain Javascript. If you’d like to explore more new and fascinating stuff about modern web development, take a look at the following articles:
- Tailwind CSS: How to Create a Back To Top Button
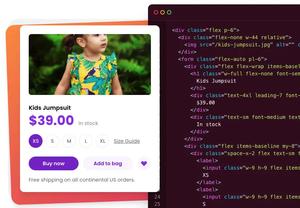
- How to Create Product Cards with Tailwind CSS
- How to Create Triangles with Tailwind CSS (4 Examples)
- Using Tailwind CSS with Font Awesome Icons: A Deep Dive
- Using :not() selector in Tailwind CSS
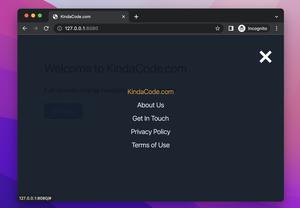
- Tailwind CSS: How to Create a Clickable Dropdown Menu
You can also check out our CSS category page for the latest tutorials and examples.