


In VS Code (Visual Studio Code), the auto-update feature is enabled by default. However, not everyone wants this. There are a plethora of reasons, but the most common ones are:
- You are working on a project that requires a specific version of VS Code or its extensions, and you don’t want to risk breaking your workflow or compatibility by updating to a newer version.
- You prefer to have more control over when and how you update your editor, and you don’t want to be interrupted by notifications or downloads.
- You have a slow or unreliable internet connection, and you don’t want to waste bandwidth or time downloading updates that you think aren’t necessary.
- You are happy with the current features and performance of VS Code, and you don’t see any benefit in updating to the latest version.
To turn off the auto-update feature in VS Code, just follow a few easy steps below:
1. Start your VS Code and go to:
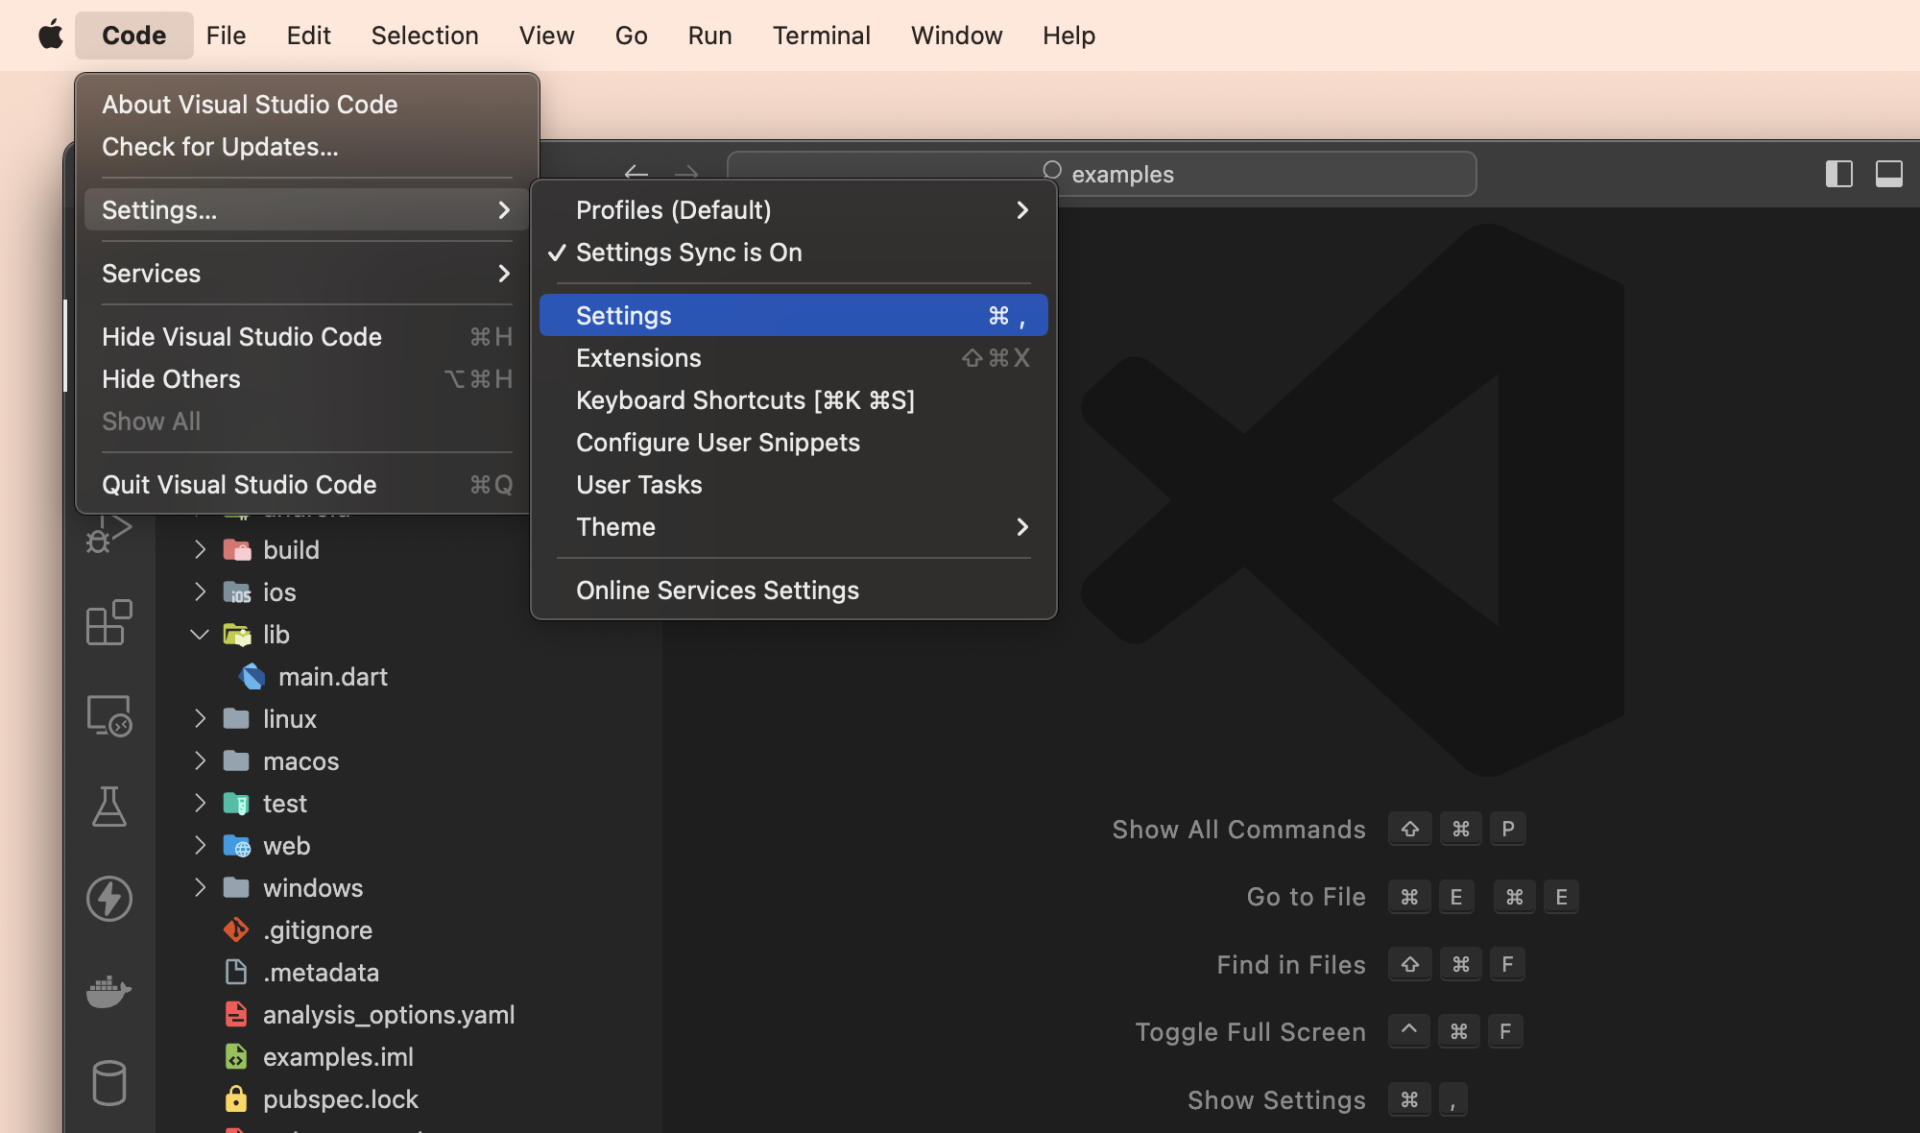
- Windows: File > Preferences > Settings (hotkeys: Ctrl + ,)
- MacOS: Code > Settings… > Settings (shortcuts: Command + ,)
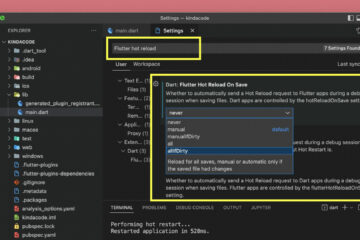
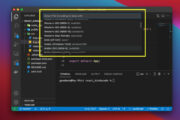
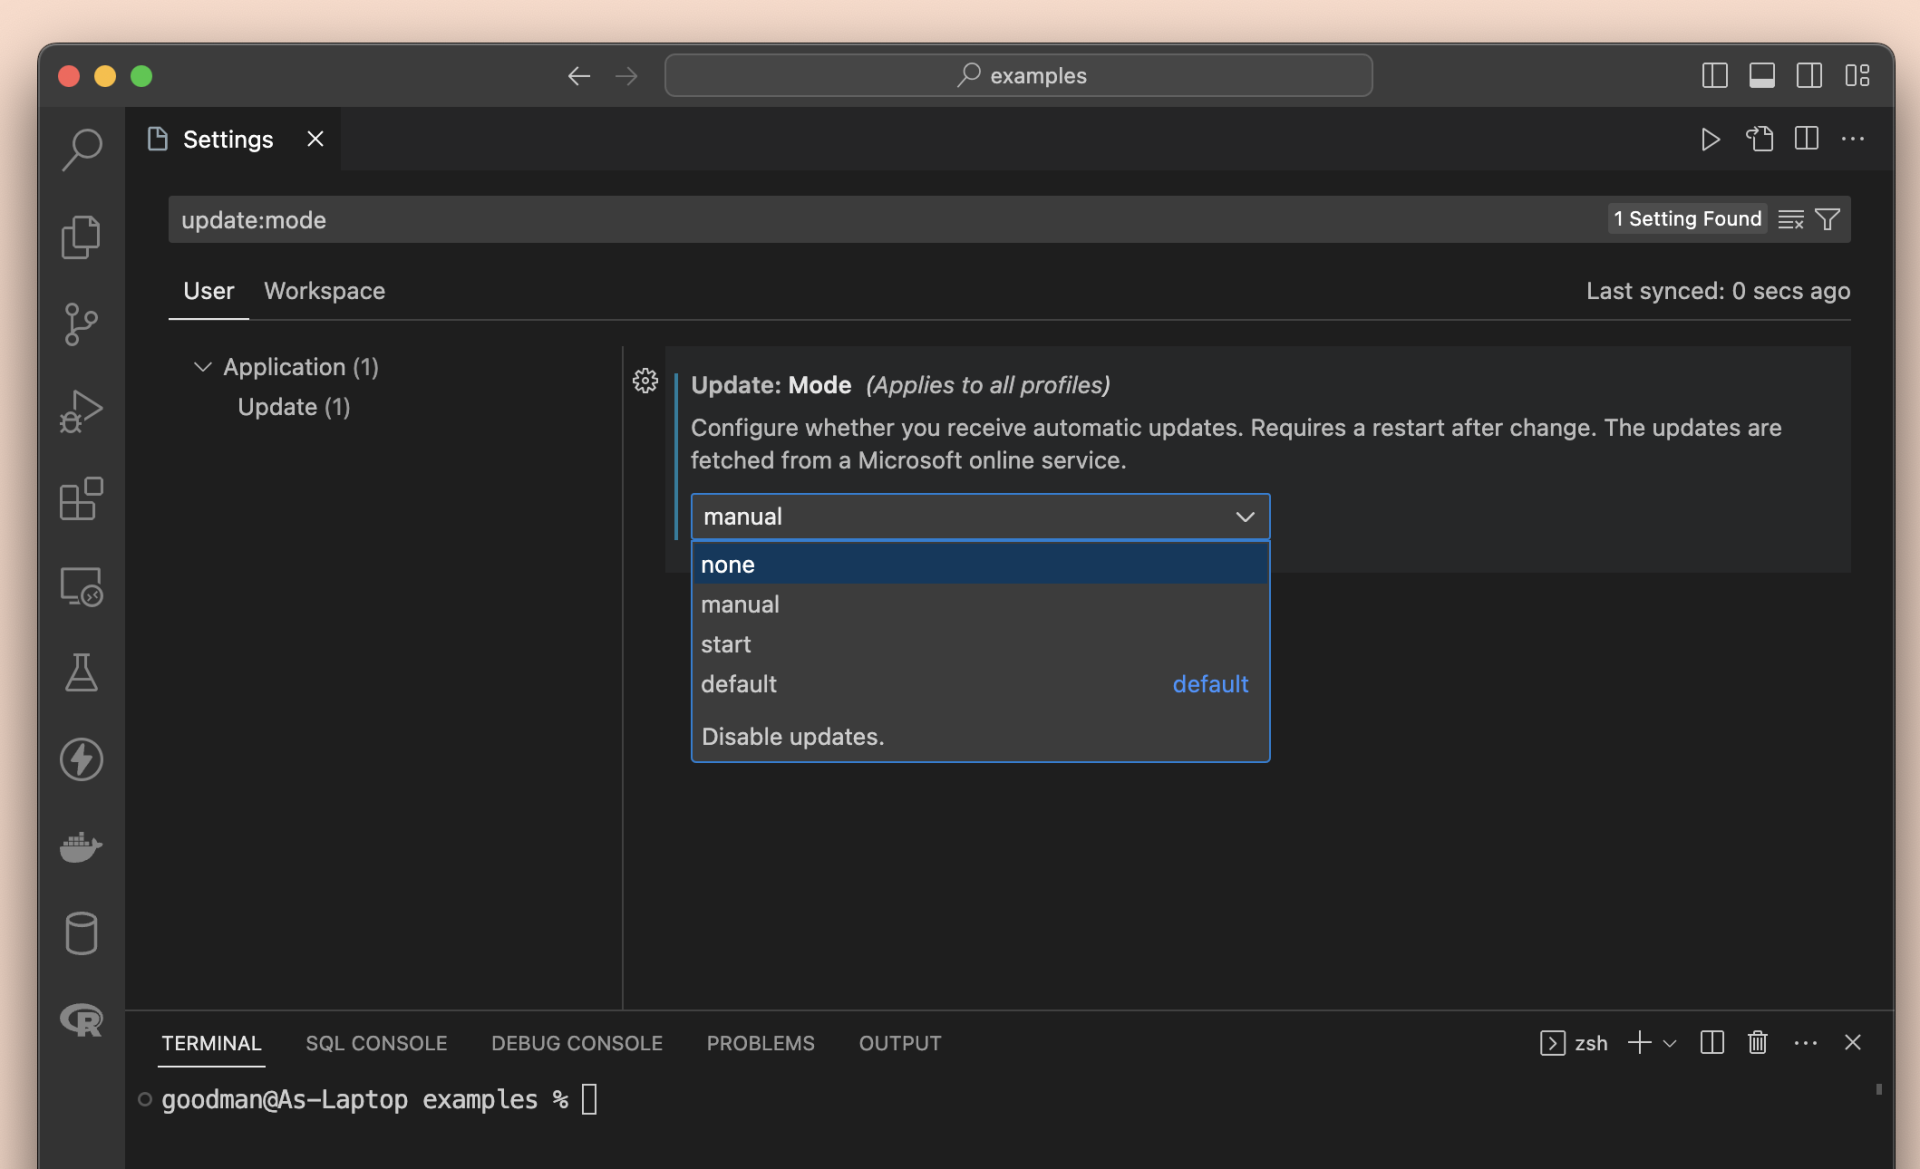
2. Search for “update mode” in the search box and find the setting that says “Update: Mode”, as shown in the screenshot below:
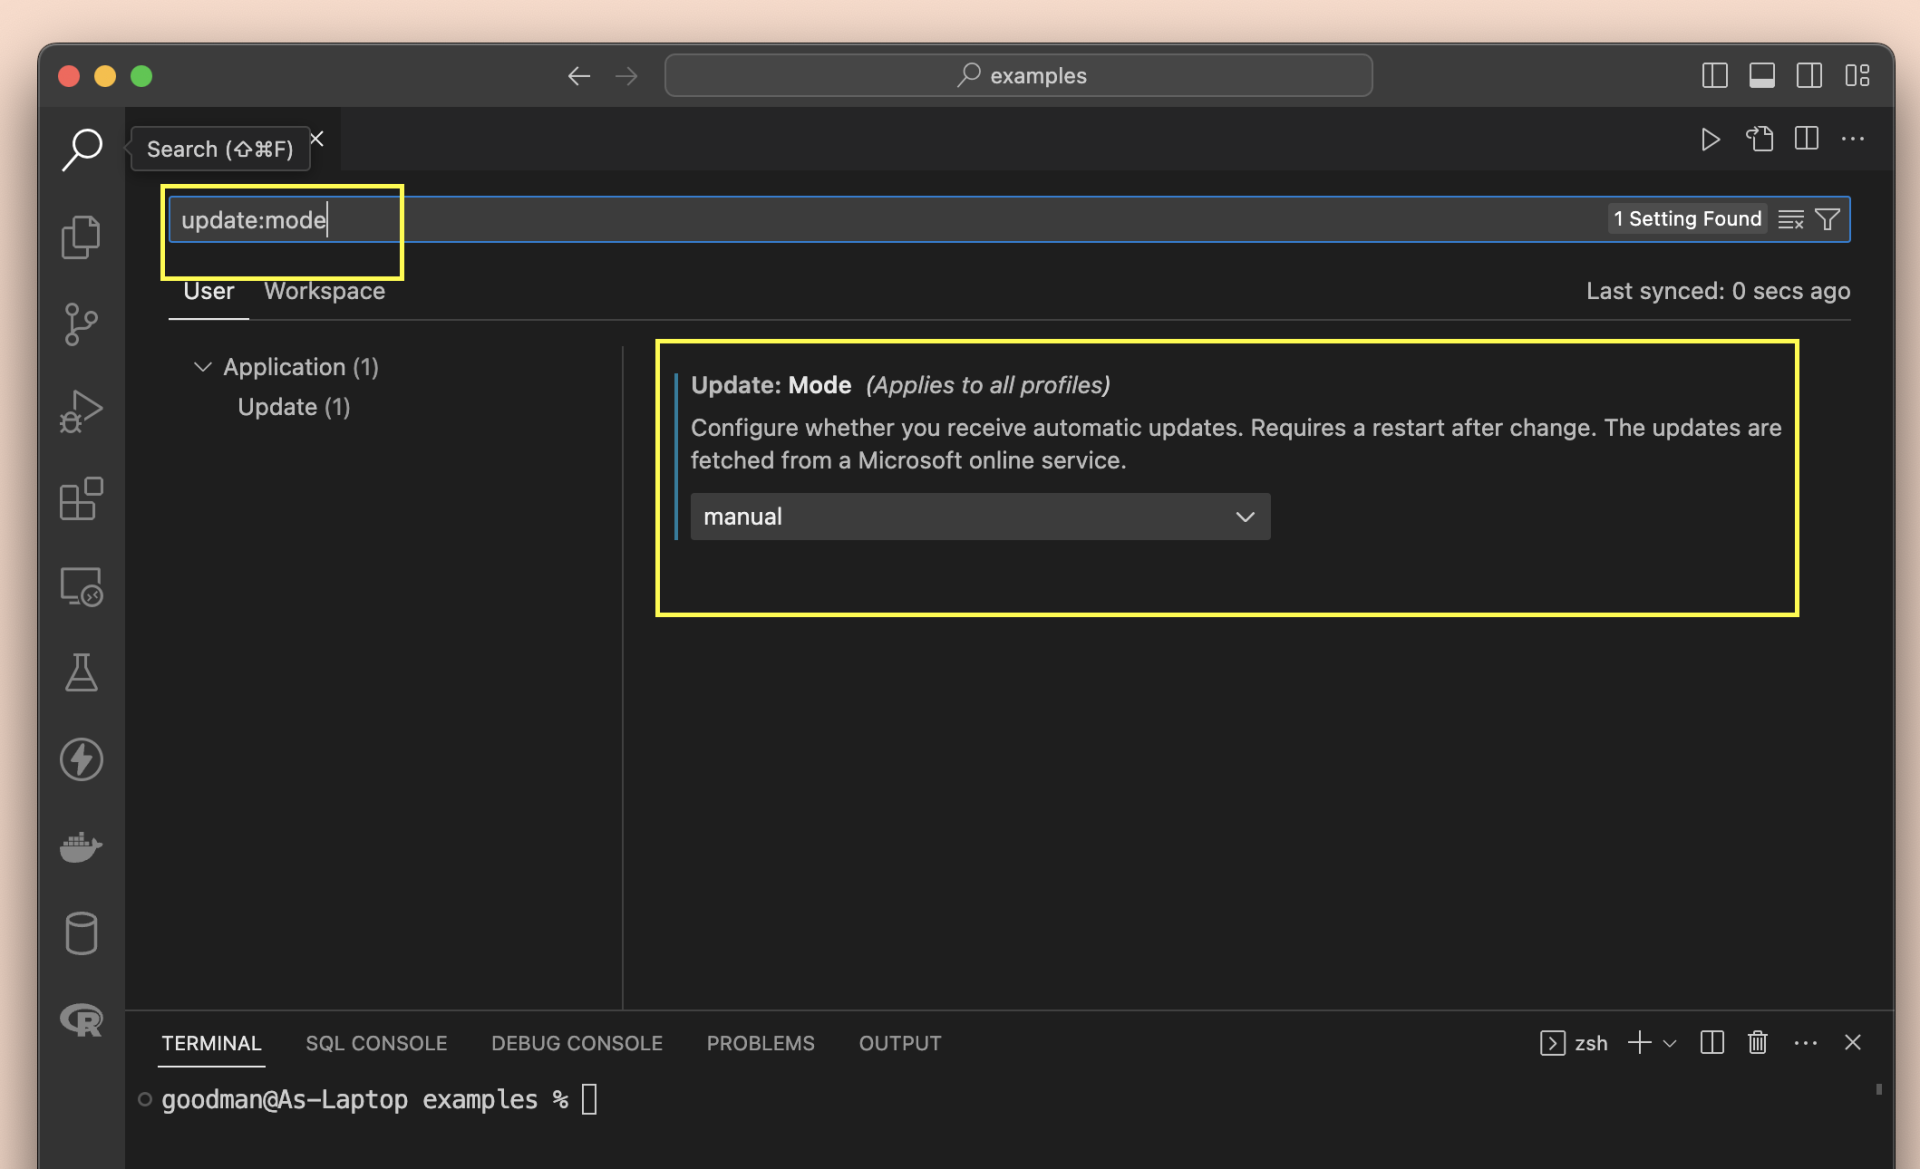
3. Click on the dropdown menu and select “None” to disable auto update completely, or “Manual” to disable automatic updates but still allow manual updates from the gear icon in the bottom left corner.
4. Your change requires a restart to take effect. VS Code will ask you to do so. Just hit the “Restart” button to get it done.

If one day you want to enable the auto-update feature again, just select “default” or “auto” (in step 3). This tutorial ends here. Happy coding & have a nice day!