


There might be cases where you want to add multiple trailing icon buttons to a ListTIle widget. Many Flutter developers will get a solution in seconds: using a Row widget and placing some icon buttons inside it, like this:
ListTile(
            title: Text('The Title'),
            subtitle: Text('The Subtitle'),
            trailing: Row(
              children: [
                IconButton(onPressed: () {}, icon: Icon(Icons.favorite)),
                IconButton(onPressed: () {}, icon: Icon(Icons.edit)),
                IconButton(onPressed: () {}, icon: Icon(Icons.delete)),
              ],
            ),
          )
Unfortunately, if do so, you may run into the following error:
══╡ EXCEPTION CAUGHT BY RENDERING LIBRARY ╞═══
The following assertion was thrown during performLayout():
Trailing widget consumes entire tile width. Please use a sized widget, or consider replacing
ListTile with a custom widget
To fix this issue, we have more than one option:
1. Set the mainAxisSize property of the Row widget to MainAxisSize.min:
ListTile(
            title: const Text('The Title'),
            subtitle: const Text('The Subtitle'),
            trailing: Row(
              mainAxisSize: MainAxisSize.min,
              children: [
                IconButton(onPressed: () {}, icon: const Icon(Icons.favorite)),
                IconButton(onPressed: () {}, icon: const Icon(Icons.edit)),
                IconButton(onPressed: () {}, icon: const Icon(Icons.delete)),
              ],
            ),
          )
And it works as expected:
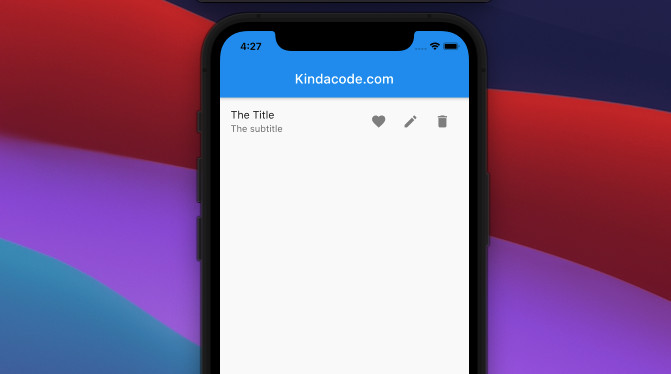
2. The second option is to wrap the Row widget within a SizedBox or a Container widget with a fixed width, like this:
 ListTile(
            title: const Text('The Title'),
            subtitle: const Text('The Subtitle'),
            trailing: SizedBox(
              width: 150,
              child: Row(
                children: [
                  IconButton(onPressed: () {}, icon: const Icon(Icons.favorite)),
                  IconButton(onPressed: () {}, icon: const Icon(Icons.edit)),
                  IconButton(onPressed: () {}, icon: const Icon(Icons.delete)),
                ],
              ),
            ),
          )
And it works just fine, too.
Continue learning more new and exciting stuff in Flutter by having a look at the following:
- Flutter & SQLite: CRUD Example
- Flutter: 5 Ways to Add a Drop Shadow to a Widget
- Flutter: ListTile examples
- Flutter AnimatedList – Tutorial and Examples
- Flutter: Safety nesting ListView, GridView inside a Column
- 2 Ways to Fetch Data from APIs in Flutter
You can also check out our Flutter category page or Dart category page for the latest tutorials and examples.


