
This practical article shows you how to implement a custom back button in a React application that uses React Router 6 (the latest version). Besides the browser’s back button, our custom back button will add convenience and optimize the user experience.
Table of Contents
A Quick Note
In React Router 6, we can navigate programmatically by using the useNavigate hook. To go back to the previous route, you can do as follows:
const navigate = useNavigate();
navigate(-1);
If you want to go back more than one page, replace -1 with -2, -3, etc. Now it’s time to see some real code.
The Example
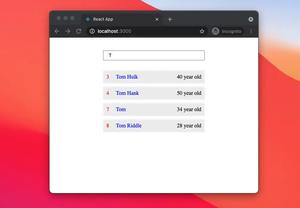
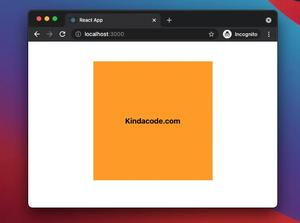
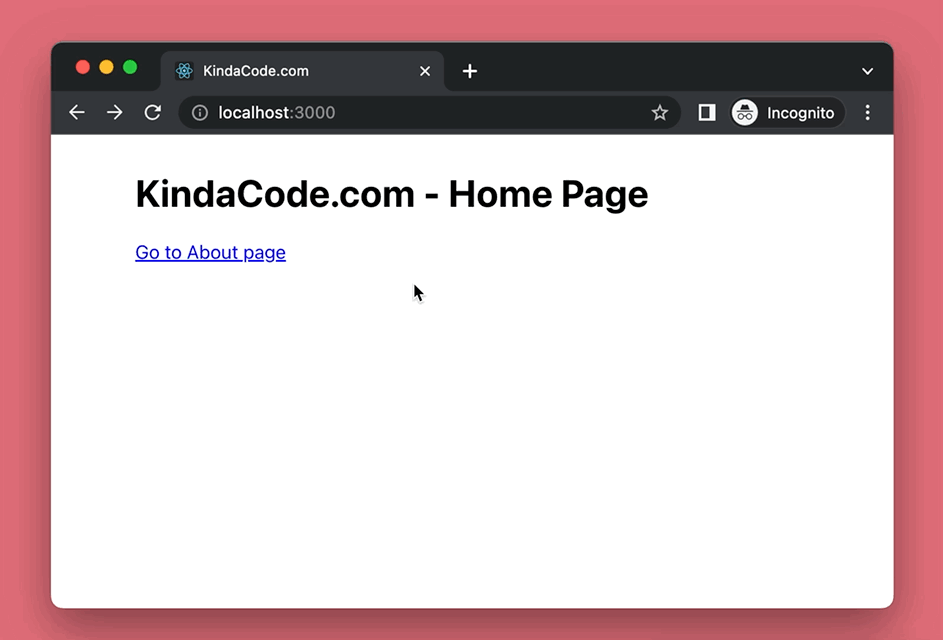
Preview
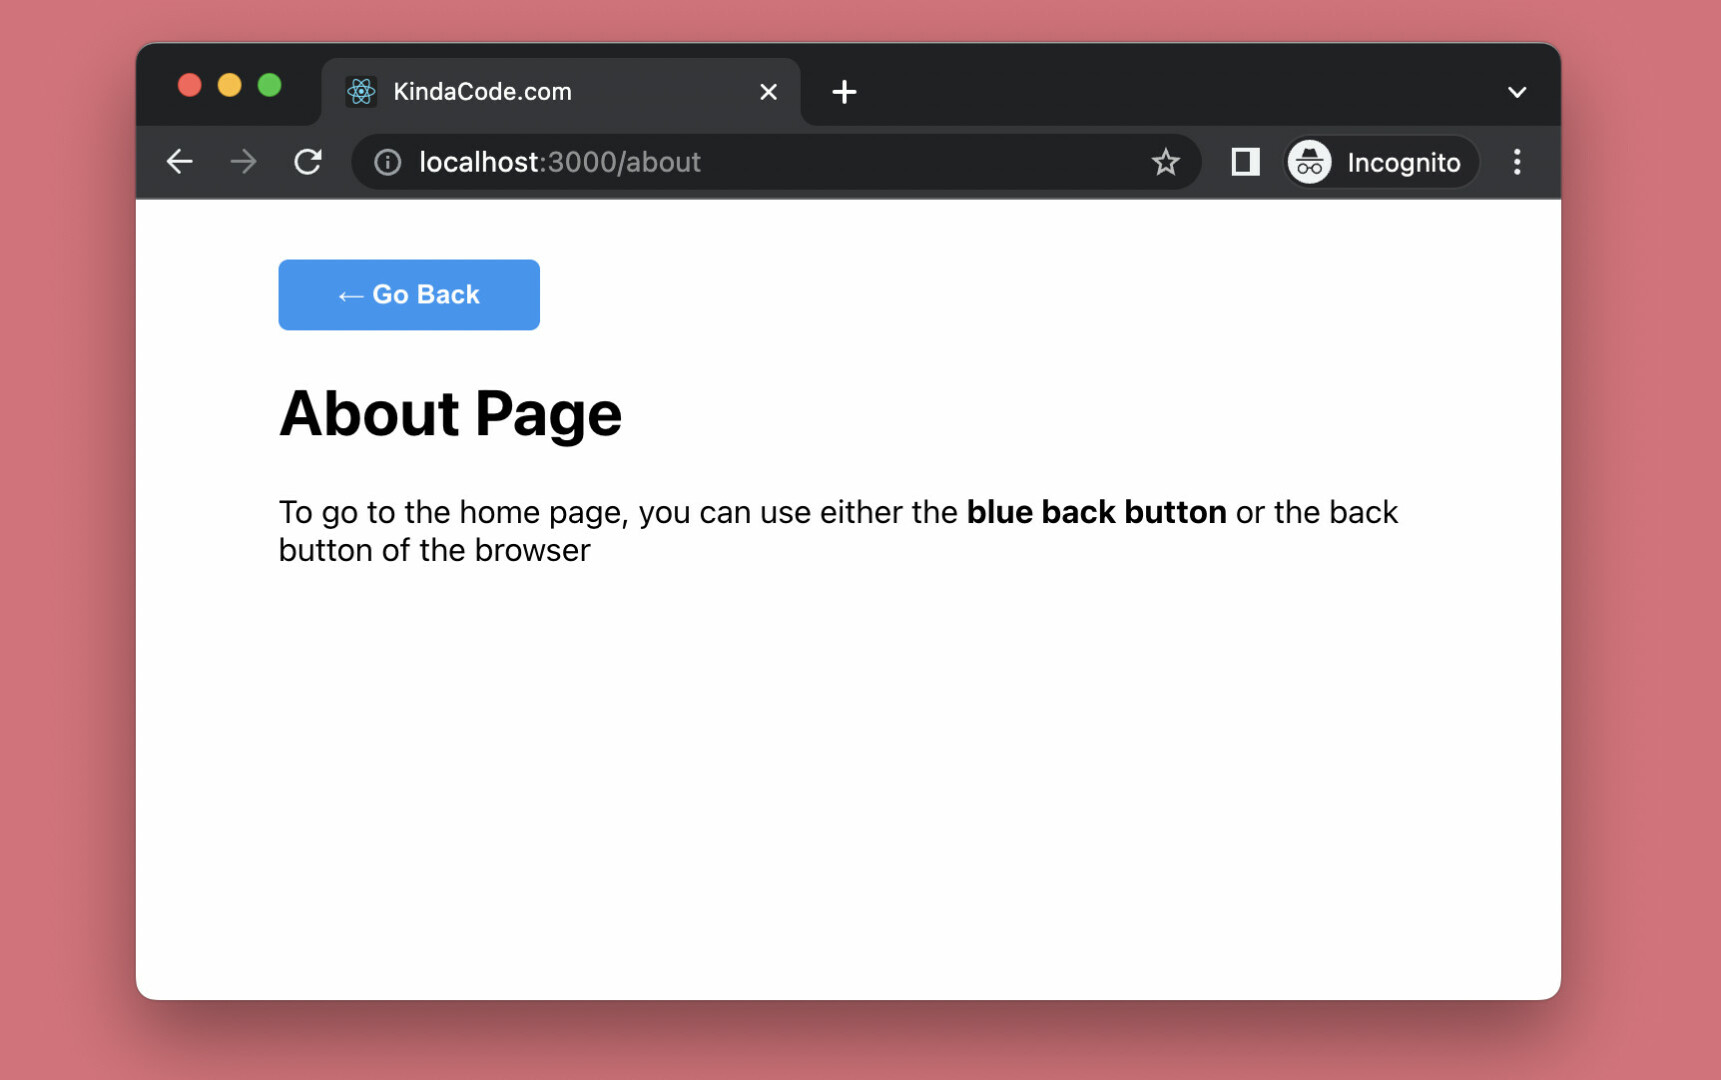
The small demo project we’re going to make has 2 pages:
- Home page: This page presents a link that leads the user to the about page
- About page: This contains a blue button that can be used to go back to the home page
Here’s how it works:
The Steps
1. Create a new brand new React project:
npx create-react-app kindacode-example2. Install React Router:
npm i react-router-dom3. In your src/App.js file, remove all of the default code and add the following (you can find the detailed explanations in the comments):
// KindaCode.com
// src/App.js
import {
BrowserRouter,
Routes,
Route,
Link,
useNavigate,
} from 'react-router-dom';
import './App.css';
// App component
function App() {
return (
<BrowserRouter>
<Routes>
<Route path='/' element={<HomePage />} />
<Route path='/about' element={<AboutPage />} />
</Routes>
</BrowserRouter>
);
}
// Home page
const HomePage = () => {
return (
<div className='container'>
<h1>KindaCode.com - Home Page</h1>
{/* Use this link to go to the About page */}
<Link to='/about'>Go to About page</Link>
</div>
);
};
// About page
const AboutPage = () => {
// Use this hook to programmatically navigate to another page
const navigate = useNavigate();
// This function is used to navigate to the home page
// It will be called when the button is clicked
const goBack = () => {
navigate(-1);
};
return (
<div className='container'>
{/* Here's our custom back button */}
<button onClick={goBack} className='back-button'>
← Go Back
</button>
<h1>About Page</h1>
<p>
To go to the home page, you can use either the <b>blue back button</b>{' '}
or the back button of the browser
</p>
</div>
);
};
export default App;4. An important part of our project is CSS. Replace the unwanted code in your src/App.css with this:
.container {
    width: 80%;
    margin: 30px auto;
}

.back-button {
    padding: 10px 30px;
    background: #2196f3;
    color: #fff;
    font-weight: bold;
    border: none;
    border-radius: 5px;
    cursor: pointer;
    transition: 0.5s;
}

.back-button:hover {
    background: #0d47a1;
}
5. Run it and check the result:
npm startConclusion
You’ve learned how to make a custom back button with React Router 6. If the browser’s back button is out of our control, our custom back button can be placed anywhere on the page as long as it makes sense.
If you’d like to explore more new and interesting things about modern React and React Router, take a look at the following articles:
- React Router: Redirecting with the Navigate component
- React Router: useParams & useSearchParams Hooks
- React Router: Programmatically Navigate on Button Click
- React Router: How to Highlight Active Link
- React Router Dom: Implement a Not Found (404) Route
- React: Show a Loading Dialog (without any libraries)
You can also check our React category page and React Native category page for the latest tutorials and examples.