


React Router (react-router-dom) is one of the most popular React libraries, with over 50k stars on GitHub and nearly 8 million downloads per week on npmjs. In this article, you will learn how to programmatically navigate on a click event in React by using a hook provided by React Router:
- If you’re using React Router 6 or newer, please use the useNavigate hook
- If you’re working with React Router 5.x, you can use the useHistory hook
The example that we are going to look at below will be written with both React Router 6 and React Router 5 for your reference. Although React Router 6 is newer and brings many improvements, there are still many projects whose code bases are old and still using React Router 5.
What is programmatic navigation?
Programmatic navigation means doing the navigation when calling a function instead of using <Link/> or <NavLink />. For example, performing navigation to a new route when the user clicks a button, checks a checkbox, selects an option from a select menu, enters the correct captcha code, and completes valid information in a form, etc.
The point of the useNavigate/useHistory hook
useNavigate hook
As mentioned earlier, this hook has been available since React Router 6. It returns a function that lets you navigate programmatically:
import { useNavigate } from 'react-router-dom';

const SomeComponent = () => {
   const navigate = useNavigate();

   const someEventHandler = () => {
       navigate('/some-route');
   }
}
The navigate function can take up to 2 arguments:
- The first argument is required, and it determines where you want to go. It can be a route or a number. For example, navigate(‘/some-route’), navigate(-1) (go back), etc.
- The second argument is optional. It lets you provide some options: { replace?: boolean; state?: any }. For example: navigate(‘/login’, {replace: true}).
For more clarity, please check the Using React Router 6 section in the example below.
useHistory hook
You can skip this section if you only want to work with the latest version of React Router.
The useHistory hook gives you access to the history instance that you may use to navigate. It provides a few methods:
push('route-name')
replace('route-name')
location('URL')
goBack()
listen()
Simple usage:
import { useHistory } from 'react-router-dom';

const ExampleComponent = () => {
  const history = useHistory();
  const handleClick = () => history.push('/some-route');

  return (
    <button type="button" onClick={handleClick}>
      Navigate to another route
    </button>
  );
};
For more clarity, please check the Using React Router 5.x section in the example below.
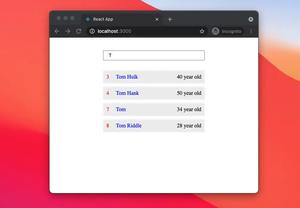
The Complete Example
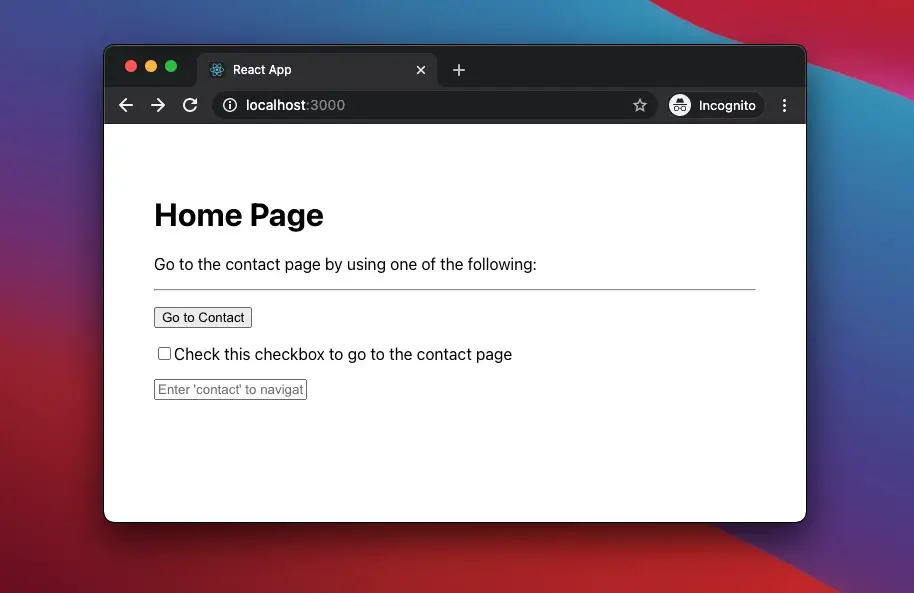
This simple example contains 2 routes: / (Home page) and /contact (Contact page). The user can go from the Home page to the Contact page by doing one of the following actions:
- Click a button
- Check a checkbox
- Type “contact” into a text field
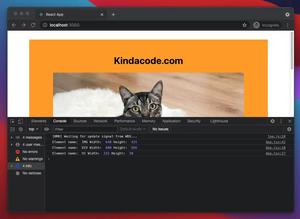
App Preview
Using React Router 6 or newer
1. Initialize a new React project:
npx create-react-app example2. Install react-router-dom:
npm i react-router-domHere’s my package.json:
{
  "name": "example",
  "version": "0.1.0",
  "private": true,
  "dependencies": {
    "@testing-library/jest-dom": "^5.16.5",
    "@testing-library/react": "^13.4.0",
    "@testing-library/user-event": "^13.5.0",
    "react": "^18.2.0",
    "react-dom": "^18.2.0",
    "react-router-dom": "^6.6.1",
    "react-scripts": "5.0.1",
    "web-vitals": "^2.1.4"
  },
  "scripts": {
    "start": "react-scripts start",
    "build": "react-scripts build",
    "test": "react-scripts test",
    "eject": "react-scripts eject"
  },
  "eslintConfig": {
    "extends": [
      "react-app",
      "react-app/jest"
    ]
  },
  "browserslist": {
    "production": [
      ">0.2%",
      "not dead",
      "not op_mini all"
    ],
    "development": [
      "last 1 chrome version",
      "last 1 firefox version",
      "last 1 safari version"
    ]
  }
}
3. In the ./src folder, create 2 new files called Home.js and Contact.js, then add the following code snippets, respectively.
Home.js:
// src/Home.js
import React from "react";
import { useNavigate } from "react-router-dom";

const Home = (props) => {
  const navigate = useNavigate();

  return (
    <>
      <h1>Home Page</h1>
      <p>Go to the contact page by using one of the following:</p>
      <hr />

      {/* Button */}
      <p>
        <button onClick={() => navigate("/contact")}>Go to Contact</button>
      </p>

      {/* Checkbox */}
      <p>
        <input
          type="checkbox"
          onChange={() => navigate("/contact")}
        ></input>
        <span>Check this checkbox to go to the contact page</span>
      </p>

      {/* Text field */}
      <p>
        <input
          type="text"
          onChange={(e) => {
            if (e.target.value === "contact") {
              navigate("/contact");
            }
          }}
          placeholder="Enter 'contact' to navigate"
        ></input>
      </p>
    </>
  );
};

export default Home;
// Kindacode.com
And here’s Contact.js:
// src/Contact.js
import React from "react";
import { useNavigate } from "react-router-dom";

const Contact = (props) => {
  const navigate = useNavigate();
  return (
    <>
      <h1>Contact Page</h1>
      <br />
      <button onClick={() => navigate(-1)}>Go Back</button>
    </>
  );
};

export default Contact;
// Kindacode.com
4. Remove all of the auto-generated code in App.js and add the following:
// src/App.js
import React from "react";
import { BrowserRouter as Router, Routes, Route } from "react-router-dom";

import Home from "./Home";
import Contact from "./Contact";

const App = () => {
  return (
    <div style={styles.app}>
      <Router>
        <Routes>
          <Route path="/" element={<Home />} />
          <Route path="/contact" element={<Contact />} />
        </Routes>
      </Router>
    </div>
  );
};

export default App;

// Kindacode.com
// Just some styling
const styles = {
  app: {
    padding: 50,
  },
};
Using React Router 5.x
You can skip this section if you don’t want to use React Router 5.x anymore.
1. Initialize a new React project:
npx create-react-app example-old2. Install React Router 5:
npm i [email protected]3. In the ./src folder, create 2 new files called Home.js and Contact.js, then add the following code snippets, respectively:
// src/Home.js
import React from 'react';
import { useHistory } from 'react-router-dom';

const Home = (props) => {
  const history = useHistory();

  return (
    <>
      <h1>Home Page</h1>
      <p>Go to the contact page by using one of the following:</p>
      <hr />

      {/* Button */}
      <p>
        <button onClick={() => history.push('/contact')}>Go to Contact</button>
      </p>

      {/* Checkbox */}
      <p>
        <input
          type="checkbox"
          onChange={() => history.push('/contact')}
        ></input>
        <span>Check this checkbox to go to the contact page</span>
      </p>

      {/* Text field */}
      <p>
        <input
          type="text"
          onChange={(e) => {
            if (e.target.value === 'contact') {
              history.push('/contact');
            }
          }}
          placeholder="Enter 'contact' to navigate"
        ></input>
      </p>
    </>
  );
};

export default Home;
// src/Contact.js
import React from 'react';
import { useHistory } from 'react-router-dom';
const Contact = (props) => {
const history = useHistory();
return (
<>
<h1>Contact Page</h1>
<br />
<button onClick={() => history.goBack()}>Go Back</button>
</>
);
};
export default Contact;4. Remove all of the default code in App.js and add the following:
// src/App.js
import React from 'react';
import { BrowserRouter as Router, Route, Switch } from 'react-router-dom';

import Home from './Home';
import Contact from './Contact';

const App = () => {
  return (
    <div style={styles.app}>
      <Router>
        <Switch>
          <Route path="/" exact>
            <Home />
          </Route>

          <Route path="/contact" exact>
            <Contact />
          </Route>
        </Switch>
      </Router>
    </div>
  );
};

export default App;

const styles = {
  app: {
    padding: 50
  }
}
Conclusion
Using the useNavigate (or useHistory, in old code bases) hook within your React applications gives us more strategies to navigate. If you’d like to learn more about React and React Native, take a look at the following articles:
- React: How to Upload Multiple Files with Axios
- React: Using inline styles with the calc() function
- React: Create an Animated Side Navigation from Scratch
- React: Create a Reusable Switch/Toggle Component
- React Router 6: How to Create a Custom Back Button
- React Router: useParams & useSearchParams Hooks
- React Native FlatList: Tutorial and Examples
You can also check our React category page and React Native category page for the latest tutorials and examples.