


This article walks you through a couple of different ways to programmatically resize images in Node.js.
Using sharp
The sharp package is fast in converting large images to smaller ones. It works well with JPEG, PNG, WebP, GIF, and AVIF.
Installing
npm i sharpExample
// Kindacode.com
// This example uses ES modules (or "import" instead of "require")
import path, { dirname } from 'path'
import { fileURLToPath } from 'url'
import sharp from 'sharp'
const __filename = fileURLToPath(import.meta.url)
const __dirname = dirname(__filename)
// input image path
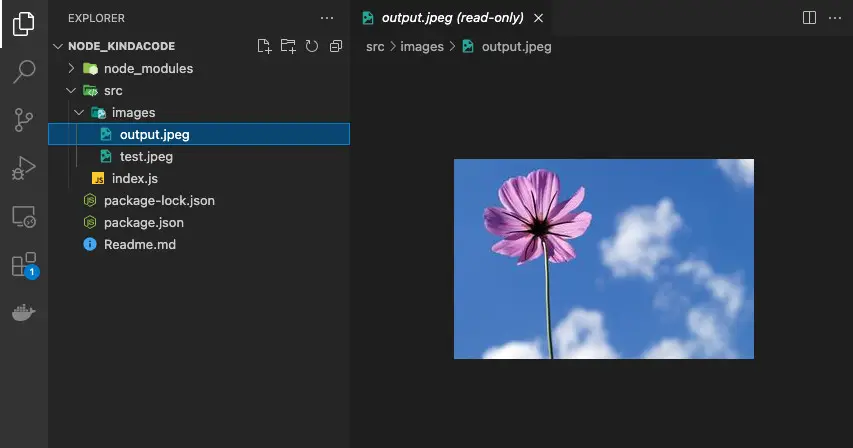
// don't forget to add an image named test.jpeg to your images folder
const originalImage = path.resolve(__dirname, "images/test.jpeg");
(async function () {
try {
await sharp(originalImage)
.resize({
width: 300,
height: 200,
})
.toFile(path.resolve(__dirname, "images/output.jpeg"));
console.log("Successfully resized an image!");
} catch (err) {
console.log(err);
}
})();Screenshot:
Using gm and imageMagick
Resizing images in Node.js is super easy with a library named gm. To use this one, you need to install ImageMagick first. Here is the download page for Windows, Linux, and macOS.
Verifying ImageMagick
After installing ImageMagick, open your terminal and execute the following command to ensure everything is OK:
magick --versionYou should see something similar to this:
Version: ImageMagick 7.0.10-17 Q16 x86_64 2020-06-07 https://imagemagick.org
Copyright: © 1999-2020 ImageMagick Studio LLC
License: https://imagemagick.org/script/license.php
Features: Cipher DPC HDRI Modules OpenMP(3.1)
Delegates (built-in): bzlib freetype gslib heic jng jp2 jpeg lcms lqr ltdl lzma openexr png ps tiff webp xml zlib
Adding gm to your Node.js project
Official docs: https://github.com/aheckmann/gm.
Installation:
npm install gm --saveExample
// Kindacode.com
// This example uses ES modules (import) instead of CommonJS (require)
import gm from 'gm';

/*
input: the path to the image your want to resize
output: the path to the image created by the resizing process
width, height: the dimension of the output image
*/
const resizeImage = (input, output, width, height) => {
  gm(input)
    .resize(width, height)
    .write(output, (err) => {
        if(err){
            console.log(err);
        } else {
            console.log('Done');
        }
    });
};

// Testing
resizeImage('a.jpg', 'a-resized.jpg', 300, 200);
// Don't forget to use put an image named 'a.jpg' in your project directory
Conclusion
You’ve learned how to resize images with code. If you’d like to explore more new and interesting things in Node.js, take a look at the following articles:
- Top 5 best Node.js Open Source Headless CMS
- Using Axios to download images and videos in Node.js
- 7 best Node.js frameworks to build backend APIs
- Node.js: Executing a Piece of Code after a Delay
- Node.js: Get domain, hostname, and protocol from a URL
- 7 Best Open-Source HTTP Request Libraries for Node.js
You can also check out our Node.js category page for the latest tutorials and examples.