


When building websites and mobile apps, there will be some cases where it is desirable to deploy more than one floating action button on one screen, such as a pair of Next/Previous buttons, several share buttons, several quick action buttons in a gamelike app (move up/down/left/right), etc.
This article shows you a couple of different ways to add multiple floating buttons to a single screen in Flutter.
Using Self-Written Code
Overview
The Scaffold widget has a parameter named floatingActionButton that can take not only the FloatingActionButton widget but also other widgets. When you only need a single floating button, using the FloatingActionButton widget is elegant and neat. If you need multiple floating buttons, using a Stack, Column, or Row widget is a good choice.
Example
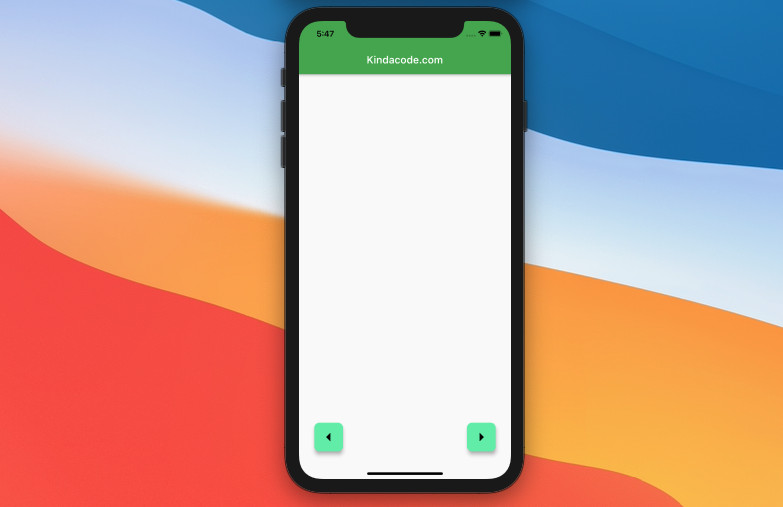
This example creates 2 floating action buttons: Back and Next. We’ll assign a Stack to floatingActionButton and give it 2 Positioned widgets as the children.
Screenshot:
The code:
// main.dart
import 'package:flutter/material.dart';

void main() {
  runApp(const MyApp());
}

class MyApp extends StatelessWidget {
  const MyApp({Key? key}) : super(key: key);

  @override
  Widget build(BuildContext context) {
    return MaterialApp(
      // Remove the debug banner
      debugShowCheckedModeBanner: false,
      title: 'Kindacode.com',
      theme: ThemeData(
          colorScheme: ColorScheme.fromSwatch(primarySwatch: Colors.green)
              .copyWith(secondary: Colors.greenAccent)),
      home: const HomePage(),
    );
  }
}

class HomePage extends StatefulWidget {
  const HomePage({Key? key}) : super(key: key);

  @override
  State<HomePage> createState() => _HomePageState();
}

class _HomePageState extends State<HomePage> {
  @override
  Widget build(BuildContext context) {
    return Scaffold(
      appBar: AppBar(
        title: const Text('Kindacode.com'),
      ),
      body: const Center(),
      floatingActionButtonLocation: FloatingActionButtonLocation.centerFloat,
      floatingActionButton: Stack(
        fit: StackFit.expand,
        children: [
          Positioned(
            left: 30,
            bottom: 20,
            child: FloatingActionButton(
              heroTag: 'back',
              onPressed: () {/* Do something */},
              shape: RoundedRectangleBorder(
                borderRadius: BorderRadius.circular(10),
              ),
              child: const Icon(
                Icons.arrow_left,
                size: 40,
              ),
            ),
          ),
          Positioned(
            bottom: 20,
            right: 30,
            child: FloatingActionButton(
              heroTag: 'next',
              onPressed: () {/* Do something */},
              shape: RoundedRectangleBorder(
                borderRadius: BorderRadius.circular(10),
              ),
              child: const Icon(
                Icons.arrow_right,
                size: 40,
              ),
            ),
          ),
          // Add more floating buttons if you want
          // There is no limit
        ],
      ),
    );
  }
}
You can find more exciting ways to play with this kind of button in this article: Flutter: Floating Action Button examples (basic & advanced).
Using a third-party Plugin
There are several plugins that can help you create more than one floating button on the same screen. One of the best and most popular ones is flutter_speed_dial.
1. Installing the plugin by executing the following command:
flutter pub add flutter_speed_dial2. Then run:
flutter pub getExample
Preview
The code
// main.dart
import 'package:flutter/material.dart';
import 'package:flutter_speed_dial/flutter_speed_dial.dart';

void main() {
  runApp(const MyApp());
}

class MyApp extends StatelessWidget {
  const MyApp({Key? key}) : super(key: key);

  @override
  Widget build(BuildContext context) {
    return MaterialApp(
      // Remove the debug banner
      debugShowCheckedModeBanner: false,
      title: 'Kindacode.com',
      theme: ThemeData(
          // use Material 3
          useMaterial3: true),
      home: const HomePage(),
    );
  }
}

class HomePage extends StatefulWidget {
  const HomePage({Key? key}) : super(key: key);

  @override
  State<HomePage> createState() => _HomePageState();
}

class _HomePageState extends State<HomePage> {
  @override
  Widget build(BuildContext context) {
    return Scaffold(
      appBar: AppBar(
        title: const Text('Kindacode.com'),
      ),
      body: const Center(),
      floatingActionButton: SpeedDial(
          icon: Icons.share,
          backgroundColor: Colors.amber,
          children: [
            SpeedDialChild(
              child: const Icon(Icons.face),
              label: 'Social Network',
              backgroundColor: Colors.amberAccent,
              onTap: () {/* Do someting */},
            ),
            SpeedDialChild(
              child: const Icon(Icons.email),
              label: 'Email',
              backgroundColor: Colors.amberAccent,
              onTap: () {/* Do something */},
            ),
            SpeedDialChild(
              child: const Icon(Icons.chat),
              label: 'Message',
              backgroundColor: Colors.amberAccent,
              onTap: () {/* Do something */},
            ),
          ]),
    );
  }
}
Conclusion
You’ve learned a few elegant approaches to implementing more than one floating button on a single screen. This is helpful in many situations and will help you quickly get your tasks done when building apps. Explore more interesting aspects about button stuff and other things in Flutter by taking a look at the following:
- Flutter: 2 Ways to Create Gradient Background Buttons
- How to make Circular Buttons in Flutter
- Flutter Cupertino Button – Tutorial and Examples
- Working with ElevatedButton in Flutter
- Flutter StreamBuilder examples
- Flutter and Firestore Database: CRUD example
You can also jump to our Flutter topic page or Dart topic page for the latest tutorials and examples.


