


This article is about the Hero widget and hero animations in Flutter. We’ll have a glance at the essence of those things and then examine a complete example of using them in practice.
Table of Contents
The TL;DR
In simple words, a hero animation is an animation of an element of one page (screen) that flies to the other page when the user navigates. To set up a hero animation, what you need to do is to put 2 Hero widgets on 2 pages, like this:
// implement a Hero widget on source page
InkWell(
         // navigate to the detail page on tap
         onTap: () {
                  Navigator.of(context).push(/* destination route */);
         },
         // implement the Hero widget
         child: Hero(
                  tag: 'id-123',
                  child: /* ... */,
         ),
);
And this:
// implement the corresponding Hero widget on destination page
Hero(
        tag: 'id-123',
        child: /* ... */,
),
2 Hero widgets on 2 different pages are linked together simply because they have the same tag. This is very important. The tag can be an arbitrary Dart object, like a string, a number, etc.
The constructor of the Hero widget:
Hero({
  Key? key,
  required Object tag,
  CreateRectTween? createRectTween,
  HeroFlightShuttleBuilder? flightShuttleBuilder,
  HeroPlaceholderBuilder? placeholderBuilder,
  bool transitionOnUserGestures = false,
  required Widget child
})
There are 2 properties that mustn’t be left out:
- tag: The identifier for the hero. The Hero widget’s tag on the departure page and that of the Hero widget on the destination page must be the same.
- child: The widget that flies from one page to another page during the transition
A wall of text can be boring and make you get confused. Move on to the next section to get a better understanding by writing a working demo app.
Full Example
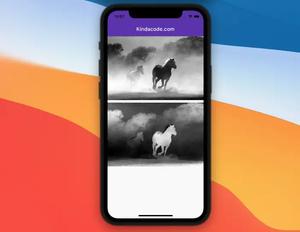
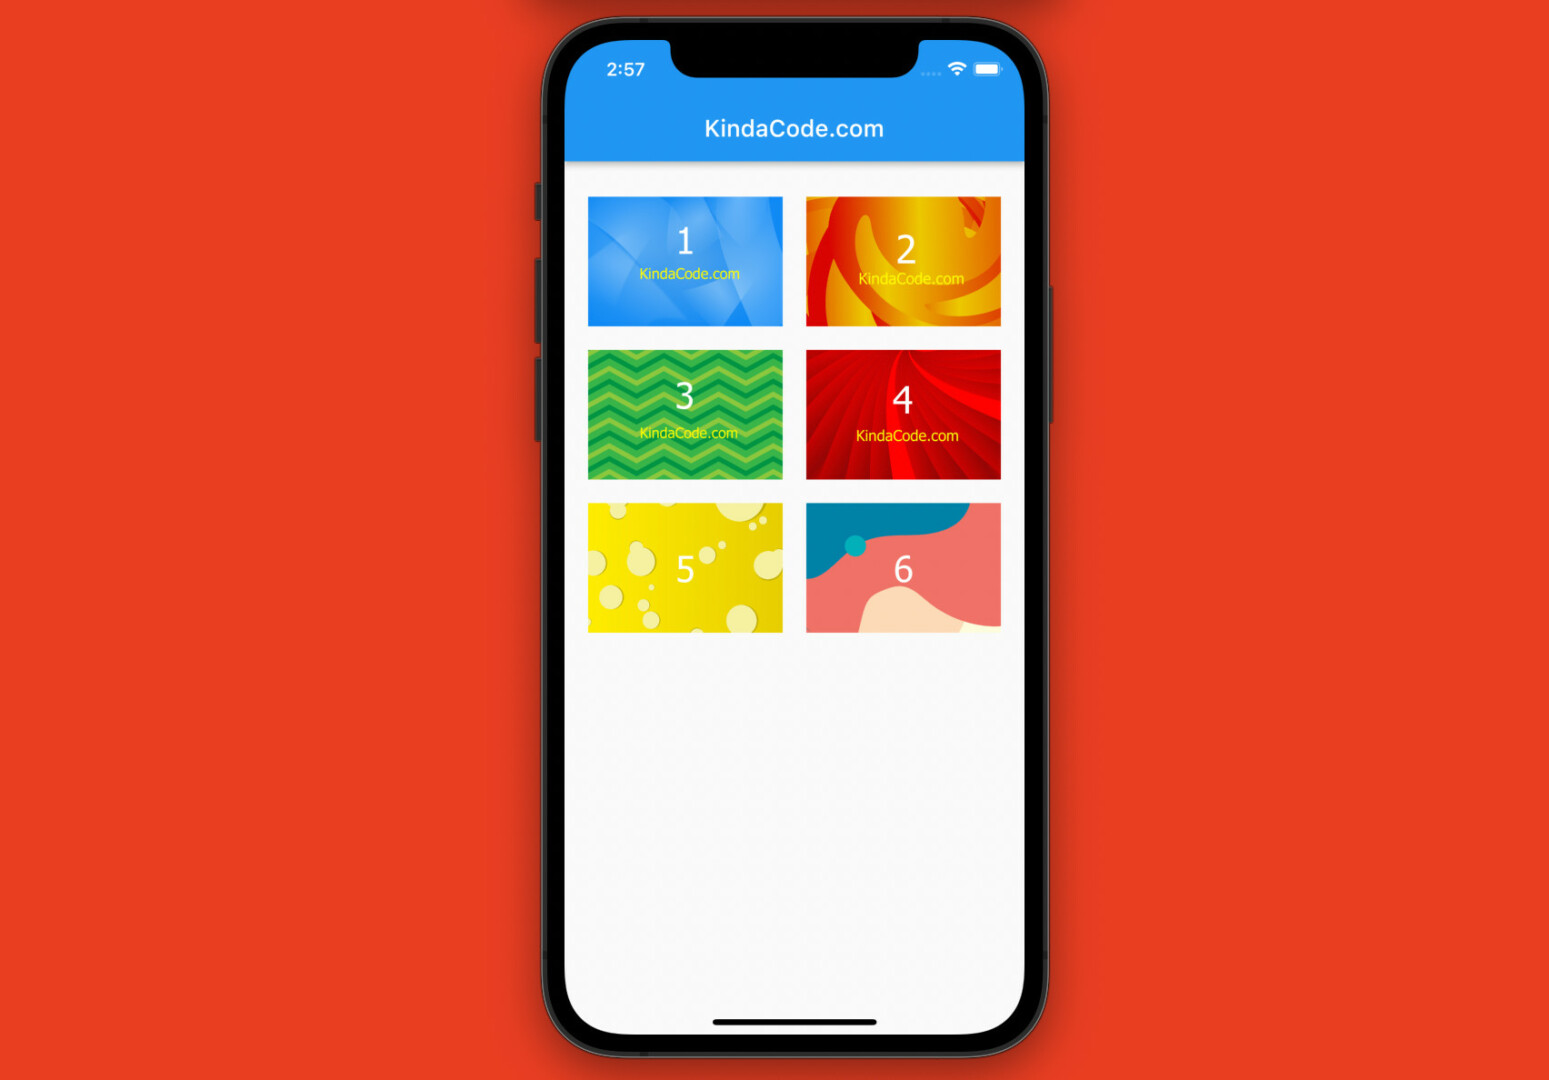
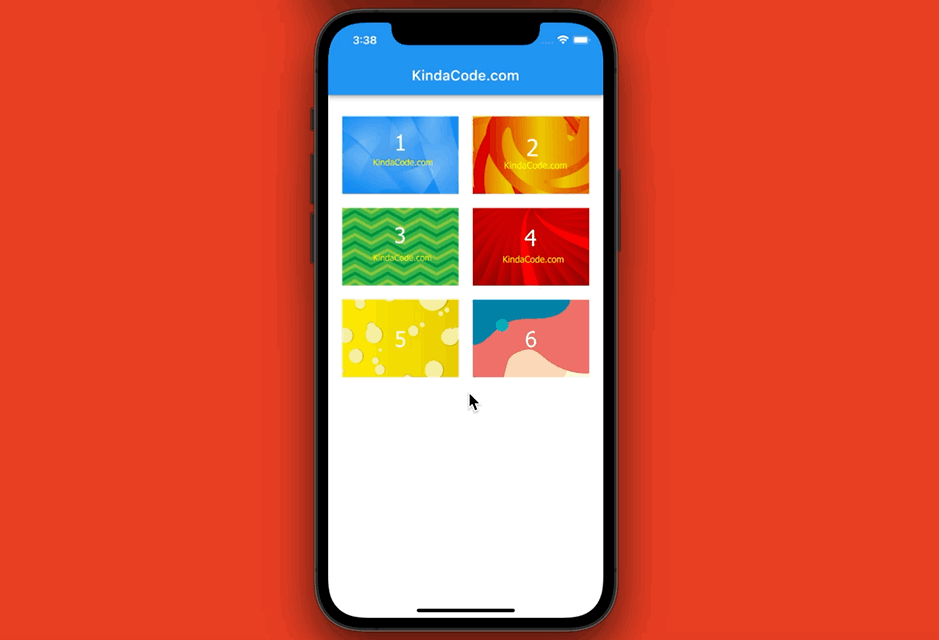
App Preview
The demo project we’re going to build consists of 2 pages:
- Main screen: Presents a grid of thumbnail images. You can navigate to the detail page by tapping on a thumbnail.
- Detail page: Displays detailed information about an image, including a full-size image and a title. You can go back to the main page by pressing the back button or the close button (these 2 buttons do the same thing but have different implementations)
The animated GIF screenshot below clearly depicts our final product. Turn your intention to the animations when navigating between the pages (the images are softly enlarged/reduced in size):
The Code
Below is the complete source code in main.dart with explanations in the comments. For simplicity’s sake, I put everything in a single file. However, you can keep the code well organized by placing each screen in a separate file (this isn’t a must-do but is considered good practice).
// main.dart
import 'package:flutter/material.dart';

void main() {
  runApp(const MyApp());
}

class MyApp extends StatelessWidget {
  const MyApp({Key? key}) : super(key: key);

  @override
  Widget build(BuildContext context) {
    return MaterialApp(
      // Remove the debug banner
      debugShowCheckedModeBanner: false,
      title: 'KindaCode.com',
      theme: ThemeData(
        primarySwatch: Colors.blue,
      ),
      home: const KindaCodeDemo(),
    );
  }
}

// implement the main page
class KindaCodeDemo extends StatefulWidget {
  const KindaCodeDemo({Key? key}) : super(key: key);

  @override
  State<KindaCodeDemo> createState() => _KindaCodeDemoState();
}

class _KindaCodeDemoState extends State<KindaCodeDemo> {
  // dummy data to feed the grid view
  // list of images
  final List<Map<String, dynamic>> _images = [
    {
      'id': 'i1',
      'title': 'One',
      'url': 'https://www.kindacode.com/wp-content/uploads/2022/08/1.png'
    },
    {
      'id': 'i2',
      'title': 'Two',
      'url': 'https://www.kindacode.com/wp-content/uploads/2022/08/2.png'
    },
    {
      'id': 'i3',
      'title': 'Three',
      'url': 'https://www.kindacode.com/wp-content/uploads/2022/08/3.jpg'
    },
    {
      'id': 'i4',
      'title': 'Four',
      'url': 'https://www.kindacode.com/wp-content/uploads/2022/08/4.jpg'
    },
    {
      'id': 'i5',
      'title': 'Five',
      'url': 'https://www.kindacode.com/wp-content/uploads/2022/08/5.jpg'
    },
    {
      'id': 'i6',
      'title': 'Six',
      'url': 'https://www.kindacode.com/wp-content/uploads/2022/08/6.jpg'
    }
  ];

  @override
  Widget build(BuildContext context) {
    return Scaffold(
      appBar: AppBar(title: const Text('KindaCode.com')),
      body: Container(
        padding: const EdgeInsets.symmetric(vertical: 30, horizontal: 20),
        // implement the grid view
        child: GridView.builder(
            gridDelegate: const SliverGridDelegateWithMaxCrossAxisExtent(
                maxCrossAxisExtent: 200,
                childAspectRatio: 3 / 2,
                crossAxisSpacing: 20,
                mainAxisSpacing: 20),
            itemCount: _images.length,
            itemBuilder: (BuildContext ctx, index) {
              return InkWell(
                key: ValueKey(_images[index]['id']),
                // navigate to the detail page on tap
                onTap: () {
                  Navigator.of(context).push(MaterialPageRoute(
                      // pass the image data to the detail page
                      builder: (context) => DetailPage(_images[index])));
                },
                // implement the Hero widget
                child: Hero(
                  // important: the tag
                  tag: _images[index]['id'],
                  // display the image
                  child: Image.network(
                    _images[index]['url'],
                    fit: BoxFit.cover,
                  ),
                ),
              );
            }),
      ),
    );
  }
}

// detail page
class DetailPage extends StatelessWidget {
  // get the image data that was passed from the main page
  final Map image;
  const DetailPage(this.image, {Key? key}) : super(key: key);

  @override
  Widget build(BuildContext context) {
    return Scaffold(
      backgroundColor: Colors.black,
      // implement the app bar
      appBar: AppBar(
        backgroundColor: Colors.transparent,
        elevation: 0,
        title: Text(image['title']),
        actions: [
          // this button does the same thing as the back button
          // I put it here to show you how to go back to the previous screen by implementing your own code
          IconButton(
              onPressed: () {
                Navigator.of(context).pop();
              },
              icon: const Icon(Icons.close))
        ],
      ),
      body: Center(
        // implement the Hero widget
        child: Hero(
          // important: the tag
          tag: image['id'],
          child: Image.network(image['url']),
        ),
      ),
    );
  }
}
Conclusion
You’ve learned the fundamentals of the Hero widget, which is not so hard to implement but gives a fruitful result. Again, it might be superfluous, but it’s important to keep in mind that you have to set the tag for the Hero widget.
Flutter is amazing and can help us build more beautiful things in less time. Continue strengthening your skills by exploring the broad world of mobile development by taking a look at the following articles:
- Flutter: Showing a Context Menu on Long Press
- Flutter: SliverGrid example
- Flutter: Full-Screen Semi-Transparent Modal Dialog
- Flutter: Get Current Scroll Offset in ListView/GridView
- Flutter AnimatedList – Tutorial and Examples
- 2 Ways to Create Flipping Card Animation in Flutter
You can also tour around our Flutter topic page or Dart topic page for the most recent tutorials and examples.


