


The onboarding process in a mobile app is a series of introductory screens (or an intro slider) that aim to educate and familiarize new users with the app’s functionality and interface. This practical article will show you 2 different ways to implement a professional onboarding flow in Flutter. In the first approach, we will write code from scratch, while in the second one, we will take advantage of using a third-party package.
Without putting you through any more unhelpful talk, let’s get started.
Using self-written code
Not depending on a third-party library allows you to customize everything you want.
App Preview
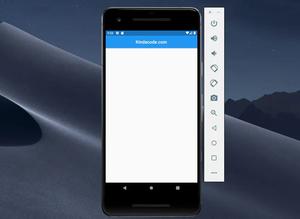
The demo project we’re going to build has an intro slider that appears right when the user starts the app for the first time. This slider includes 3 pages. On each page, there is a pair of ‘previous’ and ‘next’ buttons for navigating.
- On the first page: The ‘previous’ button is disabled.
- On the last page: The ‘next’ button is replaced with a ‘Done’ button. If this button is pressed, the user will leave the intro flow and go to the Home page.
Here’s how it works:
The Code
The complete code with explanations in main.dart:
import 'package:flutter/material.dart';

void main() {
  runApp(const MyApp());
}

class MyApp extends StatelessWidget {
  const MyApp({super.key});

  @override
  Widget build(BuildContext context) {
    return MaterialApp(
      // Remove the debug banner
      debugShowCheckedModeBanner: false,
      title: 'Flutter Demo',
      theme: ThemeData(
        primarySwatch: Colors.blue,
      ),
      home: const KindaCodeDemo(),
    );
  }
}

class KindaCodeDemo extends StatefulWidget {
  const KindaCodeDemo({super.key});

  @override
  State<KindaCodeDemo> createState() => _KindaCodeDemoState();
}

class _KindaCodeDemoState extends State<KindaCodeDemo> {
  // Current page
  int _currentPage = 0;

  // page controller
  final PageController _pageController = PageController(initialPage: 0);

  final List<Widget> _pages = [
    // Page 1
    Container(
      color: Colors.amberAccent,
      child: Column(
        mainAxisAlignment: MainAxisAlignment.center,
        children: const [
          SizedBox(height: 20),
          Text("Welcome to KindaCode.com",
              style: TextStyle(color: Colors.black, fontSize: 24)),
          // add more things here if you want
        ],
      ),
    ),
    // Page 2
    Container(
      color: Colors.red,
      child: Column(
        mainAxisAlignment: MainAxisAlignment.center,
        children: const [
          SizedBox(height: 20),
          Text("Discover new experiences!",
              style: TextStyle(color: Colors.white, fontSize: 24)),
          // add more things here if you want
        ],
      ),
    ),
    // Page 3
    Container(
      color: Colors.green,
      child: Column(
        mainAxisAlignment: MainAxisAlignment.center,
        children: const [
          SizedBox(height: 20),
          Text("Stay connected with code!",
              style: TextStyle(color: Colors.white, fontSize: 24)),
          // add more things here if you want
        ],
      ),
    )
  ];

  @override
  Widget build(BuildContext context) {
    return Scaffold(
        // use a PageView widget to display the pages
        body: PageView(
          controller: _pageController,
          onPageChanged: (int page) {
            setState(() {
              _currentPage = page;
            });
          },
          children: _pages,
        ),
        // use a Stack widget to display the "previous" and "next" buttons
        floatingActionButtonLocation: FloatingActionButtonLocation.centerFloat,
        floatingActionButton: Stack(
          fit: StackFit.expand,
          children: [
            Positioned(
              left: 30,
              bottom: 20,
              child: FloatingActionButton(
                heroTag: 'previous',
                // if the current page is the first page, disable the button
                backgroundColor: _currentPage > 0 ? Colors.blue : Colors.grey,
                onPressed: _currentPage > 0
                    ? () {
                        // if the current page is not the first page, navigate to the previous page
                        // otherwise, do nothing
                        setState(() {
                          _currentPage -= 1;
                        });
                        _pageController.previousPage(
                            duration: const Duration(milliseconds: 500),
                            curve: Curves.ease);
                      }
                    : null,
                shape: RoundedRectangleBorder(
                  borderRadius: BorderRadius.circular(10),
                ),
                child: const Icon(
                  Icons.arrow_left,
                  size: 40,
                ),
              ),
            ),
            Positioned(
              bottom: 20,
              right: 30,
              child: FloatingActionButton(
                heroTag: 'next',
                onPressed: _currentPage < _pages.length - 1
                    ? () {
                        // if the current page is not the last page, navigate to the next page
                        setState(() {
                          _currentPage += 1;
                        });

                        _pageController.nextPage(
                            duration: const Duration(milliseconds: 500),
                            curve: Curves.ease);
                      }
                    : () {
                        // if the current page is the last page, navigate to the home screen
                        Navigator.of(context).pushReplacement(MaterialPageRoute(
                            builder: (_) => const HomeScreen()));
                      },
                shape: RoundedRectangleBorder(
                  borderRadius: BorderRadius.circular(10),
                ),
                child: Icon(
                  _currentPage < _pages.length - 1
                      ? Icons.arrow_right
                      : Icons.done,
                  // if the current page is the last page, show the done icon
                  // otherwise, show the arrow right icon
                  size: 40,
                ),
              ),
            ),
          ],
        ));
  }
}

// the home screen
// you will go here after you finish the onboarding screen
// there is no way to go back to the onboarding screen
// unless you restart the app
class HomeScreen extends StatelessWidget {
  const HomeScreen({super.key});

  @override
  Widget build(BuildContext context) {
    return Scaffold(
      appBar: AppBar(title: const Text('KindaCode Home')),
      body: const Center(
        child: Text('Home Screen', style: TextStyle(fontSize: 40)),
      ),
    );
  }
}
Using a third-party library
There are several open-source libraries for creating beautiful intro sliders. One of the best libraries is intro_slider.
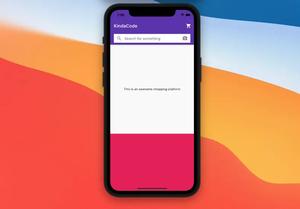
App Preview
The Code
Install the plugin by running this command:
flutter pub add intro_sliderAnd here’s the full source code in main.dart:
import 'package:flutter/material.dart';

// import the plugin
import 'package:intro_slider/intro_slider.dart';

void main() => runApp(const MyApp());

class MyApp extends StatelessWidget {
  const MyApp({Key? key}) : super(key: key);

  static const type = 1;

  @override
  Widget build(BuildContext context) {
    return const MaterialApp(
      // remove the debug banner
      debugShowCheckedModeBanner: false,
      title: 'KindaCode.com',
      home: KindaCodeDemo(),
    );
  }
}

class KindaCodeDemo extends StatefulWidget {
  const KindaCodeDemo({Key? key}) : super(key: key);

  @override
  State<KindaCodeDemo> createState() => _KindaCodeDemoState();
}

class _KindaCodeDemoState extends State<KindaCodeDemo> {
  final List<ContentConfig> _listContentConfig = [];

  @override
  void initState() {
    super.initState();

    // add content for the first slide
    _listContentConfig.add(
      const ContentConfig(
        title: "HEADING ONE",
        description:
            "I like playing Elden Ring and God of War. They are both great games.",
        backgroundColor: Colors.pink,
      ),
    );
    // add content for the second slide
    _listContentConfig.add(
      const ContentConfig(
        title: "HEADING TWO",
        description:
            "Never forgive. Never forget. The rain is coming. I see bad days and liars ahead.",
        backgroundColor: Colors.greenAccent,
      ),
    );
    // add content for the third slide
    _listContentConfig.add(
      const ContentConfig(
        title: "HEADING THREE",
        description: "Hesitation is defeat. Come on Sekiro. Yo",
        backgroundColor: Colors.orangeAccent,
      ),
    );
  }

  // This function will be called when the user press the "done" button
  // in the last slide
  void _onDonePress() {
    debugPrint('Done Pressed');
  }

  @override
  Widget build(BuildContext context) {
    return IntroSlider(
      key: UniqueKey(),
      listContentConfig: _listContentConfig,
      onDonePress: _onDonePress,
    );
  }
}
Conclusion
We’ve walked through 2 complete examples of implementing intro screens in Flutter. Which one will you choose to use? Please let us know by leaving a comment.
If you’d like to explore more new and exciting stuff in the realm of modern Flutter, take a look at the following articles:
- 2 Ways to Create Typewriter Effects in Flutter
- Flutter: Making a Tic Tac Toe Game from Scratch
- Flutter: Adding a Border to an Icon Button (2 Approaches)
- Flutter and Firestore Database: CRUD example
- Flutter + Firebase Storage: Upload, Retrieve, and Delete files
- Using GetX (Get) for State Management in Flutter
You can also tour around our Flutter topic page or Dart topic page for the most recent tutorials and examples.


