In this article, we’ll have a look at the fundamentals of the Timer class in Flutter and go over a couple of different examples of using it in applications.
Overview
Before using the TImer class, you need to import the dart:async library:
import 'dart:async';To schedule code execution after a designated amount of time, we use the Timer constructor as follows:
Timer(Duration duration, void callback());Note that you can cancel any timer by using the cancel() method. To check whether the timer is still active or not, you can use the isActive property. To find out the number of durations preceding the most recent timer event, you can use the tick property.
If there is a block of code that should execute multiple times at specified intervals, the Timer.periodic constructor can be used to execute that code:
Timer.periodic(Duration duration, void callback(Timer timer))For more clarity, see the examples below.
Example 1: Timer
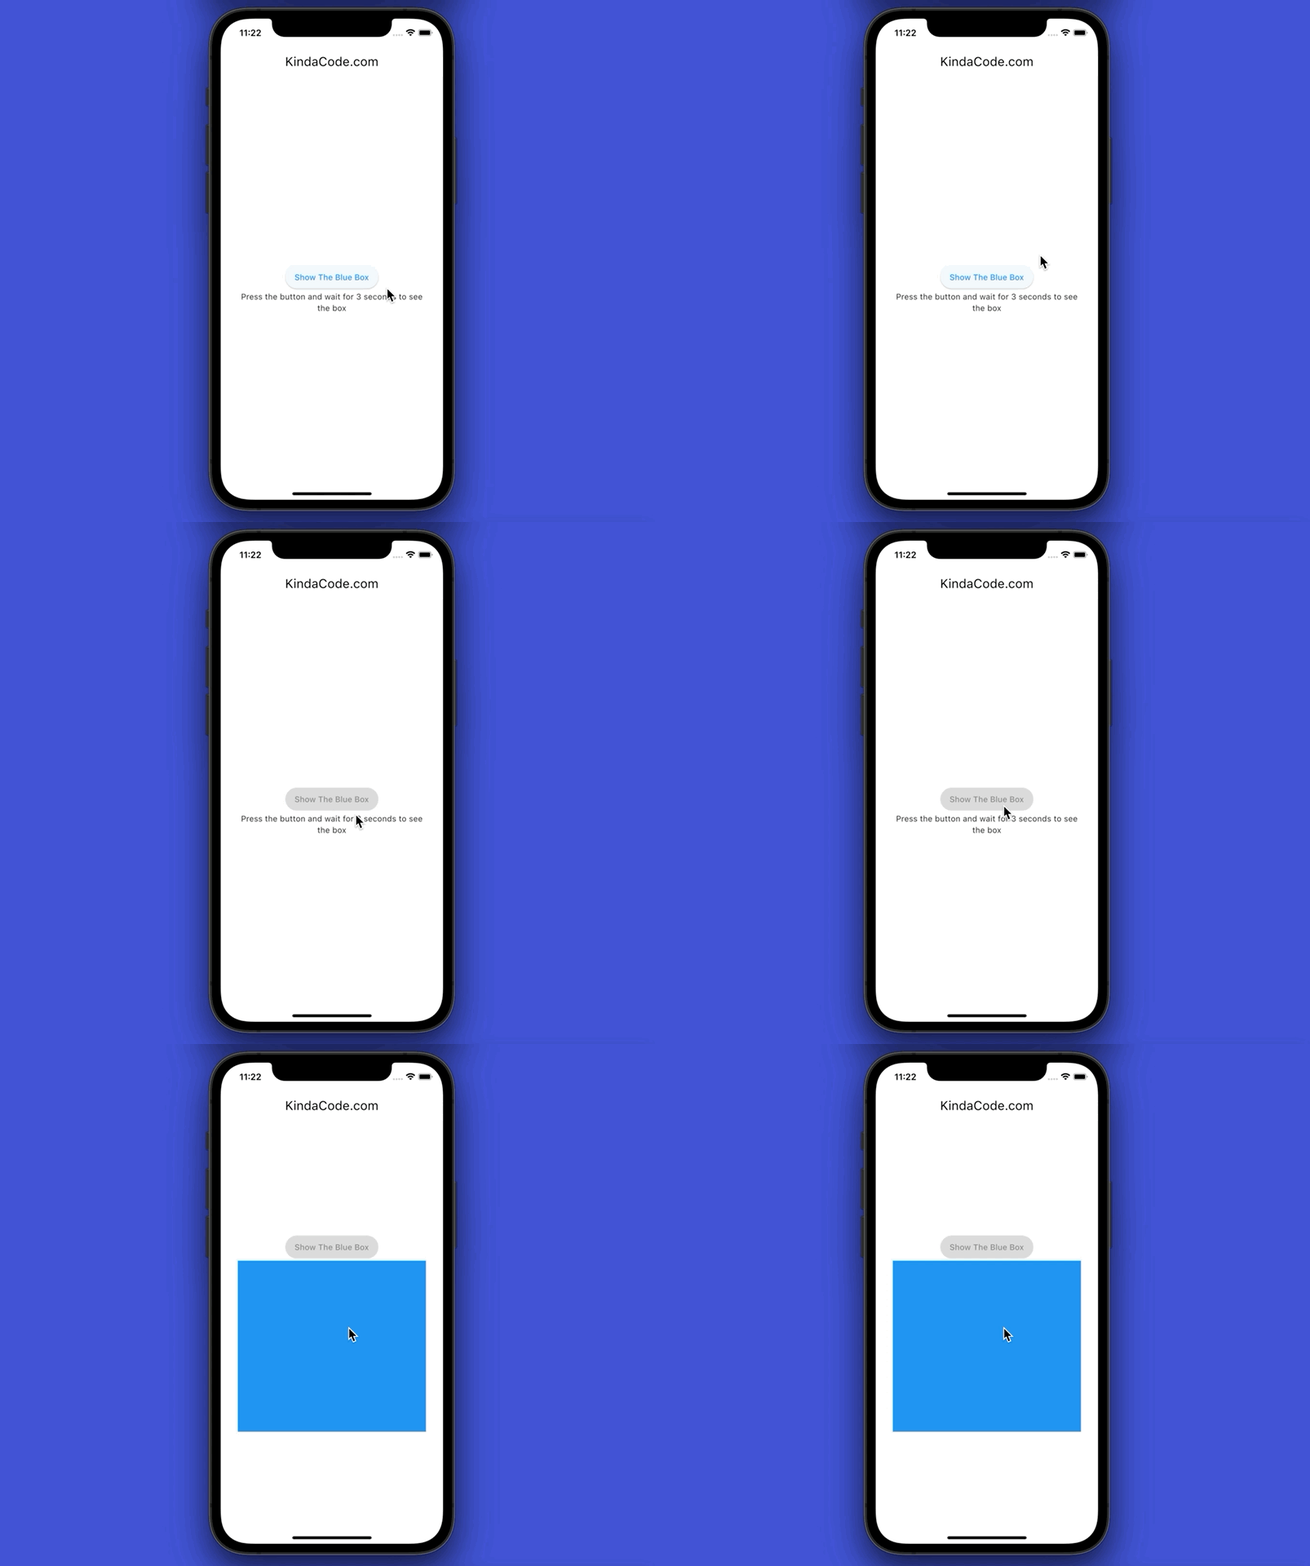
This sample Flutter app contains a button in the center of the screen. After the user presses that button for 3 seconds, a blue box will show up (the button will also be disabled after it gets pressed).
Preview
The full code
import 'package:flutter/material.dart';
import 'dart:async';

void main() {
  runApp(const MyApp());
}

class MyApp extends StatelessWidget {
  const MyApp({Key? key}) : super(key: key);

  @override
  Widget build(BuildContext context) {
    return MaterialApp(
      // Hide the debug banner
      debugShowCheckedModeBanner: false,
      title: 'Kindacode.com',
      theme: ThemeData(
        // enable Material 3
        useMaterial3: true,
        primarySwatch: Colors.blue,
      ),
      home: const HomePage(),
    );
  }
}

class HomePage extends StatefulWidget {
  const HomePage({Key? key}) : super(key: key);

  @override
  State<HomePage> createState() => _HomePageState();
}

class _HomePageState extends State<HomePage> {
  // If the user presses the button, _isButtonPressed is set to true
  // Then the button will be disable
  bool _isButtonPressed = false;

  // show a blue box when _showBox == true
  bool _showBox = false;

  void _startTimer() {
    // Disable the button after it has been pressed
    setState(() {
      _isButtonPressed = true;
    });

    Timer(const Duration(seconds: 3), () {
      setState(() {
        _showBox = true;
      });
    });
  }

  @override
  Widget build(BuildContext context) {
    return Scaffold(
        appBar: AppBar(title: const Text('KindaCode.com')),
        body: Padding(
          padding: const EdgeInsets.all(30),
          child: Column(
              mainAxisAlignment: MainAxisAlignment.center,
              crossAxisAlignment: CrossAxisAlignment.center,
              children: [
                ElevatedButton(
                  onPressed: _isButtonPressed == false ? _startTimer : null,
                  child: const Text('Show The Blue Box'),
                ),
                _showBox == true
                    ? Container(
                        width: double.infinity,
                        height: 300,
                        color: Colors.blue,
                      )
                    : const Text(
                        'Press the button and wait for 3 seconds to see the box',
                        textAlign: TextAlign.center,
                      )
              ]),
        ));
  }
}
Example 2: Timer.periodic
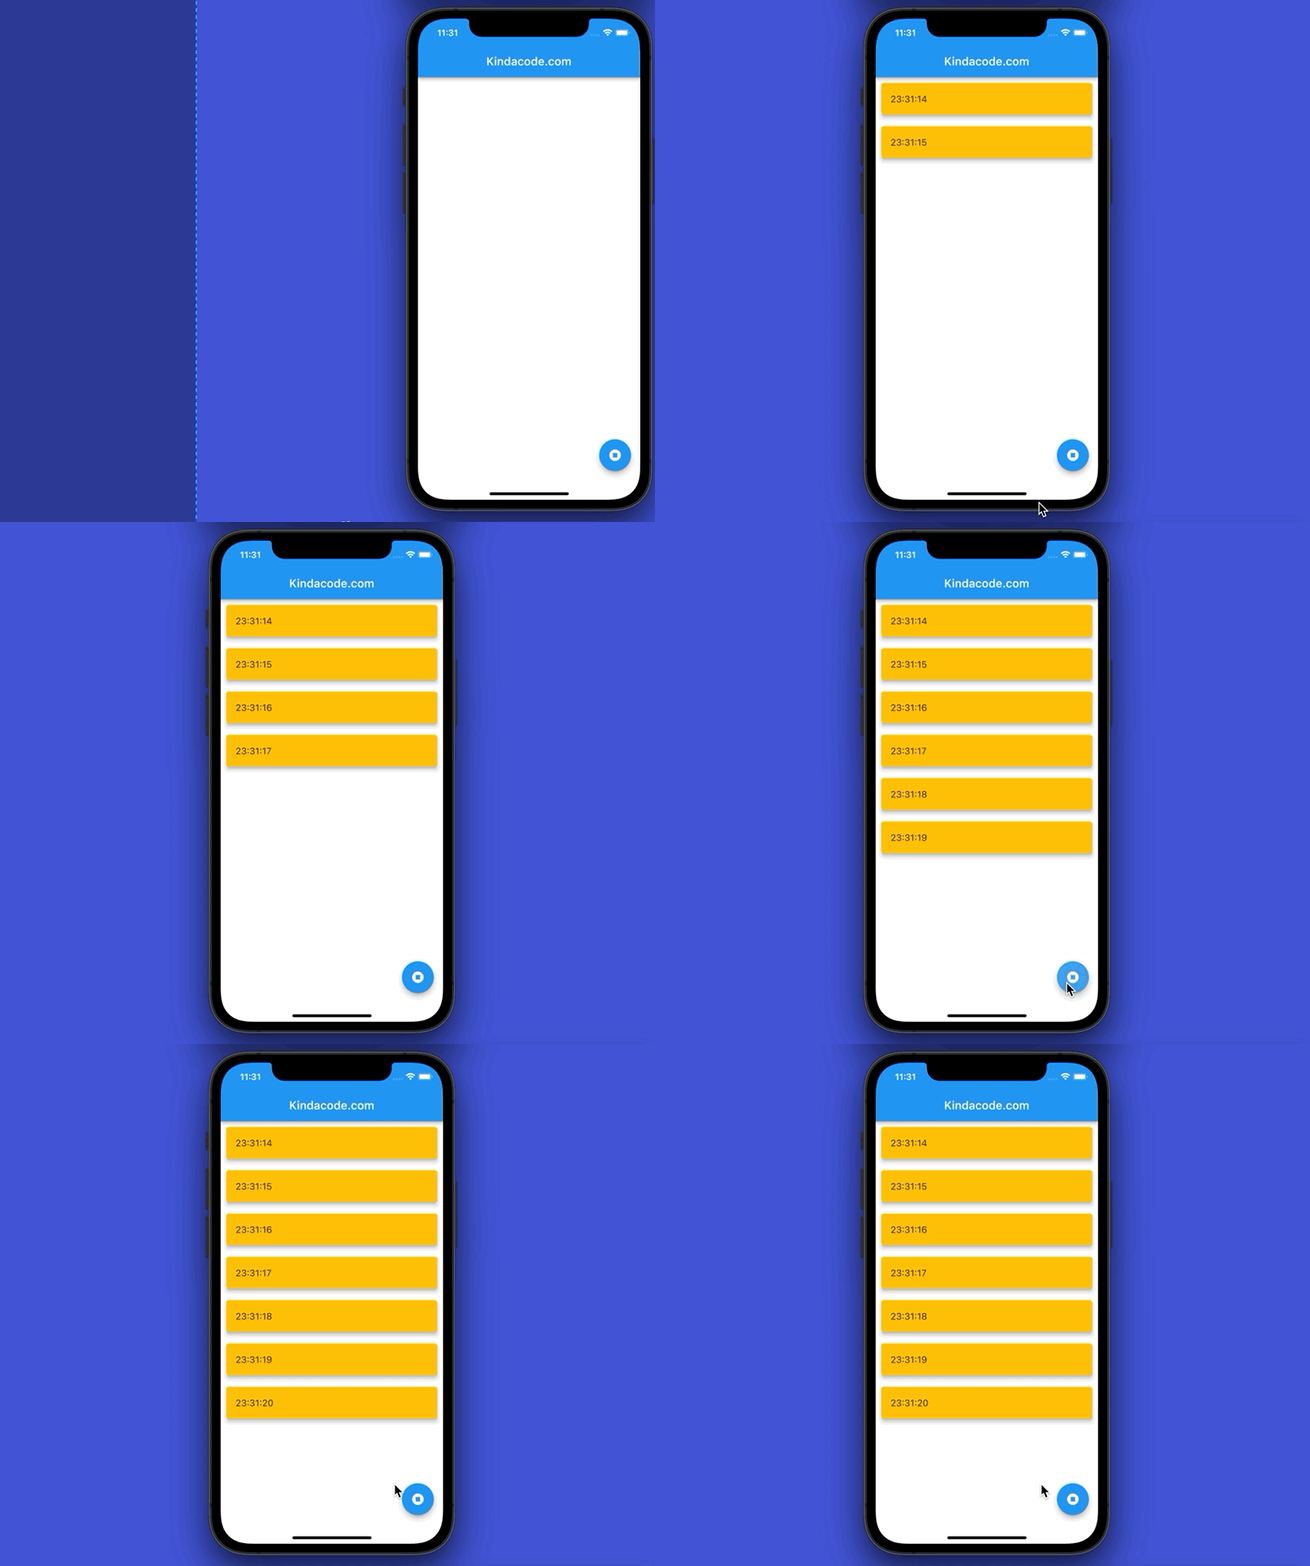
This sample app contains a list view. Every second that passes, a new element is added to the list. To stop this process, the user can press the floating button.
Preview
The full code
// main.dart
import 'package:flutter/material.dart';
import 'dart:async';

void main() {
  runApp(const MyApp());
}

class MyApp extends StatelessWidget {
  const MyApp({Key? key}) : super(key: key);

  @override
  Widget build(BuildContext context) {
    return const MaterialApp(
        // Hide the debug banner
        debugShowCheckedModeBanner: false,
        title: 'Kindacode.com',
        home: HomeScreen());
  }
}

class HomeScreen extends StatefulWidget {
  const HomeScreen({Key? key}) : super(key: key);

  @override
  State<HomeScreen> createState() => _HomeScreenState();
}

class _HomeScreenState extends State<HomeScreen> {
  // This list hold the items of the list view
  final List<String> _items = [];

  // This variable determines whether the timer runs or not
  bool _isRunning = true;

  // This function will add a new item to the list every 1 second
  void _addItem() {
    final DateTime now = DateTime.now();
    setState(() {
      _items.add("${now.hour}:${now.minute}:${now.second}");
    });
  }

  @override
  void initState() {
    Timer.periodic(const Duration(seconds: 1), (Timer timer) {
      if (!_isRunning) {
        // cancel the timer
        timer.cancel();
      }
      _addItem();
    });
    super.initState();
  }

  @override
  Widget build(BuildContext context) {
    return Scaffold(
      appBar: AppBar(
        title: const Text('Kindacode.com'),
      ),
      body: ListView.builder(
        itemCount: _items.length,
        itemBuilder: (_, index) {
          return Card(
            margin: const EdgeInsets.all(10),
            color: Colors.amber,
            elevation: 5,
            child: ListTile(
              title: Text(_items[index]),
            ),
          );
        },
      ),
      // This button will stop the timer
      floatingActionButton: FloatingActionButton(
        onPressed: () {
          setState(() {
            _isRunning = false;
          });
        },
        child: const Icon(Icons.stop_circle),
      ),
    );
  }
}
Conclusion
You’ve learned how to use Timer to fire a callback function once after a designated amount of time or repeatedly at specified intervals. If you’d like to explore more new and interesting things about Flutter, take a look at the following articles:
- Using GetX (Get) for Navigation and Routing in Flutter
- 5 Ways to Store Data Offline in Flutter
- Flutter: Convert UTC Time to Local Time and Vice Versa
- Flutter SliverList – Tutorial and Example
- Sorting Lists in Dart and Flutter (5 Examples)
- Flutter: Firing multiple Futures at the same time with FutureGroup
You can also take a tour around our Flutter topic page or Dart topic page for the latest tutorials and examples.

