


This article shows you how to implement a simple Drawer navigation menu in Flutter.
Table of Contents
Example Preview
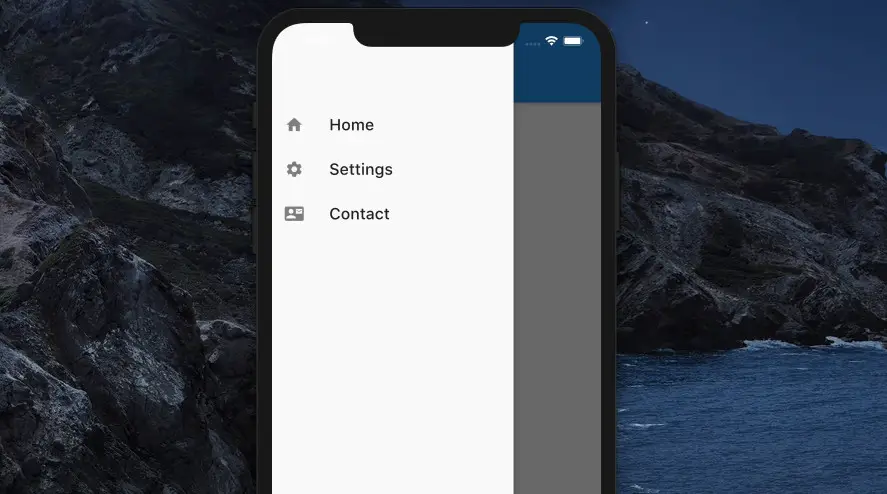
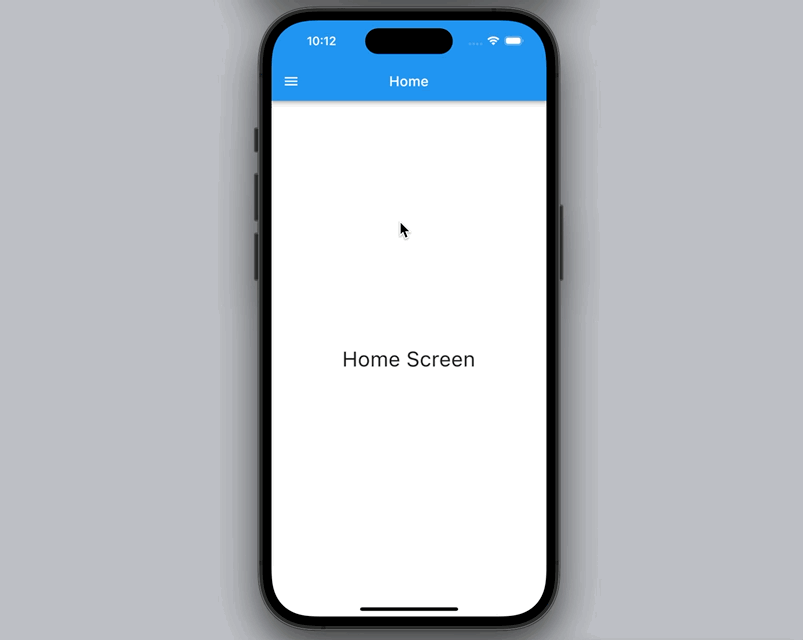
We’ll build a small Flutter app that contains 3 screens (HomeScreen, SettingsScreen, and ContactScreen) and a Drawer Navigation. This Drawer has some tappable widgets for navigating. Here’s how our app works at the end:
Here’s how to implement a drawer in general: tie the drawer property of a Scaffold widget and a Drawer widget together.
Widget build(BuildContext context) {
    return Scaffold(
      drawer: Drawer(
        child: // the contents of the drawer
      ),
      appBar: // app bar
      body: // body code
    );
  }
A Column or a ListView widget is usually used as the child of a Drawer widget to create a vertical list of menu items.
Note: The hamburger icon will automatically be added to the appBar after adding the drawer.
Let’s Write Code
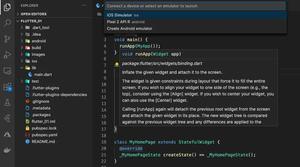
1. Create a new Flutter project:
flutter create drawer_example2. Create 4 new files in the lib folder: home_screen.dart, settings_screen.dart, contact_screen.dart, and drawer.dart. Here’s the structure inside the lib folder:
.
├── contact_screen.dart
├── drawer.dart
├── home_screen.dart
├── main.dart
└── settings_screen.dart
3. Add this code to the drawer.dart file:
// drawer.dart
import 'package:flutter/material.dart';

class MyDrawer extends StatelessWidget {
  const MyDrawer({Key? key}) : super(key: key);

  @override
  Widget build(BuildContext context) {
    return Drawer(
      elevation: 6,
      child: Column(children: [
        const SizedBox(height: 100),
        ListTile(
          onTap: () {
            Navigator.of(context).pushReplacementNamed('/');
          },
          leading: const Icon(Icons.home),
          title: const Text(
            'Home',
            style: TextStyle(fontSize: 20),
          ),
        ),
        ListTile(
          onTap: () {
            Navigator.of(context).pushReplacementNamed('/settings-screen');
          },
          leading: const Icon(Icons.settings),
          title: const Text(
            'Settings',
            style: TextStyle(fontSize: 20),
          ),
        ),
        ListTile(
          onTap: () {
            Navigator.of(context).pushReplacementNamed('/contact-screen');
          },
          leading: const Icon(Icons.contact_mail),
          title: const Text(
            'Contact',
            style: TextStyle(fontSize: 20),
          ),
        ),
      ]),
    );
  }
}
3. Add the following to home_screen.dart:
// home_screen.dart
import 'package:flutter/material.dart';
import './drawer.dart';

class HomeScreen extends StatelessWidget {
  const HomeScreen({Key? key}) : super(key: key);

  @override
  Widget build(BuildContext context) {
    return Scaffold(
      drawer: const MyDrawer(),
      appBar: AppBar(
        title: const Text(
          'Home',
        ),
      ),
      body: const Center(
        child: Text('Home Screen', style: TextStyle(fontSize: 30)),
      ),
    );
  }
}
4. Add this to settings_screen.dart:
// settings_screen.dart
import 'package:flutter/material.dart';
import './drawer.dart';

class SettingsScreen extends StatelessWidget {
  const SettingsScreen({Key? key}) : super(key: key);

  @override
  Widget build(BuildContext context) {
    return Scaffold(
      drawer: const MyDrawer(),
      appBar: AppBar(
        title: const Text('Settings'),
      ),
      body: const Center(
        child: Text('Settings Screen', style: TextStyle(fontSize: 30)),
      ),
    );
  }
}
5. Add this to contact_screen.dart:
// contact_screen.dart
import 'package:flutter/material.dart';
import './drawer.dart';

class ContactScreen extends StatelessWidget {
  const ContactScreen({Key? key}) : super(key: key);

  @override
  Widget build(BuildContext context) {
    return Scaffold(
      drawer: const MyDrawer(),
      appBar: AppBar(
        title: const Text('Contact'),
      ),
      body: const Center(
        child: Text('Contact Us', style: TextStyle(fontSize: 30)),
      ),
    );
  }
}
6. Remove all the default code in main.dart and add this:
// // main.dart
import 'package:flutter/material.dart';

import './home_screen.dart';
import './settings_screen.dart';
import './contact_screen.dart';

void main() {
  runApp(const MyApp());
}

class MyApp extends StatelessWidget {
  const MyApp({Key? key}) : super(key: key);

  @override
  Widget build(BuildContext context) {
    return MaterialApp(
      // Hide the debug banner
      debugShowCheckedModeBanner: false,
      title: 'Kindacode.com',
      home: const HomeScreen(),
      // Register routes
      routes: {
        '/settings-screen': (BuildContext ctx) => const SettingsScreen(),
        '/contact-screen': (BuildContext ctx) => const ContactScreen()
      },
    );
  }
}
8. Launch your iOS simulator, or Android emulator, then run:
flutter runFinal Words
We’ve examined a complete example of implementing a side drawer navigation menu. If you’d like to explore more new and fascinating stuff about Flutter and Dart, take a look at the following articles:
- How to Flatten a Nested List in Dart
- How to implement a right drawer in Flutter
- Flutter AnimatedList – Tutorial and Examples
- Using AnimatedIcon in Flutter
- 2 Ways to Add Multiple Floating Buttons in Flutter
- Flutter: Making a Dropdown Multiselect with Checkboxes
You can also check out our Flutter category page or Dart category page for the latest tutorials and examples.


