


CupertinoAlertDialog is an iOS-style widget that informs the user about situations that require acknowledgment. It has an optional title, optional content, and an optional list of actions.
Table of Contents
Implement
showCupertinoDialog() is a built-in function of Flutter that can help you easily show a CupertinoAlertDialog. The function requires 2 arguments: context and builder. You can use it like this:
showCupertinoDialog(
        context: ctx,
        builder: (_) => CupertinoAlertDialog(
              title: Text("This is the title"),
              content: Text("This is the content"),
              actions: [
                // Close the dialog
                // You can use the CupertinoDialogAction widget instead
                CupertinoButton(
                    child: Text('Cancel'),
                    onPressed: () {
                      Navigator.of(ctx).pop();
                    }),
                CupertinoButton(
                  child: Text('I agree'),
                  onPressed: () {
                    // Do something
                    print('I agreed');

                    // Then close the dialog
                    Navigator.of(ctx).pop();
                  },
                )
              ],
));
If you want more details, just examine the complete example below.
Example
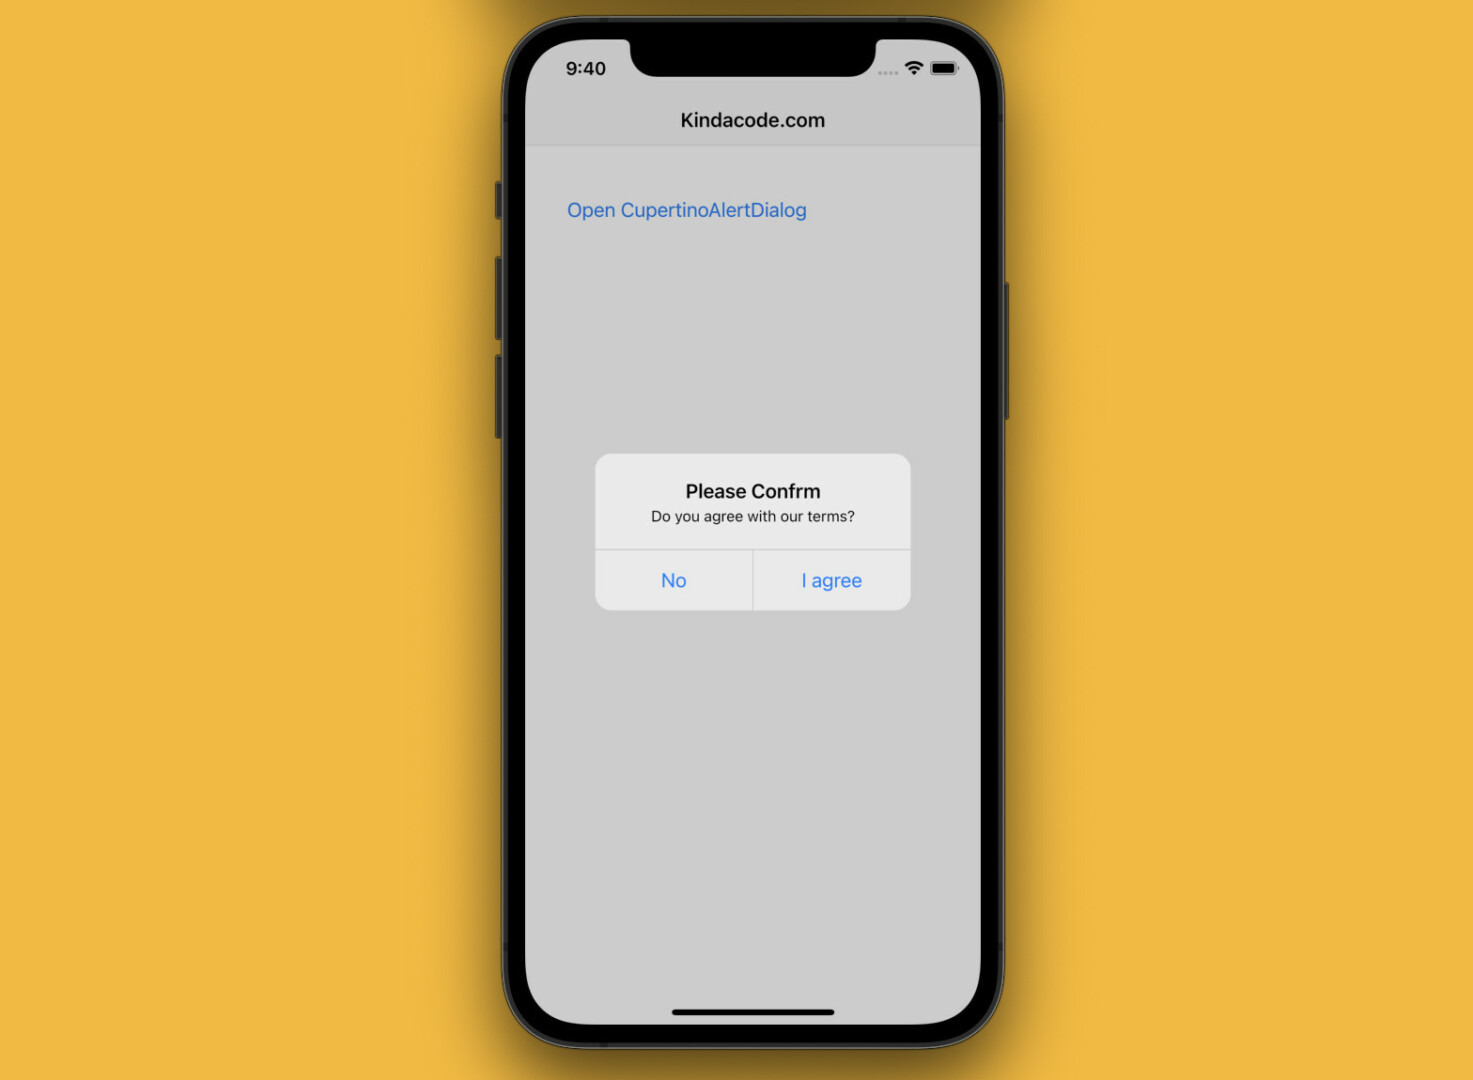
App Preview
The sample we are going to build contains a button on the screen. When this button is pressed, an alert dialog with 2 action buttons will show up:
- No button: Render “Disagree” on the screen and close the dialog when pressed.
- I Agree button: Display “I agree” on the screen and close the dialog when pressed.
Here’s the demo:
The Code
Complete code in main.dart (with explanations):
// Kindacode.com
// lib/main.dart
import 'package:flutter/cupertino.dart';

void main() {
  runApp(const MyApp());
}

class MyApp extends StatelessWidget {
  const MyApp({Key? key}) : super(key: key);

  @override
  Widget build(BuildContext context) {
    return const CupertinoApp(
      // Hide the debug banner
      debugShowCheckedModeBanner: false,
      title: "Kindacode.com",
      home: HomePage(),
    );
  }
}

class HomePage extends StatefulWidget {
  const HomePage({Key? key}) : super(key: key);

  @override
  State<HomePage> createState() => _HomePageState();
}

class _HomePageState extends State<HomePage> {
  // The result (Agree or Disagree)
  String _result = '';

  // This function will be triggered when the button is pressed
  void _openDialog(ctx) {
    showCupertinoDialog(
        context: ctx,
        builder: (_) => CupertinoAlertDialog(
              title: const Text("Please Confrm"),
              content: const Text("Do you agree with our terms?"),
              actions: [
                // Close the dialog
                // You can use the CupertinoDialogAction widget instead
                CupertinoButton(
                    child: const Text('No'),
                    onPressed: () {
                      setState(() {
                        _result = 'Disagree';
                      });
                      Navigator.of(ctx).pop();
                    }),
                CupertinoButton(
                  child: const Text('I agree'),
                  onPressed: () {
                    setState(() {
                      _result = 'Agree';
                    });
                    // Then close the dialog
                    Navigator.of(ctx).pop();
                  },
                )
              ],
            ));
  }

  @override
  Widget build(BuildContext context) {
    return CupertinoPageScaffold(
      navigationBar: const CupertinoNavigationBar(
        middle: Text('Kindacode.com'),
      ),
      child: Padding(
        padding: const EdgeInsets.all(20),
        child: Column(
          crossAxisAlignment: CrossAxisAlignment.start,
          children: [
            const SizedBox(
              height: 100,
            ),
            // this button is used to show the dialog
            CupertinoButton(
                onPressed: () => _openDialog(context),
                child: const Text('Open CupertinoAlertDialog')),
            const SizedBox(
              height: 20,
            ),
            // display the result
            Text(
              _result,
              style: const TextStyle(fontSize: 29),
            ),
          ],
        ),
      ),
    );
  }
}
The example above is so simple but from here, you’re pretty good to go.
What’s Next?
You’ve learned to use the CupertinoAlertDialog through an end-to-end example. If you’d like to explore more iOS-style widgets in Flutter, take a look at the following articles:
- Flutter CupertinoSegmentedControl Example
- Example of CupertinoSliverNavigationBar in Flutter
- Working with Cupertino Bottom Tab Bar in Flutter
- Flutter CupertinoSlider Examples
- Flutter Cupertino Button – Tutorial and Examples
- Flutter: CupertinoPicker Example
- Flutter: Global, Unique, Value, Object, and PageStorage Keys
You can also check out our Flutter category page or Dart category page for the latest tutorials and examples.


