


ConstrainedBox is a built-in widget of Flutter that lets you specify the maximum or minimum width and height of its child widget. In this tutorial, you’ll learn how to use the ConstrainedBox widget through some quick examples.
Example 1: ConstrainedBox and Container
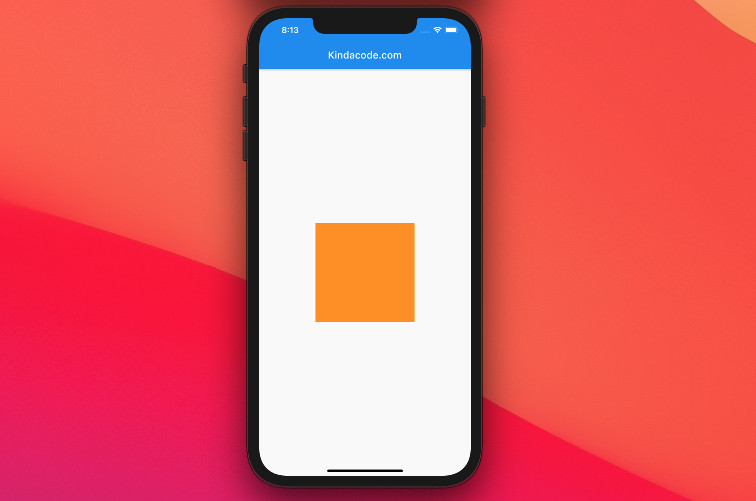
We’ll get started with a super simple example. It just contains an orange container box that is constrained by a ConstrainedBox. Without the ConstrainedBox, the orange box will expand to full screen.
Preview:
The full code:
import 'package:flutter/material.dart';
void main() {
runApp(const MyApp());
}
class MyApp extends StatelessWidget {
const MyApp({Key? key}) : super(key: key);
@override
Widget build(BuildContext context) {
return const MaterialApp(
debugShowCheckedModeBanner: false,
title: 'Kindacode.com',
home: HomePage(),
);
}
}
class HomePage extends StatelessWidget {
const HomePage({Key? key}) : super(key: key);
@override
Widget build(BuildContext context) {
return Scaffold(
appBar: AppBar(title: const Text('Kindacode.com')),
body: Center(
child: ConstrainedBox(
constraints: const BoxConstraints(maxHeight: 200, maxWidth: 200),
child: Container(
color: Colors.orange,
),
),
));
}
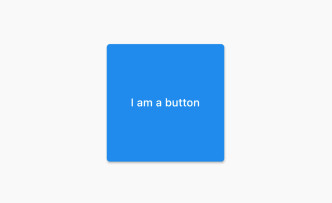
}Example 2: ConstrainedBox and buttons
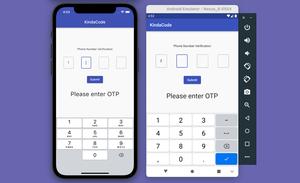
This example demonstrates how to size an elevated button with ConstrainedBox.
Screenshot:
The code (without boilerplate):
ConstrainedBox(
            constraints: const BoxConstraints.tightFor(width: 150, height: 150),
            child: ElevatedButton(
              child: const Text('I am a button'),
              onPressed: () {},
            ),
),
Example 3: ConstrainedBox and Image
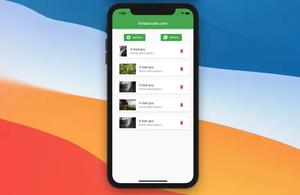
In this example, the images will be displayed with dimensions between 200 x 200 and 350 x 350.
Preview
The original resolution of the first image is 640 x 426 and the original resolution of the second image is 101 x 97. However, the first one is displayed as smaller than its actual size and the second one is displayed as larger than its actual size.

The full code:
import 'package:flutter/material.dart';

void main() {
  runApp(const MyApp());
}

class MyApp extends StatelessWidget {
  const MyApp({Key? key}) : super(key: key);

  @override
  Widget build(BuildContext context) {
    return const MaterialApp(
      debugShowCheckedModeBanner: false,
      title: 'Kindacode.com',
      home: HomePage(),
    );
  }
}

class HomePage extends StatelessWidget {
  const HomePage({Key? key}) : super(key: key);

  @override
  Widget build(BuildContext context) {
    return Scaffold(
        appBar: AppBar(title: const Text('Kindacode.com')),
        body: Padding(
          padding: const EdgeInsets.all(20),
          child: Column(
            children: [
              ConstrainedBox(
                constraints: const BoxConstraints(
                    minWidth: 200,
                    minHeight: 200,
                    maxWidth: 350,
                    maxHeight: 350),
                child: Image.network(
                  'https://www.kindacode.com/wp-content/uploads/2020/11/my-dog.jpg',
                  fit: BoxFit.fill,
                  // the original resolution is 640 x 426
                ),
              ),

              // just add some white space
              const SizedBox(
                height: 20,
              ),

              ConstrainedBox(
                constraints: const BoxConstraints(
                    minWidth: 200,
                    minHeight: 200,
                    maxWidth: 350,
                    maxHeight: 350),
                child: Image.network(
                    'https://www.kindacode.com/wp-content/uploads/2021/01/tiny-dog.jpg',
                    // the original resolution is 101 x 97
                    fit: BoxFit.fill),
              ),
            ],
          ),
        ));
  }
}
API
ConstrainedBox constructor:
ConstrainedBox({
  Key key,
  @required BoxConstraints constraints,
  Widget child
})
ConstrainedBox properties:
| Name | Type | Description |
|---|---|---|
| child | Widget | The child widget |
| constraints | BoxConstraints | The constraints that impose on the child widget |
To implement ConstrainedBox, you need to know about BoxConstraints class constructors.
This constructor will create box constraints with the given constraints:
BoxConstraints({
  double minWidth: 0.0,
  double maxWidth: double.infinity,
  double minHeight: 0.0,
  double maxHeight: double.infinity
})
This one makes box constraints that expand to fill another box constraints:
BoxConstraints.expand({
  double? width,
  double? height
})
This implements a box constraint that forbids sizes larger than the given size:
BoxConstraints.loose(
  Size size
)
This creates box constraints that are respected only by the given size:
BoxConstraints.tight(
  Size size
)
This creates box constraints that require the given width or height:
BoxConstraints.tightFor({
  double? width,
  double? height
})
This builds box constraints that require the given width or height, except if they are infinite:
BoxConstraints.tightForFinite({
  double width: double.infinity,
  double height: double.infinity
})
Wrap Up
In this article, we have explored the ConstrainedBox widget and walked through a few examples of using it. If you would like to learn more about Flutter, real also the following:
- Flutter: Making a Tic Tac Toe Game from Scratch
- Ways to Create Full-Width Buttons in Flutter
- Flutter: Showing a Context Menu on Long Press
- Flutter: Making a Dropdown Multiselect with Checkboxes
- Flutter: ValueListenableBuilder Example
You can also check out our Flutter category page or Dart category page for the latest tutorials and examples.


