


A few examples of using the ColorFiltered widget in Flutter.
A Prefatory Note
The ColorFiltered widget is used to apply a color filter to its child widgets. It takes 3 parameters: key (optional), child (a child widget – optional), colorFilter (required). The colorFilter parameter can be constructed by using one of the following ways:
1. ColorFilter.mode: Creates a color filter that applies the blend mode given as the second argument. The source color is the one given as the first argument, and the destination color is the one from the layer being composited
2. ColorFilter.matrix: Construct a color filter that transforms a color by a 5×5 matrix, where the 5th row is implicitly added in an identity configuration:
| R' |   | a00 a01 a02 a03 a04 |   | R |
| G' |   | a10 a11 a22 a33 a44 |   | G |
| B' | = | a20 a21 a22 a33 a44 | * | B |
| A' |   | a30 a31 a22 a33 a44 |   | A |
| 1  |   |  0   0   0   0   1  |   | 1 |
3. ColorFilter.srgbToLinearGamma: Creates a color filter that applies the inverse of the sRGB gamma curve to the RGB channels.
4. ColorFilter.linearToSrgbGamma: Creates a color filter that applies the sRGB gamma curve to the RGB channels.
The images used in this article are from Pixabay, used under the Pixabay License.
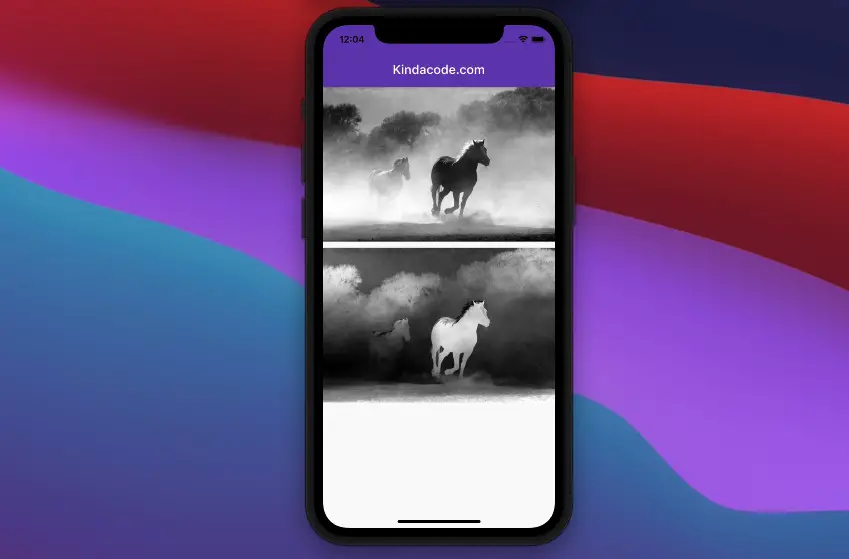
Example 1: ColorFilter.mode
This example displays a black-and-white photo from a color photo.
Screenshot:
The code:
// KindaCode.com
// main.dart
import 'package:flutter/material.dart';
void main() {
runApp(const MyApp());
}
class MyApp extends StatelessWidget {
const MyApp({super.key});
@override
Widget build(BuildContext context) {
return MaterialApp(
// hide the debug banner
debugShowCheckedModeBanner: false,
title: 'KindaCode.com',
theme: ThemeData(
primarySwatch: Colors.blue,
),
home: const HomeScreen(),
);
}
}
class HomeScreen extends StatelessWidget {
final _imageUrl =
'https://www.kindacode.com/wp-content/uploads/2021/06/pi-1.jpeg';
const HomeScreen({Key? key}) : super(key: key);
@override
Widget build(BuildContext context) {
return Scaffold(
appBar: AppBar(
title: const Text('Kindacode.com'),
),
body: Column(
children: [
// The original image
Image.network(_imageUrl),
// The black-and-white image
ColorFiltered(
colorFilter:
const ColorFilter.mode(Colors.grey, BlendMode.saturation),
child: Image.network(_imageUrl),
),
],
),
);
}
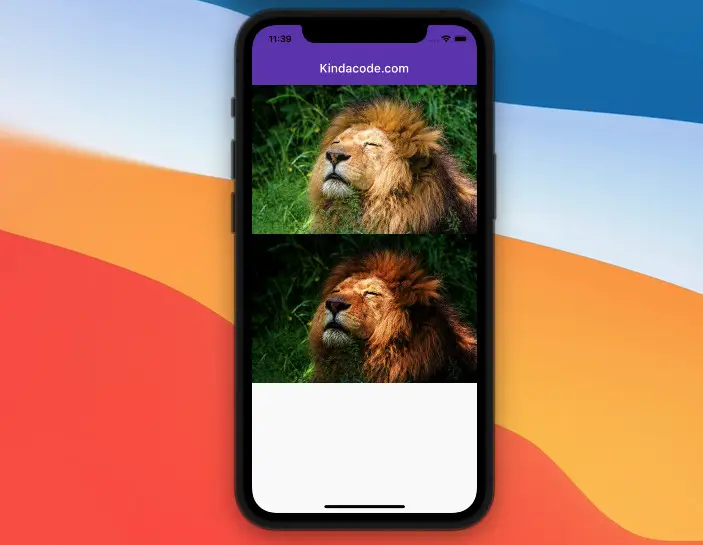
}Example 2: ColorFilter.matrix
In this example, we use ColorFilter.matrix to invert the color of an image. Light areas will turn dark and vice versa.
Screenshot:
The code:
class HomeScreen extends StatelessWidget {
final _imageUrl =
'https://www.kindacode.com/wp-content/uploads/2021/06/23.jpeg';
const HomeScreen({Key? key}) : super(key: key);
@override
Widget build(BuildContext context) {
return Scaffold(
appBar: AppBar(
title: const Text('Kindacode.com'),
),
body: Column(
children: [
// The original image
Image.network(_imageUrl),
const SizedBox(
height: 10,
),
// The filtered-color image
ColorFiltered(
colorFilter: const ColorFilter.matrix([
-1, 0, 0, 0, 255,
0, -1, 0, 0, 255,
0, 0, -1, 0, 255,
0, 0, 0, 1, 0,
]),
child: Image.network(_imageUrl),
),
],
),
);
}
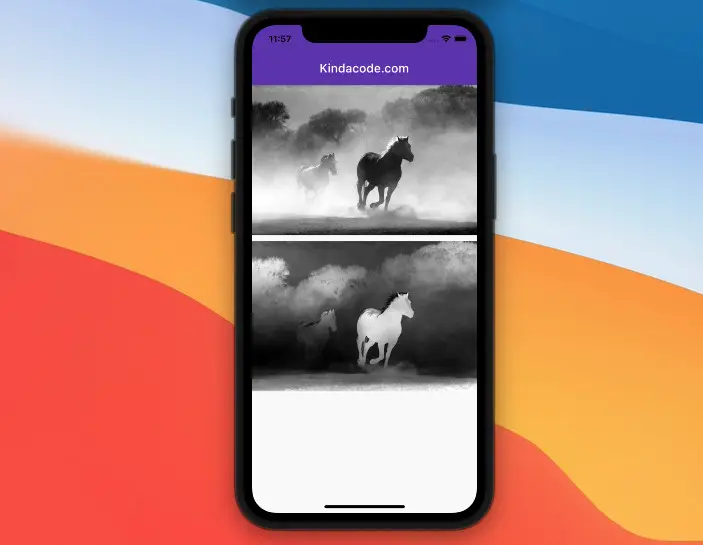
}Example 3: ColorFilter.srgbToLinearGamma
Screenshot:
The code:
class HomeScreen extends StatelessWidget {
final _imageUrl =
'https://www.kindacode.com/wp-content/uploads/2021/06/lion.jpeg';
const HomeScreen({Key? key}) : super(key: key);
@override
Widget build(BuildContext context) {
return Scaffold(
appBar: AppBar(
title: const Text('Kindacode.com'),
),
body: Column(
children: [
// The original image
Image.network(_imageUrl),
// The filtered image
ColorFiltered(
colorFilter: const ColorFilter.srgbToLinearGamma(),
child: Image.network(_imageUrl),
),
],
),
);
}
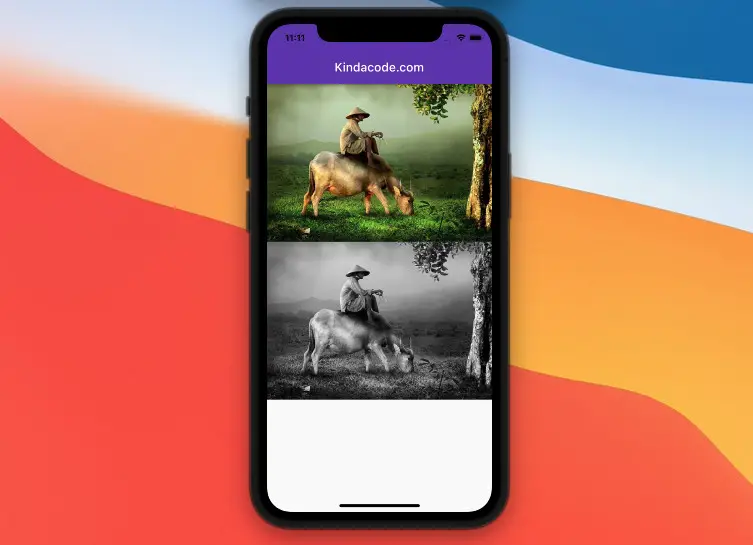
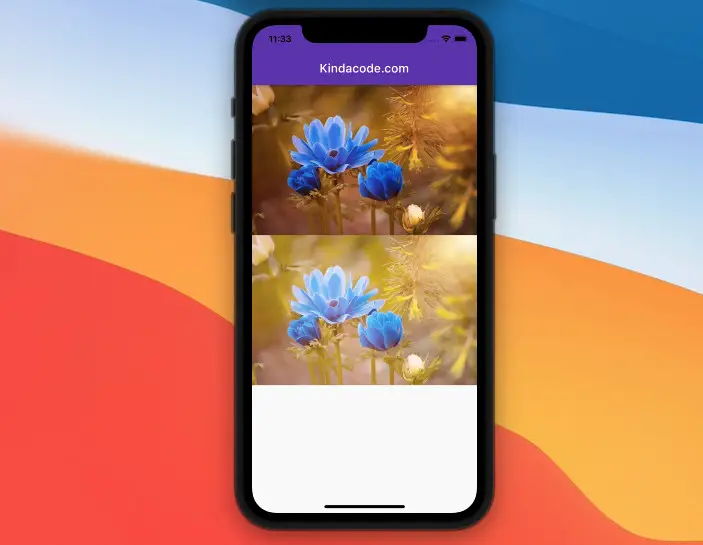
}Example 4: ColorFilter.linearToSrgbGamma
This example uses ColorFilter.linearToSrgbGamma.
Screenshot:
The code:
class HomeScreen extends StatelessWidget {
  final _imageUrl =
      'https://www.kindacode.com/wp-content/uploads/2021/06/flowers.jpeg';

  const HomeScreen({Key? key}) : super(key: key);
  @override
  Widget build(BuildContext context) {
    return Scaffold(
      appBar: AppBar(
        title: const Text('Kindacode.com'),
      ),
      body: Column(
        children: [
          // The original image
          Image.network(_imageUrl),

          // The filtered-color image
          ColorFiltered(
            colorFilter: const ColorFilter.linearToSrgbGamma(),
            child: Image.network(_imageUrl),
          ),
        ],
      ),
    );
  }
}
Conclusion
We’ve gone over a couple of examples of making use of the ColorFiltered widget. With this widget, we can conveniently add nice effects to an image. If you’d like to learn more about Flutter and mobile development, take a look at the following articles:
- Flutter: Firebase Remote Config example
- How to make Circular Buttons in Flutter
- Using GetX (Get) for State Management in Flutter
- How to create a Filter/Search ListView in Flutter
- How to render HTML content in React Native
- Flutter: Creating a Custom Number Stepper Input
You can also check out our Flutter category page, or Dart category page for the latest tutorials and examples.


