


In the web and mobile development world, masonry layout is useful when we want to display a grid of items whose sizes are not the same. One axis uses a strict grid layout, most often columns. On the other axis, items have different heights but are flexibly arranged to fill up the free space. A famous example of using masonry layout is Pinterest. They implement this layout for both their website and mobile app to display images of different sizes.
This article walks you through an example of implementing a real-world-like masonry layout in Flutter by using a widget named MasonryGridView provided by a popular package called fluter_staggered_grid_view.
Table of Contents
App Preview
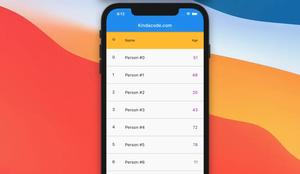
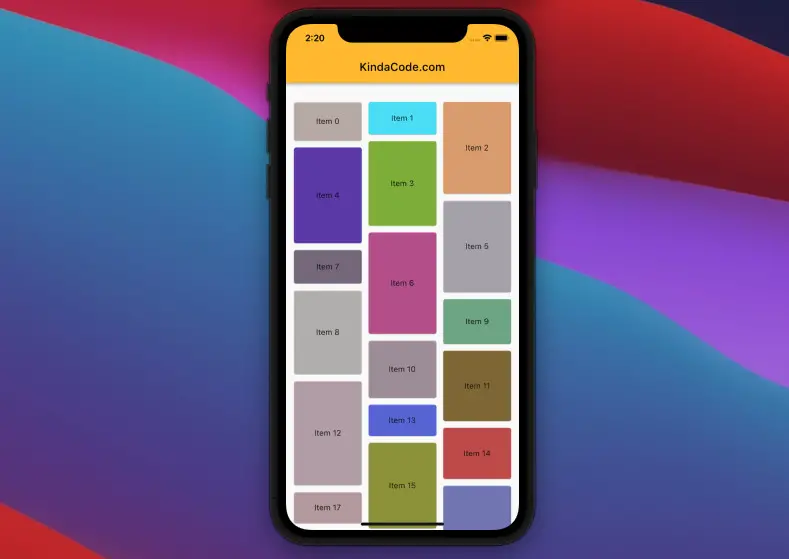
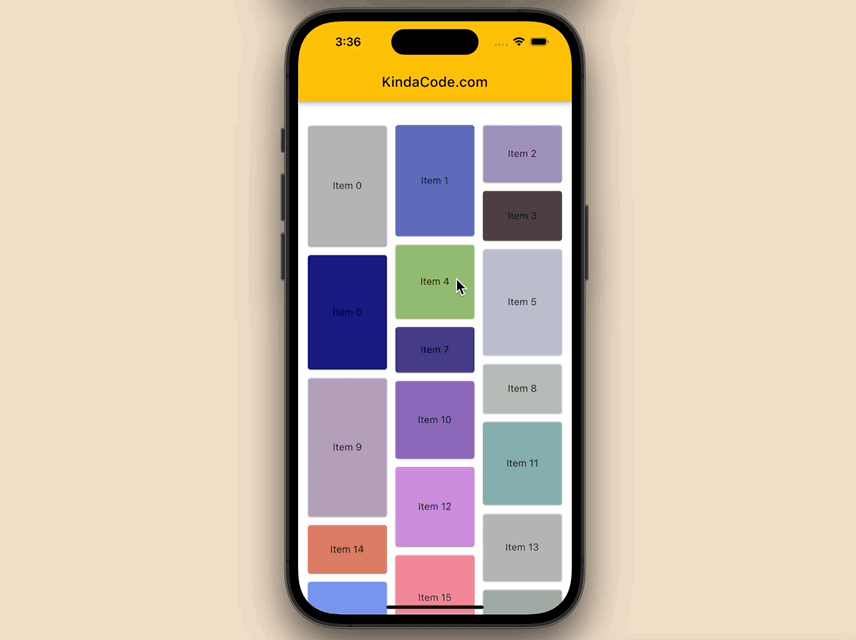
The app we are going to build contains a masonry layout with 3 columns. Each item has a random background color and a dynamic height. Here’s how it works on mobile:
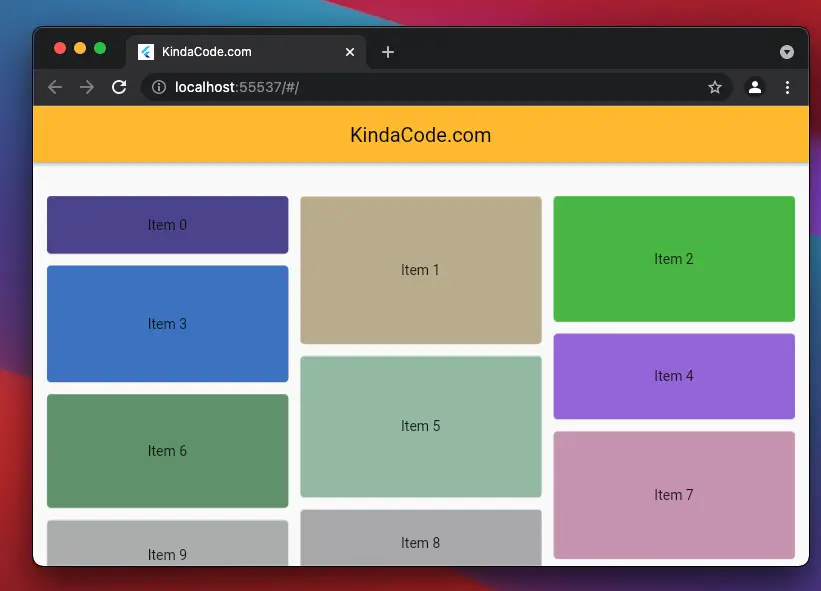
And here’s how it looks on the web:
The Code
Install the plugin by running:
flutter pub add flutter_staggered_grid_viewThen execute this command:
flutter pub getThe complete source code in main.dart with explanations:
// main.dart
import 'package:flutter/material.dart';
import 'dart:math';

import 'package:flutter_staggered_grid_view/flutter_staggered_grid_view.dart';

void main() {
  runApp(const MyApp());
}

class MyApp extends StatelessWidget {
  const MyApp({Key? key}) : super(key: key);

  @override
  Widget build(BuildContext context) {
    return MaterialApp(
      debugShowCheckedModeBanner: false,
      title: 'KindaCode.com',
      theme: ThemeData(
        primarySwatch: Colors.amber,
      ),
      home: const HomePage(),
    );
  }
}

class HomePage extends StatefulWidget {
  const HomePage({Key? key}) : super(key: key);

  @override
  State<HomePage> createState() => _HomePageState();
}

class _HomePageState extends State<HomePage> {
  // Generate a list of dummy items
  final List<Map<String, dynamic>> _items = List.generate(
      200,
      (index) => {
            "id": index,
            "title": "Item $index",
            "height": Random().nextInt(150) + 50.5
          });

  @override
  Widget build(BuildContext context) {
    return Scaffold(
        appBar: AppBar(
          title: const Text('KindaCode.com'),
        ),
        // implement the massonry layout
        body: MasonryGridView.count(
          itemCount: _items.length,
          padding: const EdgeInsets.symmetric(vertical: 30, horizontal: 10),
          // the number of columns
          crossAxisCount: 3,
          // vertical gap between two items
          mainAxisSpacing: 4,
          // horizontal gap between two items
          crossAxisSpacing: 4,
          itemBuilder: (context, index) {
            // display each item with a card
            return Card(
              // Give each item a random background color
              color: Color.fromARGB(
                  Random().nextInt(256),
                  Random().nextInt(256),
                  Random().nextInt(256),
                  Random().nextInt(256)),
              key: ValueKey(_items[index]['id']),
              child: SizedBox(
                height: _items[index]['height'],
                child: Center(
                  child: Text(_items[index]['title']),
                ),
              ),
            );
          },
        ));
  }
}
Conclusion
You’ve learned how to make a masonry layout in Flutter. This knowledge might be helpful in many cases where you want to build a beautiful and professional user interface. If you would like to explore more new and interesting stuff about Flutter and Dart, take a look at the following articles:
- Flutter: Safety nesting ListView, GridView inside a Column
- Flutter: SliverGrid example
- Flutter SliverAppBar Example (with Explanations)
- Flutter AnimatedList – Tutorial and Examples
- Flutter & Hive Database: CRUD Example
- Flutter and Firestore Database: CRUD example
You can also take a tour around our Flutter topic page and Dart topic page to see the latest tutorials and examples.


